179
Chapter 7 Advanced Features
6
Move the SNMP switch to the
position to enable SNMP.
7
SNMP has been configured for the TeraStation. For further use, configure your SNMP-compatible network
management software using the Buffalo-specific MIB (management information base) file. The MIB file is
available from the
Depending on which SNMP client software you use, the procedure for configuring the software will differ. For
more detailed information on configuring the client software, refer to its help or included manual.
Relevant Trap List
Standard Public MIB Traps
Conditions
Trap Name
OID
SNMP service starts.
coldStart
1.3.6.1.6.3.1.1.5.1
SNMP service ends.
nsNotifyShutdown
1.3.6.1.4.1.8072.4.0.2
Private MIB Traps
If any traps are not listed in the following chart, refer to the web page for downloading the private MIB file on the
for more detailed information.
Conditions
Trap Name
Backup fails.
nasBackupStatus
The RAID array is in degraded mode.
nasDiskStatus
An error occurs and an error code has been displayed.
nasErrorOccur
An event occurs and an event code has been displayed.
nasInformationOccur
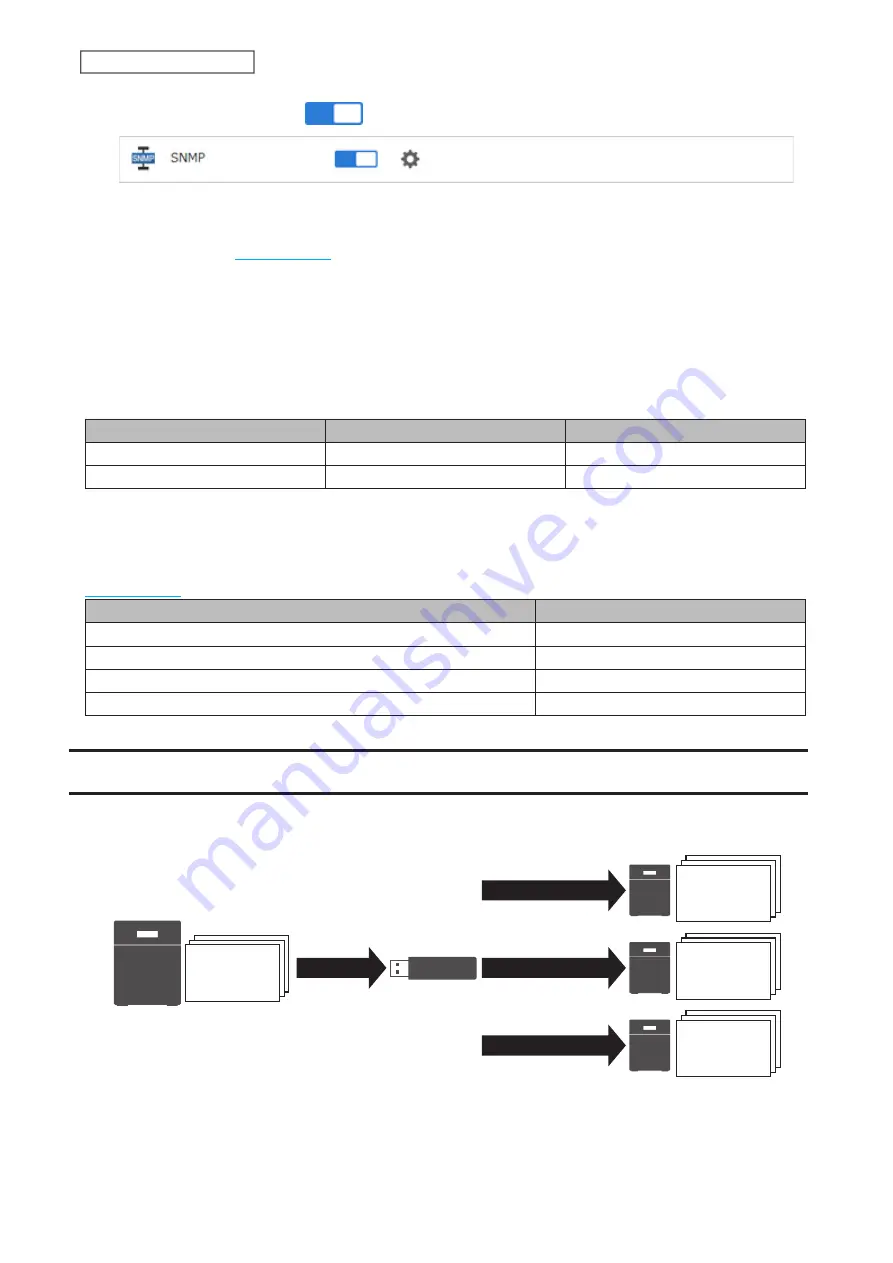
Saving and Applying Settings
The TeraStation’s settings can be saved to a USB drive and applied to another TeraStation of the same series. Use this
feature to back up and copy settings to a new TeraStation.
Save
Settings &
Firmware
Settings &
Firmware
Settings &
Firmware
Settings &
Firmware
Restore
Restore
Restore
Write down the drive configuration (number of drives, RAID, LVM, etc.) of the TeraStation whose settings were saved.
Make sure that any TeraStations that you apply these settings to have the exact same drive configuration before you
apply the settings. If the drive configuration is different, you may get unexpected results.
The following settings are not saved or applied:
Содержание TeraStation 3010
Страница 29: ...28 Chapter 3 File Sharing 3 Click Create User...
Страница 32: ...31 Chapter 3 File Sharing 3 Click Add Group...
Страница 71: ...70 Chapter 4 Storage Management 6 Click Edit under NAS Volume 7 Click Create Volume...
Страница 88: ...87 Chapter 5 Backup 4 Enter the backup device access key and click OK 5 Click Add...
Страница 107: ...106 Chapter 5 Backup 2 Click the settings icon to the right of Failover 3 Click the Periodic Sync tab 4 Click Edit...
Страница 111: ...110 Chapter 5 Backup 3 Click Select Backup Disk 4 Select the shared folder then click Use Disk...
Страница 113: ...112 Chapter 5 Backup 7 Time Machine will count down from 120 seconds then backup will begin...
Страница 125: ...124 Chapter 6 Cloud Services and Remote Access 5 Click Edit...
Страница 137: ...136 Chapter 6 Cloud Services and Remote Access 4 Click the Options tab 5 Click Edit...
Страница 146: ...145 Chapter 6 Cloud Services and Remote Access 3 From the job list click the job whose settings you want to change...
Страница 147: ...146 Chapter 6 Cloud Services and Remote Access 4 Click the Options tab...
Страница 148: ...147 Chapter 6 Cloud Services and Remote Access 5 Click Edit...
Страница 176: ...175 Chapter 7 Advanced Features 11Click the NFS Rules tab 12Click Add...
Страница 201: ...200 Chapter 7 Advanced Features 3 Click Edit 4 Select or enter the desired MTU size and click OK...
Страница 205: ...204 Chapter 7 Advanced Features 3 Click FQDN Mapping 4 Click Add...


