71
Chapter 4 Storage Management
8
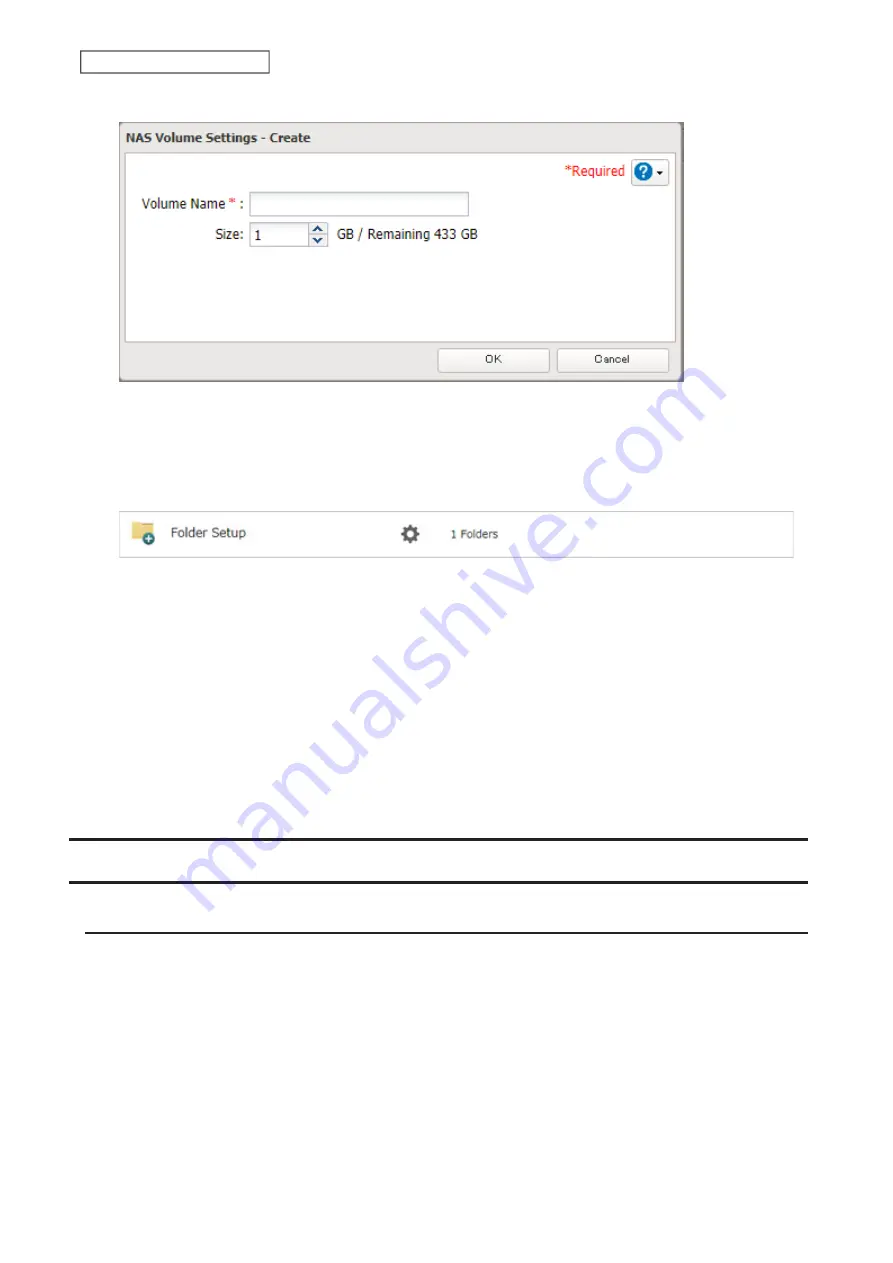
Configure the desired settings, then click
OK
.
9
Click
OK
.
10
Click
Close
, then click
Close
again.
11
Navigate to
File Sharing
>
Folder Setup
.
12
Click
Create Folder
.
13
Configure the settings.
14
Select the volume that you created for “Drive/Array” on the
Basic
tab and click
OK
.
Notes:
• If you click
Show
under “Volume List”, the volumes will be listed on the screen and you can see if these volumes
are being used as iSCSI or NAS.
• If an LVM volume could not be mounted, try restarting the TeraStation. If an issue still exists, delete and recreate
the LVM volume. Deleting the LVM volume will erase data on the volume.
Using the TeraStation as an iSCSI Device
Introduction
iSCSI is a protocol for carrying SCSI commands over IP networks. Unlike traditional SAN protocols such as Fibre
Channel, which requires special-purpose cabling, iSCSI can be run over long distances using existing network
infrastructure. Normal Windows formatting such as NTFS is supported.
Differences Between NAS and iSCSI
With iSCSI, the TeraStation is connected to a single computer, such as a server. Other computers on the network
access files on the TeraStation through the computer it’s connected to. The TeraStation can be used as a local drive
from Windows Server. Features of Windows Server such as Active Directory can be used normally.
As a NAS, the TeraStation is a server, and computers (including other servers) on the network can access shared
folders on it directly. A separate server is not required, and features such as backup are built-in.
Содержание TeraStation 3010
Страница 29: ...28 Chapter 3 File Sharing 3 Click Create User...
Страница 32: ...31 Chapter 3 File Sharing 3 Click Add Group...
Страница 71: ...70 Chapter 4 Storage Management 6 Click Edit under NAS Volume 7 Click Create Volume...
Страница 88: ...87 Chapter 5 Backup 4 Enter the backup device access key and click OK 5 Click Add...
Страница 107: ...106 Chapter 5 Backup 2 Click the settings icon to the right of Failover 3 Click the Periodic Sync tab 4 Click Edit...
Страница 111: ...110 Chapter 5 Backup 3 Click Select Backup Disk 4 Select the shared folder then click Use Disk...
Страница 113: ...112 Chapter 5 Backup 7 Time Machine will count down from 120 seconds then backup will begin...
Страница 125: ...124 Chapter 6 Cloud Services and Remote Access 5 Click Edit...
Страница 137: ...136 Chapter 6 Cloud Services and Remote Access 4 Click the Options tab 5 Click Edit...
Страница 146: ...145 Chapter 6 Cloud Services and Remote Access 3 From the job list click the job whose settings you want to change...
Страница 147: ...146 Chapter 6 Cloud Services and Remote Access 4 Click the Options tab...
Страница 148: ...147 Chapter 6 Cloud Services and Remote Access 5 Click Edit...
Страница 176: ...175 Chapter 7 Advanced Features 11Click the NFS Rules tab 12Click Add...
Страница 201: ...200 Chapter 7 Advanced Features 3 Click Edit 4 Select or enter the desired MTU size and click OK...
Страница 205: ...204 Chapter 7 Advanced Features 3 Click FQDN Mapping 4 Click Add...


