119
Chapter 6 Cloud Services and Remote Access
8
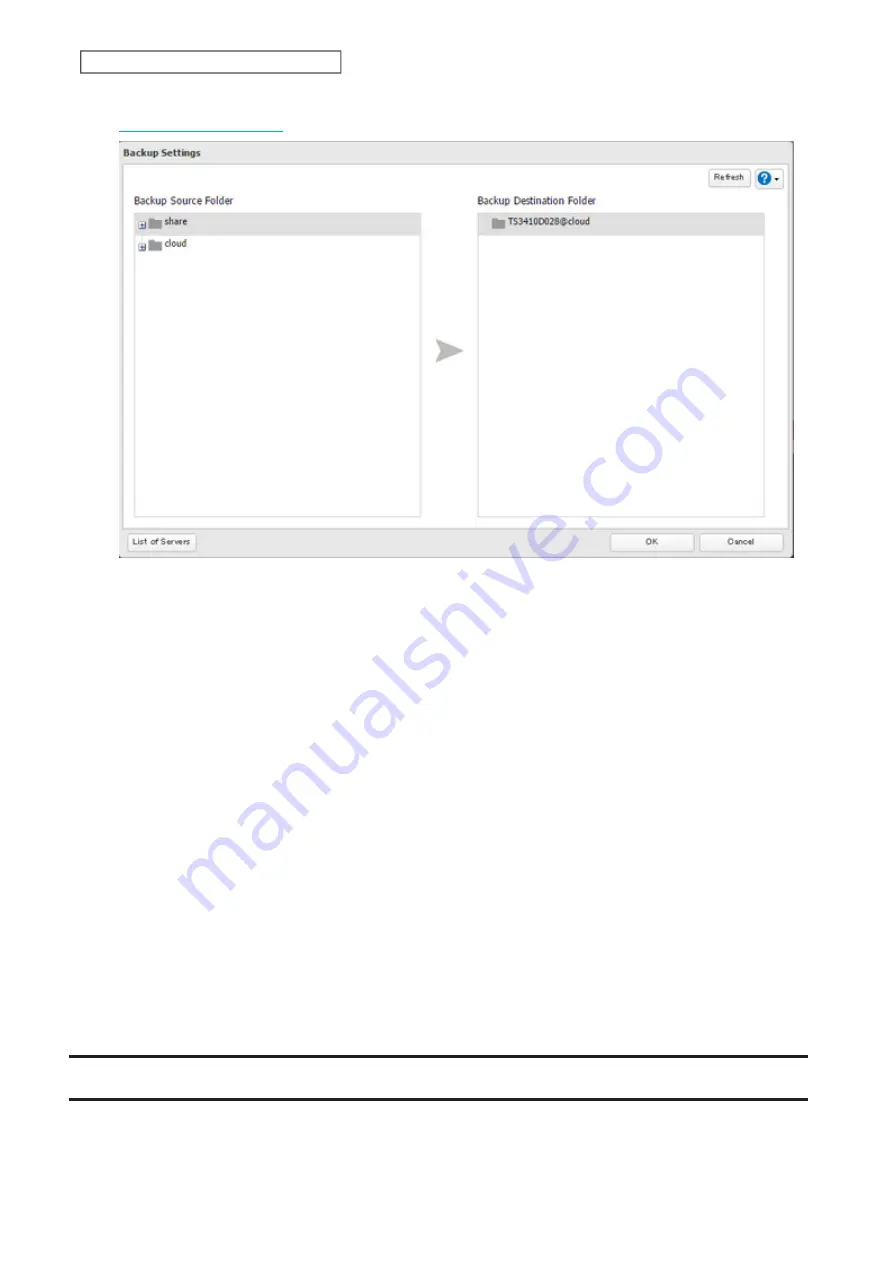
Select the shared folder that files will be saved to as a source, and the remote folder created through the
section above as a destination.
9
Click
OK
. The backup job will be added to the backup job list.
Notes:
• To use the service after the network was temporarily disconnected, click
Reconnect
.
• If a file is directly added to the Amazon S3 bucket, the file will not be replicated to the remote folder.
• Do not copy 100,000 or more files to the backup source folder at once. If you do and uploading fails, check the
network environment speed and try again with fewer files.
• Be careful with existing files in the remote folder, as files with the same name will be overwritten even if copied
files are older.
• If you copy a file to the shared folder using File Explorer or a backup process, the file will also be uploaded
sequentially to the Amazon S3 bucket. This second uploading process will start in the background during the first
copying process and will not be visible. If the TeraStation is shut down or restarted immediately after copying a
file to the shared folder, changing the settings, or disconnecting and reconnecting the Ethernet cable, the file
may not be uploaded to the bucket. Try copying the file again if this occurs.
• If you encounter any upload or download errors, click
Error Log
. The log will display the filename and operation
during which the error occurred.
• If uploading fails, try copying the file again. If it still fails, click
Reconnect
or set the Amazon S3 switch to off and on
again, then restart the function service.
• If accessing or transferring files that total 1 TB or more to the Amazon S3 bucket, make sure there is enough free
space on the TeraStation for temporary file caching. For example, when uploading 1 TB of files to the bucket, it is
recommended to keep at least 2 TB of free space available.
Synchronizing with Dropbox
The TeraStation supports synchronizing with Dropbox, the online cloud service. Once linked, you can share
TeraStation files via Dropbox (or Dropbox files via TeraStation). To link your TeraStation with your Dropbox account,
follow the procedure below.
Содержание TeraStation 3010
Страница 29: ...28 Chapter 3 File Sharing 3 Click Create User...
Страница 32: ...31 Chapter 3 File Sharing 3 Click Add Group...
Страница 71: ...70 Chapter 4 Storage Management 6 Click Edit under NAS Volume 7 Click Create Volume...
Страница 88: ...87 Chapter 5 Backup 4 Enter the backup device access key and click OK 5 Click Add...
Страница 107: ...106 Chapter 5 Backup 2 Click the settings icon to the right of Failover 3 Click the Periodic Sync tab 4 Click Edit...
Страница 111: ...110 Chapter 5 Backup 3 Click Select Backup Disk 4 Select the shared folder then click Use Disk...
Страница 113: ...112 Chapter 5 Backup 7 Time Machine will count down from 120 seconds then backup will begin...
Страница 125: ...124 Chapter 6 Cloud Services and Remote Access 5 Click Edit...
Страница 137: ...136 Chapter 6 Cloud Services and Remote Access 4 Click the Options tab 5 Click Edit...
Страница 146: ...145 Chapter 6 Cloud Services and Remote Access 3 From the job list click the job whose settings you want to change...
Страница 147: ...146 Chapter 6 Cloud Services and Remote Access 4 Click the Options tab...
Страница 148: ...147 Chapter 6 Cloud Services and Remote Access 5 Click Edit...
Страница 176: ...175 Chapter 7 Advanced Features 11Click the NFS Rules tab 12Click Add...
Страница 201: ...200 Chapter 7 Advanced Features 3 Click Edit 4 Select or enter the desired MTU size and click OK...
Страница 205: ...204 Chapter 7 Advanced Features 3 Click FQDN Mapping 4 Click Add...


