95
Chapter 5 Backup
2
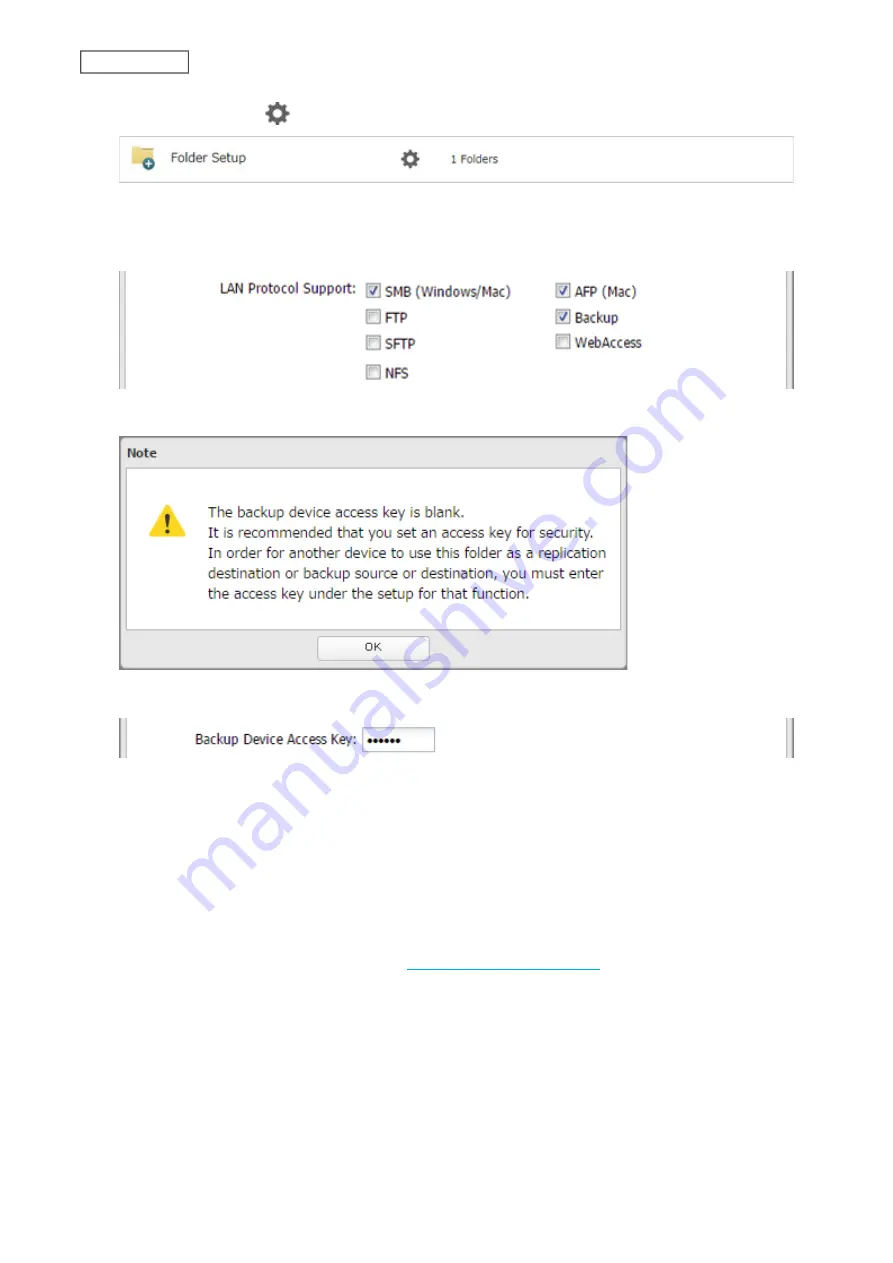
Click the settings icon (
) to the right of “Folder Setup”.
3
Choose the folder to be set as a replication destination.
4
Under “LAN Protocol Support”, select the “Backup” checkbox on the
Basic
tab.
5
Click
OK
and proceed to the next step to create a backup device access key.
6
Enter the desired characters into the backup device access key field and click
OK
.
Note:
You may leave this field blank if you do not want a backup device access key, but for security reasons
we highly recommend entering one for the shared folder. If a backup device access key is configured for the
shared folder, that folder will not show up as the replication destination when configuring a replication job on
another Buffalo NAS device unless it’s entered. You may create multiple folders using different backup device
access keys for backup and replication, but only one access key can be used on the TeraStation. Folders that
are configured with a different access key cannot be used.
A replication destination has been created.
Note:
If you want to replicate to a Buffalo NAS device on another network, follow the procedure below to add the
Buffalo NAS device so it can be used as a replication destination.
(1) Create a new replication job by referring to the
“Configuring a Replication Job”
section below.
(2) On the screen that allows you to select a shared folder, click
List of Servers
.
(3) Click
Add
; select the “Add Buffalo NAS device” option, enter the IP address or hostname of the destination
Buffalo NAS device, then click
OK
.
(4) Click
Close
when completed.
(5) Click
Refresh
and make sure the desired Buffalo NAS device has been added to the list.
Содержание TeraStation 3010
Страница 29: ...28 Chapter 3 File Sharing 3 Click Create User...
Страница 32: ...31 Chapter 3 File Sharing 3 Click Add Group...
Страница 71: ...70 Chapter 4 Storage Management 6 Click Edit under NAS Volume 7 Click Create Volume...
Страница 88: ...87 Chapter 5 Backup 4 Enter the backup device access key and click OK 5 Click Add...
Страница 107: ...106 Chapter 5 Backup 2 Click the settings icon to the right of Failover 3 Click the Periodic Sync tab 4 Click Edit...
Страница 111: ...110 Chapter 5 Backup 3 Click Select Backup Disk 4 Select the shared folder then click Use Disk...
Страница 113: ...112 Chapter 5 Backup 7 Time Machine will count down from 120 seconds then backup will begin...
Страница 125: ...124 Chapter 6 Cloud Services and Remote Access 5 Click Edit...
Страница 137: ...136 Chapter 6 Cloud Services and Remote Access 4 Click the Options tab 5 Click Edit...
Страница 146: ...145 Chapter 6 Cloud Services and Remote Access 3 From the job list click the job whose settings you want to change...
Страница 147: ...146 Chapter 6 Cloud Services and Remote Access 4 Click the Options tab...
Страница 148: ...147 Chapter 6 Cloud Services and Remote Access 5 Click Edit...
Страница 176: ...175 Chapter 7 Advanced Features 11Click the NFS Rules tab 12Click Add...
Страница 201: ...200 Chapter 7 Advanced Features 3 Click Edit 4 Select or enter the desired MTU size and click OK...
Страница 205: ...204 Chapter 7 Advanced Features 3 Click FQDN Mapping 4 Click Add...


