74
Chapter 4 Storage Management
Notes:
• If you click
Disable Connection
for the selected volume in
Storage
>
iSCSI
in Settings, the selected iSCSI volume can
no longer be accessed. If you click
Enable Connection
, the volume will become accessible from the iSCSI initiator
software.
• If you selected “Block I/O” for the “Backstore” option, write cache (WCE) cannot be configured from the “Advanced
Settings” page.
Connecting or Disconnecting Volumes
Connecting Volumes
To connect a volume, follow the procedure below.
Note:
Do not shut down the TeraStation while connecting to an iSCSI volume. It may cause unexpected data erasure.
Make sure all connections are disconnected before shutdown.
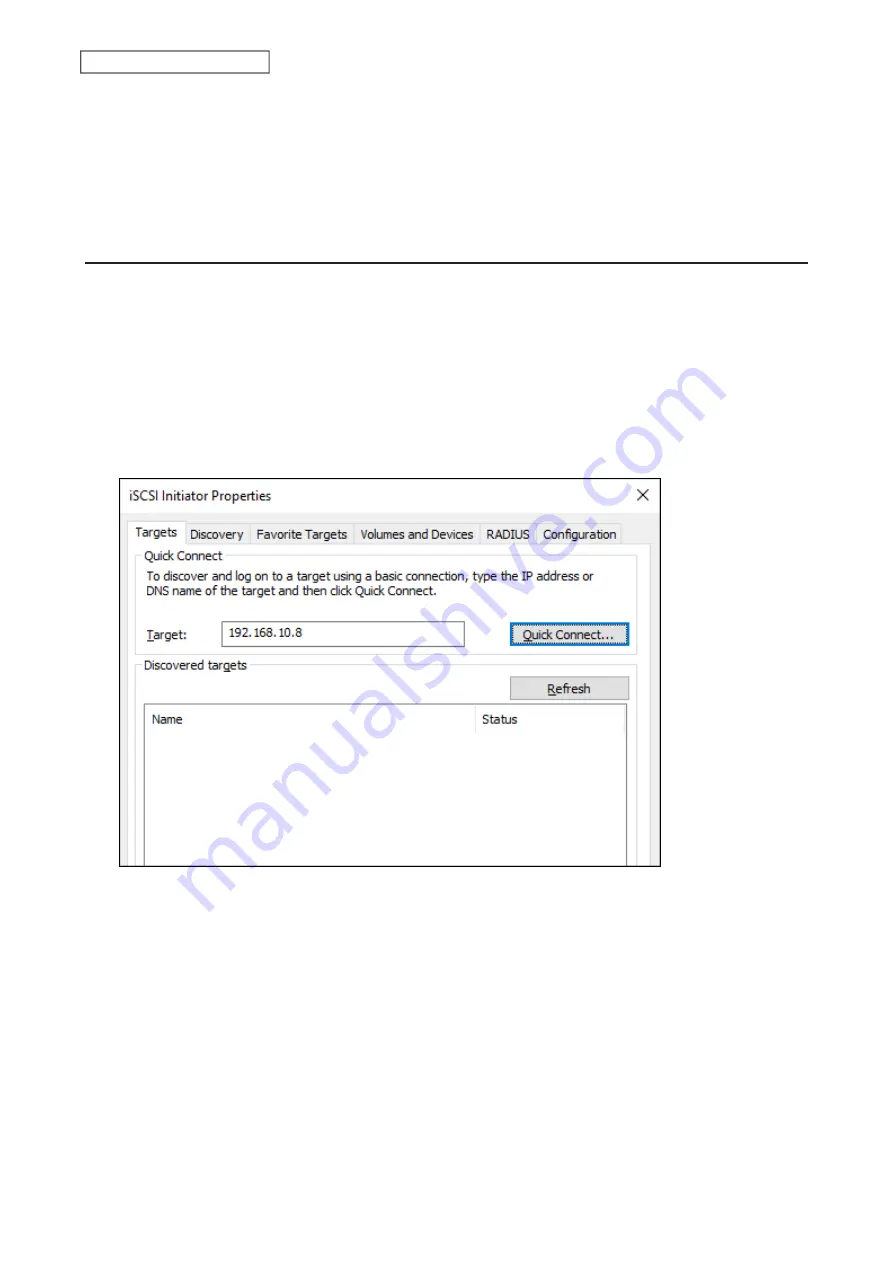
1
From Windows, navigate to
Control Panel
>
System and Security
>
Administrative Tools
>
iSCSI Initiator
.
2
Enter the IP address of the TeraStation into the “Target” field and click
Quick Connect
.
3
Confirm if the connection is established and click
Done
.
Formatting Volumes
If using the connected volume for the first time, the volume should be formatted to be used as a local drive. Follow
the procedure below for formatting.
1
From Windows, navigate to
Control Panel
>
System and Security
>
Administrative Tools
>
Computer Management
.
2
Click
Disk Management
.
When the “Initialize Disk” screen appears, click
OK
without changing any settings.
3
Right-click the drive volume that shows the status “Unallocated” and click
New Simple Volume
from the
displayed menu. Follow the screen to finish formatting.
Содержание TeraStation 3010
Страница 29: ...28 Chapter 3 File Sharing 3 Click Create User...
Страница 32: ...31 Chapter 3 File Sharing 3 Click Add Group...
Страница 71: ...70 Chapter 4 Storage Management 6 Click Edit under NAS Volume 7 Click Create Volume...
Страница 88: ...87 Chapter 5 Backup 4 Enter the backup device access key and click OK 5 Click Add...
Страница 107: ...106 Chapter 5 Backup 2 Click the settings icon to the right of Failover 3 Click the Periodic Sync tab 4 Click Edit...
Страница 111: ...110 Chapter 5 Backup 3 Click Select Backup Disk 4 Select the shared folder then click Use Disk...
Страница 113: ...112 Chapter 5 Backup 7 Time Machine will count down from 120 seconds then backup will begin...
Страница 125: ...124 Chapter 6 Cloud Services and Remote Access 5 Click Edit...
Страница 137: ...136 Chapter 6 Cloud Services and Remote Access 4 Click the Options tab 5 Click Edit...
Страница 146: ...145 Chapter 6 Cloud Services and Remote Access 3 From the job list click the job whose settings you want to change...
Страница 147: ...146 Chapter 6 Cloud Services and Remote Access 4 Click the Options tab...
Страница 148: ...147 Chapter 6 Cloud Services and Remote Access 5 Click Edit...
Страница 176: ...175 Chapter 7 Advanced Features 11Click the NFS Rules tab 12Click Add...
Страница 201: ...200 Chapter 7 Advanced Features 3 Click Edit 4 Select or enter the desired MTU size and click OK...
Страница 205: ...204 Chapter 7 Advanced Features 3 Click FQDN Mapping 4 Click Add...


