29
Chapter 3 File Sharing
4
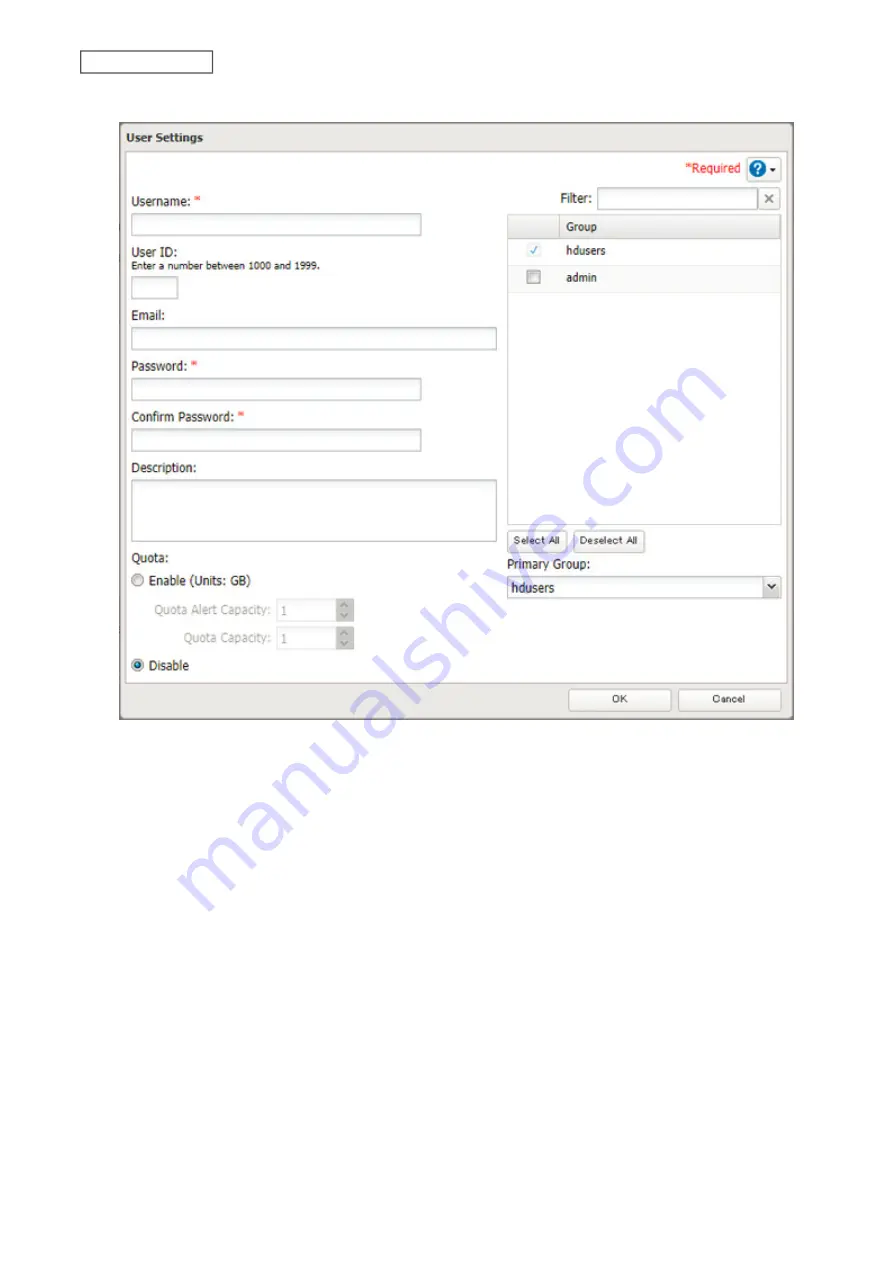
Enter the desired settings, then click
OK
.
Notes:
• Usernames may contain up to 128 alphanumeric characters, hyphens (-), underscores (_), periods (.), and the
symbols ! # & @ $ * ^ %. The first character should not be a symbol.
• The user ID should be a number from 1000 to 1999. Each user ID should be unique. If this field is left blank, a user
ID is assigned automatically.
• Do not duplicate user IDs, group IDs, usernames, or group names. Each should be distinct and unique.
• User descriptions may contain up to 75 alphanumeric characters, hyphens (-), underscores (_), and spaces.
Multibyte characters are supported. The first character should not be a symbol or space.
• Passwords may contain up to 20 alphanumeric characters, hyphens (-), underscores (_), spaces, commas (,),
periods (.), semicolons (;), tildes (~), and the symbols @ ! $ & * + : = ? ] [ ^ } { \. The first character should not be a
symbol unless it is an underscore.
• Use the same username and password for both Windows and the TeraStation or you may be unable to access
shared folders.
• Do not use a name already in use as a group; do not use any of the following words as a username as these
words are reserved for internal use by the TeraStation: _lldpd, adm, admin, administrator, admins, all, apache,
avahi, avahi-autoipd, backup, bin, crontab, daemon, dialout, dip, disk, ftp, ftpuser, fuse, gnats, guest, guests, halt,
hdusers, irc, kmem, libuuid, list, lp, mail, man, messagebus, mysql, netdev, news, nobody, nogroup, none, ntp,
openldap, operator, plugdev, proftpd, proxy, puppet, root, rpc, rpcuser, sambashare, sasl, shadow, shutdown,
snmp, splx, src, ssh, sshd, staff, statd, sudo, sync, syslog, tmhttpd, tty, users, utmp, uucp, winbindd_priv, www,
www-data
Содержание TeraStation 3010
Страница 29: ...28 Chapter 3 File Sharing 3 Click Create User...
Страница 32: ...31 Chapter 3 File Sharing 3 Click Add Group...
Страница 71: ...70 Chapter 4 Storage Management 6 Click Edit under NAS Volume 7 Click Create Volume...
Страница 88: ...87 Chapter 5 Backup 4 Enter the backup device access key and click OK 5 Click Add...
Страница 107: ...106 Chapter 5 Backup 2 Click the settings icon to the right of Failover 3 Click the Periodic Sync tab 4 Click Edit...
Страница 111: ...110 Chapter 5 Backup 3 Click Select Backup Disk 4 Select the shared folder then click Use Disk...
Страница 113: ...112 Chapter 5 Backup 7 Time Machine will count down from 120 seconds then backup will begin...
Страница 125: ...124 Chapter 6 Cloud Services and Remote Access 5 Click Edit...
Страница 137: ...136 Chapter 6 Cloud Services and Remote Access 4 Click the Options tab 5 Click Edit...
Страница 146: ...145 Chapter 6 Cloud Services and Remote Access 3 From the job list click the job whose settings you want to change...
Страница 147: ...146 Chapter 6 Cloud Services and Remote Access 4 Click the Options tab...
Страница 148: ...147 Chapter 6 Cloud Services and Remote Access 5 Click Edit...
Страница 176: ...175 Chapter 7 Advanced Features 11Click the NFS Rules tab 12Click Add...
Страница 201: ...200 Chapter 7 Advanced Features 3 Click Edit 4 Select or enter the desired MTU size and click OK...
Страница 205: ...204 Chapter 7 Advanced Features 3 Click FQDN Mapping 4 Click Add...


