160
Chapter 7 Advanced Features
3
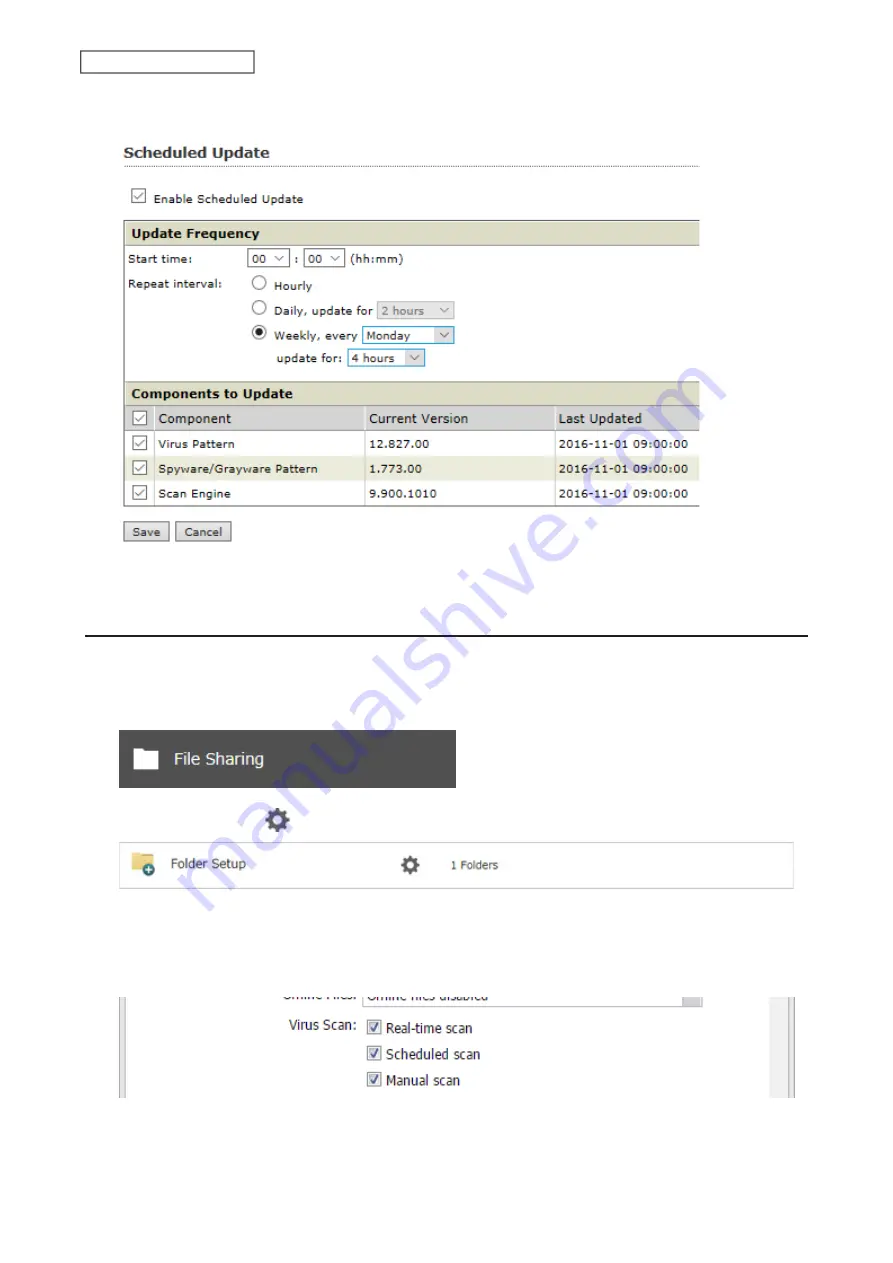
Select a time for updates to begin, an interval for updates, and an amount of time for updates to continue.
Select the components to update. Click
Save
.
The antivirus software is now configured to update automatically at the scheduled time. Updates will not be
downloaded if the TeraStation is turned off, in standby mode, or disconnected from the Internet.
Configuring Folders as Virus Scanning Targets
By default, all folders on the TeraStation (including attached USB drives) will be scanned. Follow the procedure
below to block specific shared folders from being scanned.
1
From Settings, click
File Sharing
.
2
Click the settings icon (
) to the right of “Folder Setup”.
3
Click the shared folder that you want to exclude from the scan.
4
If the options’ checkboxes are selected on the
Option 1
tab, it means the shared folder will be scanned by those
scan options. To exclude from the scan, clear the options’ checkboxes.
5
Click
OK
.
Содержание TeraStation 3010
Страница 29: ...28 Chapter 3 File Sharing 3 Click Create User...
Страница 32: ...31 Chapter 3 File Sharing 3 Click Add Group...
Страница 71: ...70 Chapter 4 Storage Management 6 Click Edit under NAS Volume 7 Click Create Volume...
Страница 88: ...87 Chapter 5 Backup 4 Enter the backup device access key and click OK 5 Click Add...
Страница 107: ...106 Chapter 5 Backup 2 Click the settings icon to the right of Failover 3 Click the Periodic Sync tab 4 Click Edit...
Страница 111: ...110 Chapter 5 Backup 3 Click Select Backup Disk 4 Select the shared folder then click Use Disk...
Страница 113: ...112 Chapter 5 Backup 7 Time Machine will count down from 120 seconds then backup will begin...
Страница 125: ...124 Chapter 6 Cloud Services and Remote Access 5 Click Edit...
Страница 137: ...136 Chapter 6 Cloud Services and Remote Access 4 Click the Options tab 5 Click Edit...
Страница 146: ...145 Chapter 6 Cloud Services and Remote Access 3 From the job list click the job whose settings you want to change...
Страница 147: ...146 Chapter 6 Cloud Services and Remote Access 4 Click the Options tab...
Страница 148: ...147 Chapter 6 Cloud Services and Remote Access 5 Click Edit...
Страница 176: ...175 Chapter 7 Advanced Features 11Click the NFS Rules tab 12Click Add...
Страница 201: ...200 Chapter 7 Advanced Features 3 Click Edit 4 Select or enter the desired MTU size and click OK...
Страница 205: ...204 Chapter 7 Advanced Features 3 Click FQDN Mapping 4 Click Add...


