background image

Trend Micro™ InterScan™ Gateway Security Appliance M-Series Administrator’s Guide

13

-

24

F

IGURE

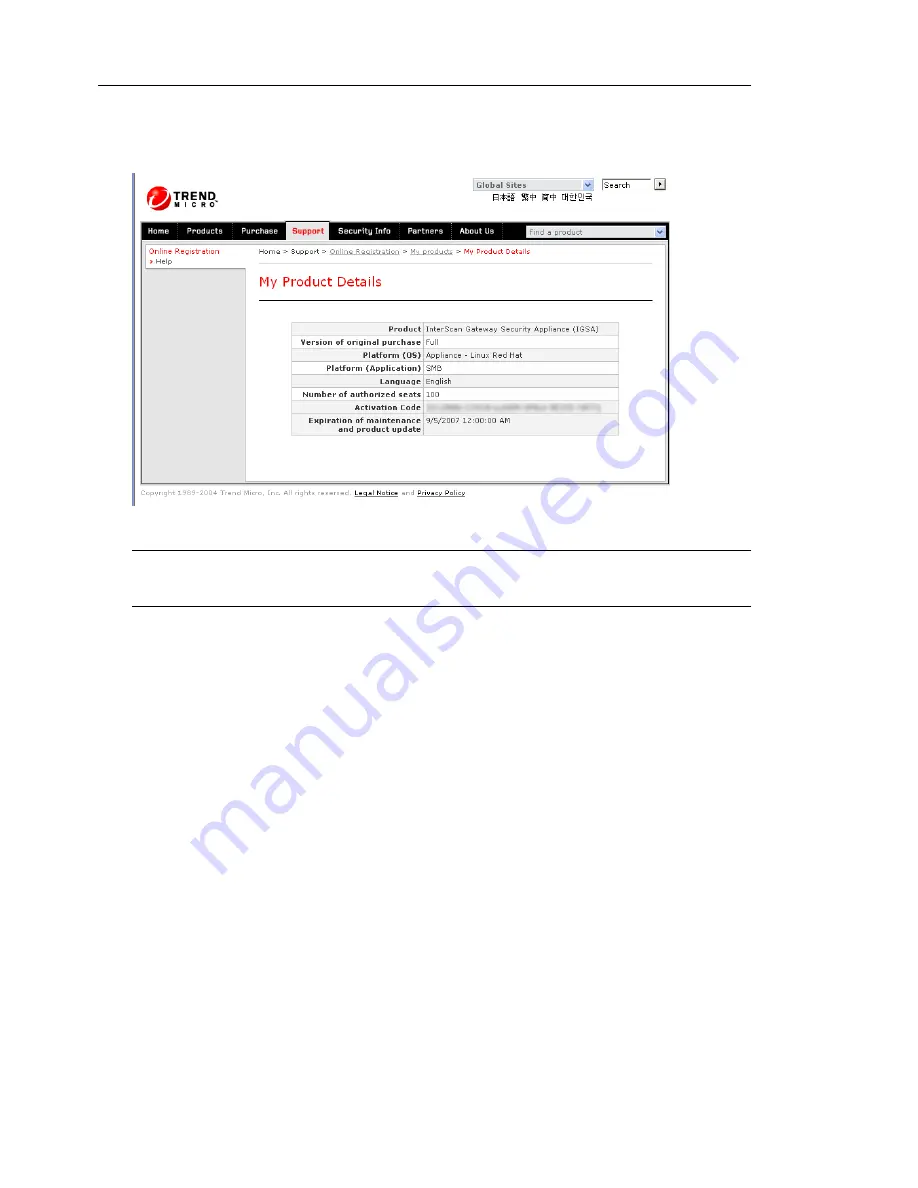
13-17.  

My Product Details

Note:

InterScan Gateway Security Appliance supports automatic online updates as long 
as the Activation Code has not expired.

To perform online Updates for the product license manually: 

1.

Check the network status and proxy settings.

2.

Select 

Administration > Product License

 to display the Product License screen.

3.

Click 

Update Information.


Summary of Contents for InterScan M Series

Page 1: ...InterScan TM Gateway Security Appliance M Series...

Page 2: ......

Page 3: ...Web site at http www trendmicro com download documentation Trend Micro the Trend Micro t ball logo IntelliTrap InterScan ScanMail MacroTrap and TrendLabs are trademarks registered trademarks or servi...

Page 4: ...pecific features within the software is available in the online help file and the online Knowledge Base at the Trend Micro Web site Trend Micro is always seeking to improve its documentation If you ha...

Page 5: ...pam 1 7 Anti Phishing 1 7 Anti Pharming 1 7 Content and URL Filtering 1 8 Outbreak Defense 1 8 Web Reputation 1 9 The Appliance Hardware 1 10 The Front Panel 1 10 LCD Module 1 11 LED Indicators 1 12 T...

Page 6: ...Security Appliance Works The Range and Types of Internet Threats 3 2 How InterScan Gateway Security Appliance Protects You 3 3 The Primary Functional Components 3 4 Chapter 4 Getting Started with Inte...

Page 7: ...18 Configuring SMTP Web Reputation 5 19 SMTP Web Reputation Target 5 19 SMTP Web Reputation Action 5 20 SMTP Web Reputation Notification 5 21 Configuring SMTP Anti Spam Email Reputation 5 22 SMTP Ant...

Page 8: ...iTrap Target 6 19 HTTP IntelliTrap Action 6 20 HTTP IntelliTrap Notification 6 21 Configuring HTTP Anti Pharming 6 22 HTTP Anti Pharming Target 6 22 HTTP Anti Pharming Action 6 23 HTTP Anti Pharming N...

Page 9: ...4 Chapter 8 POP3 Services POP3 Services 8 2 Enabling Scanning of POP3 Traffic 8 2 Selecting an Alternative Service Port 8 3 Configuring POP3 Virus Scanning 8 4 POP3 Scanning Target 8 4 POP3 Scanning A...

Page 10: ...nse The Outbreak Defense Services 9 2 Current Status 9 3 Configuring Internal Outbreak 9 5 Configuring Damage Cleanup 9 6 Potential Threat 9 7 Configuring Settings 9 7 Outbreak Defense Settings 9 8 Ou...

Page 11: ...Backup 13 4 Control Manager Settings 13 6 Registering InterScan Gateway Security Appliance to Control Manager 13 7 Disk SMART Test 13 9 Firmware Update 13 10 IP Address Settings 13 11 Managing IP Addr...

Page 12: ...spected Internet Threats 14 18 Chapter 15 Updating the InterScan Gateway Security Appliance Firmware Identifying the Procedures to Follow 15 2 Updating the Device Image Through the Web Console 15 3 Up...

Page 13: ...trol Manager Agent Heartbeat B 7 Using the Schedule Bar B 8 Determining the Right Heartbeat Setting B 8 Registering InterScan Gateway Security Appliance M Series to Control Manager B 9 Managing InterS...

Page 14: ...derstanding Report Templates B 46 Understanding Report Profiles B 47 Generate On demand Scheduled Reports B 54 Appendix C Technology Reference Deferred Scan C 2 Diskless Mode C 2 False Positives C 3 L...

Page 15: ...em Checklist Appendix F File Formats Supported Compression Types F 2 Blockable File Formats F 4 Malware Naming Formats F 6 Appendix G Specifications and Environment Hardware Specifications G 2 Dimensi...

Page 16: ...Trend Micro InterScan Gateway Security Appliance M Series Administrator s Guide xiv...

Page 17: ...ains information about the tasks involved in configuring administering and maintaining the Trend Micro InterScan Gateway Security Appliance Use it in conjunction with the Trend Micro InterScan Gateway...

Page 18: ...opics Chapters Chapter 1 Introducing Trend Micro InterScan Gateway Security Appliance Chapter 2 Deployment Options Chapter 3 How InterScan Gateway Security Appliance Works Chapter 4 Getting Started wi...

Page 19: ...ology Appendix B Introducing Trend Micro Control Manager Appendix C Technology Reference Appendix D Removing the Hard Disk Appendix E System Checklist Appendix F File Formats Supported Appendix G Spec...

Page 20: ...N Abbreviations and names of certain commands and keys on the keyboard Bold Menus and menu commands command buttons tabs options and ScanMail tasks Italics References to other documentation Monospace...

Page 21: ...his chapter includes the following topics What Is InterScan Gateway Security Appliance on page 1 2 Important Features and Benefits on page 1 3 How InterScan Gateway Security Appliance Works on page 1...

Page 22: ...y features of the appliance are configured to work right out of the box the appliance starts protecting your network from the moment the appliance is connected The appliance comes preconfigured with s...

Page 23: ...EPS which enables Trend Micro devices to proactively defend against threats in their insur gency before traditional pattern files are available Gateway protection Protection from malware right at the...

Page 24: ...Content Scanning Allows the administrator to do the following Set the spam threshold to high medium or low Specify approved and blocked senders Define certain categories of mail as spam Anti Spam Emai...

Page 25: ...pliance blocks viruses spyware spam phishing botnet attacks harmful URLs and inappropriate content before they enter your network InterScan Gateway Security Appliance stops threats at the gateway usin...

Page 26: ...me IntelliTrap heuristic detection and Outbreak Prevention Services increase defenses against emerging threats Anti Spyware The anti spyware feature in InterScan Gateway Security Appliance blocks inco...

Page 27: ...et to your mail servers and impact performance Improves spam detection Combines machine learning pattern recognition heuristics blocked sender lists and approved sender lists for better detection Enab...

Page 28: ...e data from going out Categorizes Web sites in real time Employs dynamic rating technology to categorize Web sites while users browse Outbreak Defense In the event of an Internet outbreak of viruses o...

Page 29: ...on provides both email notification to the administrator and inline notification to the user for Web Reputation detections SMTP Web Reputation evaluates the potential security risk of any URL embedded...

Page 30: ...sitives The Appliance Hardware The Front Panel The front panel of the InterScan Gateway Security Appliance contains two 2 thumb screws and a removable bezel for holding it in a fixed position in a rac...

Page 31: ...messages in two rows of 16 characters each Displays device status and preconfiguration instructions Control panel One five button control panel that provides LCD navigation Used for inputting data dur...

Page 32: ...iance is operating normally Off no color The appliance is off UID Blue steady The UID LED lights up when the UID button is pressed Off no color The UID LED is not illuminated default is off System Red...

Page 33: ...s serial port with a DB9 type connection to perform preconfiguration Ports MGT EXT INT Copper Gigabit LAN port designated as the MANAGEMENT EXTERNAL or INTERNAL port depending on the Operation Mode Fa...

Page 34: ...port s current state and duplex speed FIGURE 1 5 Port indicators The following table describes the status of the port indicators when the device is operating normally TABLE 1 5 Port indicator status I...

Page 35: ...to use the IP address of InterScan Gateway Security Appliance as its default gateway address Deployment in either of the above ways prevents the appliance from working Assign an IP address in any of t...

Page 36: ...raffic To connect the InterScan Gateway Security Appliance to your network 1 Connect one end of the Ethernet cable to the INT port right side and the other end to the segment of the network that Inter...

Page 37: ...o obtain the Activation Code 1 Visit the Trend Micro Online Registration Web site https olr trendmicro com registration The Online Registration page of the Trend Micro Web site opens 2 Perform one of...

Page 38: ...Micro emails you an Activation Code which you can then use to activate InterScan Gateway Security Appliance A Registration Key has 22 characters including the hyphens and looks like this xx xxxx xxxx...

Page 39: ...see the Trend Micro InterScan Gateway Security Appliance M Series Deployment Guide This chapter includes the following topics Deployment Topologies on page 2 4 Basic Deployment on page 2 8 Advanced De...

Page 40: ...way Security Appliance is not a firewall or a router Always deploy the appliance behind a firewall or security device that provides adequate NAT and firewall type protection A typical network topology...

Page 41: ...etween the network servers and the firewall as shown in figure 2 2 FIGURE 2 2 The most common deployment of InterScan Gateway Security Appliance Internet Network switch or router Firewall Mail server...

Page 42: ...uter is the default gateway of the core switch and the appliance Note If the appliance is not deployed between the router and the core switch the connection will go through the core switch and then to...

Page 43: ...ddress The core switch is the default gateway of the clients The router is the default gateway of the core switch and the appliance If the clients and the appliance are on different network segments t...

Page 44: ...to clients These transactions lead to a decrease in the network throughput Server Internet 219 219 2 19 192 168 1 254 192 168 1 100 192 168 1 1 10 2 211 136 1Core switch default gateway of 2 Default...

Page 45: ...5 on page 2 7 for an illustration of the solution to this problem and see figure 2 6 on page 2 8 for instructions on how to add static routes Server Internet Client 219 219 2 19 192 168 1 254 192 168...

Page 46: ...age 2 17 for tips to help minimize issues in a multi segment environment Basic Deployment As shown in figure 2 2 The most common deployment of InterScan Gateway Security Appliance on page 2 3 it is ne...

Page 47: ...thernet packets are transferred between INT eth0 and EXT eth1 ports In transparent proxy with bridging the appliance is transparent to other computers that is clients servers network devices Other net...

Page 48: ...he server Transparent Proxy Mode InterScan Gateway Security Appliance enforces transparency through the following behavior Clients do not see the presence of additional filters scanners unless a viola...

Page 49: ...nnection may be lost if the default gateway IP address of InterScan Gateway Security Appliance is deployed behind the appliance In this mode the source IP address is that of the InterScan Gateway Secu...

Page 50: ...e delivers the packet to the destination server by way of the router the default gateway of the appliance In this mode the source IP address is the client s address and the destination IP address is t...

Page 51: ...ppliances deployed as mentioned above In the illustration the company LAN is the area with a gray border and the DMZ is the area with a red border FIGURE 2 9 Deployment in a DMZ environment requires t...

Page 52: ...e The basic steps for setting up a failover deployment are 1 Deploy two appliances in your network see Failover Deployment Scenario on page 2 15 2 Ensure that LAN bypass an option in the Preconfigurat...

Page 53: ...in figure 2 10 FIGURE 2 10 Two InterScan appliances arranged in a link state failover deployment Internet Layer 4 network switch Firewall Mail server HTTP server FTP server Client computers in your n...

Page 54: ...that causes scanning to stop network traffic will still flow through the appliance unscanned so that network traffic is not interrupted enabled by default Link State Failover Link state failover is a...

Page 55: ...k or Internet Before a proxy server leading to the public network If deploying in a multi segment environment take note of the following recommendations Connect the default gateway to the EXT port Use...

Page 56: ...ration mode Original bridge forwarding processing may be disturbed in both operation modes See Deployment Issues on page 2 18 If the link is broken on the external Internet facing side of the applianc...

Page 57: ...he LCD module to set the netmask address default gateway address and primary DNS address You can also designate a host name in this way Note You may also be required to provide a secondary DNS server...

Page 58: ...ooking at the LCD panel on the front of the device 2 Browse the InterScan Gateway Security Appliance Web interface by going to a PC on the protected network and opening an Internet Explorer browser to...

Page 59: ...Trend Micro will send you a confirmation message that you need to acknowledge by clicking OK 7 Click OK twice After the registration is complete Trend Micro emails you an Activation Code which you can...

Page 60: ...Trend Micro InterScan Gateway Security Appliance M Series Administrator s Guide 2 22...

Page 61: ...how the appliance protects your network from a range of Internet borne security risks The topics discussed in this chapter include The Range and Types of Internet Threats on page 3 2 How InterScan Ga...

Page 62: ...ar in nature to email phishing pharming seeks to obtain per sonal or private information usually financially related through domain spoofing Phishing Phishing is the use of unsolicited email to reques...

Page 63: ...management and targeted administration of device settings The primary functional components in InterScan Gateway Security Appliance include Ethernet network interfaces Real time scan of SMTP POP3 HTTP...

Page 64: ...ine device that provides bi directional support for 10MB 100MB and 1GB Ethernet networks through its multi speed Ethernet Network Interfaces When InterScan Gateway Security Appliance is attached to yo...

Page 65: ...ecurity Appliance halts malicious payloads before they can enter your network The Web Console Trend Micro provides easy administration and management of InterScan Gateway Security Appliance through a...

Page 66: ...desirable content InterScan Gateway Security Appliance applies the content filtering rules to email in the same order as displayed in the Content Filtering screen of the Web console The InterScan Gate...

Page 67: ...ecurity Appliance uses spam patterns and heuristic rules to filter email messages It scans email messages and assigns a spam score to each message based on how closely it matches the rules and pattern...

Page 68: ...esses as spam A Blocked Senders list is a list of suspect email addresses InterScan Gateway Security Appliance always categorizes email messages from blocked senders as spam and takes the appropriate...

Page 69: ...le below TABLE 3 2 Wildcard matching Pattern Matched Samples Unmatched Samples john trend com john trend com john trend com Any address different from the pattern trend com trend com john trend com ma...

Page 70: ...m solution If enabled ERS can effectively block up to 80 of spam at its source ERS uses the Standard Reputation database previously called the Real Time Blackhole List or RBL and the Dynamic Reputatio...

Page 71: ...nce receives the email message sent from Sam s SMTP server to John s SMTP server it first checks Server A s IP address against the Standard Reputation database If Sam s SMTP server IP address is not o...

Page 72: ...ndLabs capture inert snippets of this code in the pattern file The engine then com pares certain parts of each scanned file to the pattern in the virus pattern file looking for a match When the scan e...

Page 73: ...k that a bot or other malware compressed using these methods will enter the network through HTTP downloads uploads or email IntelliTrap uses the virus scan engine IntelliTrap pattern and exception pat...

Page 74: ...ation or do not understand the legal jargon The existence of spyware and other types of grayware on your network have the potential to introduce the following Reduced computer performance Increased We...

Page 75: ...ome an increasing problem on the Internet Trend Micro designed the anti phishing function in InterScan Gateway Security Appliance to protect LAN users from inadvertently giving away sensitive informat...

Page 76: ...ation email to the administrator A notification message also appears on the user s browser explaining that InterScan Gateway Security Appliance has blocked access to the site for security reasons Inte...

Page 77: ...he following components when checking a URL Trend Micro URL rating database Category filter list Blocked and Approved URL lists InterScan Gateway Security Appliance applies the URL filtering rules acc...

Page 78: ...reports True File Type and IntelliScan Virus originators can easily rename a file to disguise its actual type Programs such as Microsoft Word are extension independent that is they recognize and open...

Page 79: ...d these inert file types are not scanned Outbreak Defense Services A virus outbreak can occur on the Internet and spread rapidly Outbreak Defense is a combination of services designed to protect netwo...

Page 80: ...r Damage Cleanup Services and Damage Cleanup Tool Trend Micro Damage Cleanup Services DCS is a comprehensive service that helps assess and cleanup system damage without the need to install software on...

Page 81: ...ize security InterScan Gateway Security Appliance assists the administrator in these tasks by tracking all scanning and detection activity that it performs and writing this information to vari ous log...

Page 82: ...Trend Micro InterScan Gateway Security Appliance M Series Administrator s Guide 3 22...

Page 83: ...ity Appliances from the Web console view system information deploy system components and modify device settings The topics discussed in this chapter include Preliminary Tasks on page 4 2 Accessing the...

Page 84: ...those functions and settings TABLE 4 1 Preliminary tasks Preliminary Task See Chapter Change the default admin password to ensure appliance security Ch 13 Schedule default email notifications Ch 13 Se...

Page 85: ...atible Web browser To access InterScan Gateway Security Appliances 1 Open a compatible Web browser 2 In the address field type the URL https URL or IP Address of the target InterScan Gateway Security...

Page 86: ...ays and the Last 30 days along with totals for all items scanned Information Above the Panels Below the screen title the first piece of information shown is the license status If the InterScan Gateway...

Page 87: ...threat that OPS is protecting against Displayed are Status Risk Threat and Description To get more information about the status of Outbreak Prevention Service click Outbreak Defense Current Status in...

Page 88: ...ect all of the components to update and then click the Manual Update link The Manual Update Update in Progress indicator appears FIGURE 4 3 Update in Progress When the Update in Progress indicator has...

Page 89: ...ck Update to update the appliance The Update in Progress indicator reappears while the appliance updates 3 Optional Click Rollback to roll back the appliance to the last update Note Rollback allows an...

Page 90: ...IntelliTrap statistics from SMTP POP3 HTTP FTP traffic including Infected files cleaned Infected files quarantined Infected files deleted or blocked Infected files removed Infected files passed Total...

Page 91: ...p IntelliTrap detects malicious code such as bots in compressed files IntelliTrap pro vides detection statistics from SMTP POP3 traffic including Infected files deleted or blocked Infected files quara...

Page 92: ...ion for SMTP POP3 evaluates the potential security risk of URLs embedded in email messages Web Reputation for SMTP POP3 provides statistics for malicious URLs that the appliance detected in email mess...

Page 93: ...ance filtered content and detected information that met the SMTP and POP3 content filtering criteria Number of files blocked based on the HTTP and FTP file blocking criteria Additional Screen Actions...

Page 94: ...ide 4 12 Navigating the Web Console Click SMTP Scanning Incoming in the navigation menu to display the sample screen below The Target tab appears FIGURE 4 7 SMTP Scanning Incoming Target Sample Screen...

Page 95: ...ction and Notification tabs that you can click to access additional screens Separate panels in the screens organize the settings according to functions An online Help system with a drop down menu whic...

Page 96: ...ed Help Embedded help appears in several forms One form is the Tooltip a yellow icon that displays relevant explanatory material when you mouse over it as shown in fig ure 4 8 below FIGURE 4 8 Sample...

Page 97: ...on the right side of the Web console the title bar as illustrated in figure 4 9 below FIGURE 4 9 Online Help Menu Contents and Index To use the online Help system 1 Select Contents and Index from the...

Page 98: ...icro InterScan Gateway Security Appliance M Series Administrator s Guide 4 16 FIGURE 4 11 Online Help Configuration Screen 3 Click MORE to display additional text on any page for more details about th...

Page 99: ...ext sensitive Help for that screen The appliance online Help system displays a Help page for that context 5 Select other menu items in the online Help drop down menu to obtain information from the Tre...

Page 100: ...Trend Micro InterScan Gateway Security Appliance M Series Administrator s Guide 4 18...

Page 101: ...anning of SMTP Traffic on page 5 3 Configuring SMTP Virus Scanning on page 5 4 Configuring SMTP Anti Spyware on page 5 11 Configuring SMTP IntelliTrap on page 5 16 Configuring SMTP Anti Spam Email Rep...

Page 102: ...ateway Security Appliance SMTP Services include the following features Real time scanning of incoming and outgoing SMTP email traffic Scanning for viruses malware spyware grayware bots spam inappropri...

Page 103: ...on the main SMTP screen FIGURE 5 1 SMTP Enable To enable scanning of SMTP traffic 1 On the left side menu click SMTP 2 Select the Enable scanning of SMTP Traffic check box 3 Click Save Selecting an Al...

Page 104: ...s 5 Log on to the Web console to make any further changes Tip If you are changing the SMTP service port as a security measure against hackers Trend Micro recommends that you use the less commonly used...

Page 105: ...xcept password protected or encrypted files IntelliScan uses true file type identification IntelliScan examines the header of every file but based on certain indicators selects only files that it dete...

Page 106: ...nsions to scan field separated by a semicolon b Click Add c Finish by clicking OK 4 Back in the main Target screen select files to exclude from scanning based on different criteria Extracted file coun...

Page 107: ...er malware 3 Choose an action for InterScan Gateway Security Appliance to take when it detects a message containing viruses or malware a Clean infected items and pass If InterScan Gateway Security App...

Page 108: ...s with infected items Quarantine InterScan Gateway Security Appliance quarantines the message and any attachments Delete InterScan Gateway Security Appliance deletes the message and any attachments Re...

Page 109: ...SMTP Scanning Notification recipient s 1 From the left side menu click SMTP Incoming or Outgoing 2 Click the Notification tab 3 Select one or more of the following recipients and when a message matche...

Page 110: ...ree Notifications Inline text after InterScan Gateway Security Appliance scans a message and determines that it is free of viruses or malware it inserts a virus free notification into the body of the...

Page 111: ...e action for InterScan Gateway Security Appliance to take when it detects an item that contains spyware grayware Action tab Finally decide whom to notify when InterScan Gateway Security Appliance dete...

Page 112: ...Enable SMTP Anti spyware check box 3 Optional Configure the Spyware Grayware Exclusion List a Click the Search for spyware grayware link InterScan Gateway Security Appliance opens a browser window di...

Page 113: ...rget screen copy paste or type the name of the spyware grayware in the Enter name of spyware grayware field The spyware grayware exclusion list is case sensitive and has exact match capability 4 Click...

Page 114: ...Security Appliance to take when it detects spyware Quarantine InterScan Gateway Security Appliance sends the message and any attachments to the quarantine folder Delete InterScan Gateway Security Appl...

Page 115: ...following recipients and when a message containing spyware grayware is detected the corresponding email notifications s will be sent Administrator Sender Recipient 4 Optionally customize the text of...

Page 116: ...Target tab Next choose the action for InterScan Gateway Security Appliance to take when it detects a bot Action tab Finally decide whom to notify when InterScan Gateway Security Appliance detects a b...

Page 117: ...ed in an email attachment Quarantine InterScan Gateway Security Appliance sends the message and attachment to the quarantine folder Delete InterScan Gateway Security Appliance deletes the message and...

Page 118: ...enu click SMTP IntelliTrap 2 Click the Notification tab 3 Select one or more of the following recipients When IntelliTrap detects a potential threat such as a bot the appliance sends the corresponding...

Page 119: ...y level Tar get Next set the action that InterScan Gateway Security Appliance should take when it detects a suspicious embedded URL in SMTP mail Action Finally decide whom to notify when InterScan Gat...

Page 120: ...will be detected High Filter more messages with embedded malicious URLs but risk more false positives Medium default The standard setting Low Filter fewer messages with embedded malicious URLs but ri...

Page 121: ...d stamps Suspicious in the subject line Delete InterScan Gateway Security Appliance deletes the message and any attachments 4 Click Save SMTP Web Reputation Notification To select SMTP Web Reputation...

Page 122: ...ing area to display a list of available variables and their descriptions 4 To insert an inline stamp into the body of the suspicious message select the Message check box under Inline Notification Stam...

Page 123: ...able SMTP Anti spam Email Reputation check box 3 Select a service level Standard select this service level to use Trend Micro Email Reputation Service Standard to detect and block sources that are kno...

Page 124: ...ses for InterScan Gateway Security Appliance to exclude from filtering b Click Add The new IP address appears in the IP Address es table on the right 5 Click Save Logging in to the Email Reputation Se...

Page 125: ...ion tab 3 Choose the action for InterScan Gateway Security Appliance to take when it detects a message originating from an IP address that is known to be a source of spam Action for Standard Reputatio...

Page 126: ...d with no error message to user Pass not recommended 4 Click Save Configuring SMTP Anti Spam Content Scanning Configuring SMTP Anti Spam Content Scanning to scan SMTP traffic for spam email is a two s...

Page 127: ...3 Select a value from the Spam detection level drop down menu Set a spam detection rate to screen out spam The higher the detection level the more messages are classified as spam Low This is the defau...

Page 128: ...messages that InterScan Gateway Security Appliance filters as spam when they are actually legitimate email messages 4 Optional Keyword Exceptions Messages containing identified keywords will not be co...

Page 129: ...Choose the action for InterScan Gateway Security Appliance to take when it detects spam Pass and stamp Subject line with Spam The appliance delivers the message to the recipient and stamps spam in th...

Page 130: ...ds section Delete InterScan Gateway Security Appliance deletes the message and any attachments 4 Click Save Configuring SMTP Anti Phishing You can enable InterScan Gateway Security Appliance to scan S...

Page 131: ...t FIGURE 5 17 SMTP Anti Phishing Target To configure SMTP Anti Phishing Target to check for phishing sites 1 From the left side menu click SMTP Anti Phishing The Target tab appears 2 Select the Enable...

Page 132: ...Anti Phishing 2 Click the Action tab 3 Choose the action for InterScan Gateway Security Appliance to take when it detects a known phishing site Pass and stamp Subject line with Phishing Leave the def...

Page 133: ...ty Appliance will send notifications if it detects a known phishing site 4 Optionally customize the text of any of the email notifications The appliance supports the use of some helpful variables in c...

Page 134: ...traffic is a three step process First enable scanning of SMTP traffic and then select what to filter for Target tab Next choose the action for InterScan Gateway Security Appliance to take when one or...

Page 135: ...SMTP Services 5 35 SMTP Content Filtering Target FIGURE 5 20 SMTP Content Filtering Target...

Page 136: ...by Text in Message Body Enter one or more words for InterScan Gateway Security Appliance to check for when scanning content in the body of email For the above two filters Header and Body you can selec...

Page 137: ...attachment that matches one of the content filtering rules Quarantine InterScan Gateway Security Appliance sends the email and any attachments to the quarantine folder Delete InterScan Gateway Securi...

Page 138: ...e or True File Type filters 4 Click Save SMTP Content Filtering Notification FIGURE 5 22 SMTP Contenting Filtering Notification To select SMTP Content Filtering Notification recipient s 1 From the lef...

Page 139: ...ext of any of the email notifications The appliance supports the use of some helpful variables in customized messages A list of these variables is accessible from the View variable list link at the to...

Page 140: ...Trend Micro InterScan Gateway Security Appliance M Series Administrator s Guide 5 40...

Page 141: ...on page 6 22 Configuring HTTP Anti Phishing on page 6 25 Configuring HTTP URL Filtering on page 6 28 Configuring HTTP File Blocking on page 6 34 Configuring HTTP Web Reputation on page 6 36 HTTP Servi...

Page 142: ...To allow InterScan Gateway Security Appliance to scan HTTP traffic enable the fea ture FIGURE 6 1 HTTP Enable To enable scanning of HTTP traffic 1 On the left side menu click HTTP 2 Select the Enable...

Page 143: ...minutes while the appliance is rebooting When the appliance has rebooted the Web console login screen appears 5 Log on to the Web console to make any further changes Tip If you are changing the HTTP s...

Page 144: ...L Access Lists tab 3 Configure the Blocked URLs settings a Select the Enable blocked URL list check box b Under URL s to block enter the URL that you want to include in the blocked list c Select the t...

Page 145: ...include Web site URL keyword and String d Click Add The URLs you have added appear under the Approved URLs section 5 Click Save Configuring HTTP Virus Scanning Configuring virus scanning of HTTP traff...

Page 146: ...or s Guide 6 6 HTTP Scanning Target Configuring Virus Scanning for HTTP Traffic FIGURE 6 2 HTTP Scanning Target To configure virus scanning for HTTP traffic 1 From the left side menu click HTTP Scanni...

Page 147: ...t extension name filtering Specified file extensions Manually specify the files to scan based on their extensions by clicking Specified file extensions and then clicking the link A Scan Specified File...

Page 148: ...iles from timing out Start sending parts of the file to the client after The appliance starts sending parts of a large file to clients after a specified period so the connection between the client and...

Page 149: ...4329 replaces this type with application javascript text plain Textual data Type Video video mpeg MPEG 1 video with multiplexed audio video x ms wmv Microsoft Windows Media Video file video x shockwav...

Page 150: ...ere are both free and commercially available network traffic capture utilities Locating the MIME type in Packet Sniffer Data A typical packet sniffer application can return data on an HTTP stream simi...

Page 151: ...sends the file to the client and the browser loads it This option can sometimes result in a noticeable delay before the page loads With deferred scan enabled the appliance increases browser response...

Page 152: ...he appliance detects a virus or malware in a file it first attempts to clean the item If the item cannot be cleaned the appliance takes one of the following actions based on your selection from the dr...

Page 153: ...s 4 Click Save HTTP Scanning Notification FIGURE 6 5 HTTP Scanning Notification To select HTTP Antivirus Notification recipient s 1 From the left side menu click HTTP Scanning 2 Click the Notification...

Page 154: ...right of the Notification tab working area 6 Click Save Configuring HTTP Anti Spyware Configuring InterScan Gateway Security Appliance to scan HTTP traffic for spy ware grayware is a three step proces...

Page 155: ...side menu click HTTP Anti Spyware The Target tab appears 2 Select the Enable HTTP Anti spyware check box 3 Optional Configure the Spyware Grayware Exclusion List Click the Search for spyware grayware...

Page 156: ...exclude Returning to the Target screen copy paste or type the name of the spyware grayware in the Enter name of spyware grayware field The spyware grayware exclusion list is case sensitive and has ex...

Page 157: ...rScan Gateway Security Appliance to take when it detects spyware Block InterScan Gateway Security Appliance deletes the file s and notifies recipients with an in line user notification InterScan Gatew...

Page 158: ...Review the default user notification message or type your own notification message 4 Select the Administrator check box to enable the appliance to send a notification to the administrator when it det...

Page 159: ...n HTTP traffic Next set the action that InterScan Gateway Security Appliance should take when it detects a bot Action in HTTP traffic Finally decide whom to notify when InterScan Gateway Security Appl...

Page 160: ...liance to take if it detects a bot in a compressed file that is being downloaded or uploaded via HTTP Block InterScan Gateway Security Appliance prevents the file from being downloaded or uploaded and...

Page 161: ...inline message under User Notification 4 To send a notification to the administrator about the detected threat select the Administrator check box under Administrator Notification If you like customize...

Page 162: ...ext choose the action for InterScan Gateway Security Appliance to take when it encounters a pharming site Action tab Finally decide whom to notify when InterScan Gateway Security Appliance detects a k...

Page 163: ...nu click HTTP Anti Pharming 2 Click the Action tab 3 Choose the action for InterScan Gateway Security Appliance to take when it detects a known pharming site Block InterScan Gateway Security Appliance...

Page 164: ...browser when the appliance detects a pharming threat edit the inline message under User Notification 4 Select the Administrator check box to enable the appliance to send a notification to the administ...

Page 165: ...phishing site Action tab Finally when InterScan Gateway Security Appliance detects a phishing site it will send a message if enabled to the administrator Notifi cation tab HTTP Anti Phishing Target F...

Page 166: ...From the left side menu click HTTP Anti Phishing 2 Click the Action tab 3 Choose one of the following actions for InterScan Gateway Security Appliance to take when it detects a known phishing site Bl...

Page 167: ...istrator check box to enable the appliance to send a notification to the Administrator if it detects a link to a known phishing site 5 Optionally customize the text of any of the email notifications T...

Page 168: ...equested site is prohibited URL Filtering Rules tab InterScan Gateway Secu rity Appliance performs URL filtering according to the administrator set schedule Settings tab If InterScan Gateway Security...

Page 169: ...yword String Click Add 5 Configure the Approved URL List Type one or more URLs in the Enter Approved URL field Select a type from the drop down menu Web site URL keyword String Click Add 6 Click Save...

Page 170: ...side menu select HTTP URL Filtering The URL Filtering Rules tab appears 2 Click the Approved Clients tab 3 In the IP IP range field type an IP address or range up to 100 separate entries and click Add...

Page 171: ...lect all days that apply Work Time select All day 24 hours or Specify work hours 4 In the URL Rating Server Connection Settings section set the timeout in seconds for online querying of the Trend Micr...

Page 172: ...ngs Optional View appliance proxy settings click this link to view the proxy settings screen FIGURE 6 19 HTTP URL Filtering Proxy Settings a Check Use a proxy server for pattern engine and license upd...

Page 173: ...eb page If the user believes that the URL has been classified incorrectly he or she can click the link and submit the URL for reclassification You can change the default message by selecting and typin...

Page 174: ...o TrendLabs for Reclassification link Configuring HTTP File Blocking InterScan Gateway Security Appliance can scan for and block certain file types that downloaded or uploaded via HTTP Enable File Blo...

Page 175: ...TP File Blocking The Target tab appears 2 Select the Enable HTTP file blocking check box 3 Check one or more items from the predefined list of file types Audio Video Compressed Executable Images Java...

Page 176: ...that appears in the user s browser when the appliance blocks a file that is being downloaded or uploaded via HTTP edit the inline message under User Notification 4 Select the Administrator check box...

Page 177: ...urity Appliance detects an attempt to access a URL that is either confirmed or suspected to be a Web threat Notification Note Web Reputation is also available in Trend Micro OfficeScan If you have bot...

Page 178: ...but risk fewer false positives 4 Click Save HTTP Web Reputation Notification To select HTTP Web Reputation Notification recipients 1 From the left side menu click HTTP Web Reputation 2 Click the Noti...

Page 179: ...select the Administrator check box under Administrator Notification If you like customize the notification message InterScan Gateway Security Appliance supports the use of some helpful variables in y...

Page 180: ...Trend Micro InterScan Gateway Security Appliance M Series Administrator s Guide 6 40...

Page 181: ...er describes the FTP services in InterScan Gateway Security Appliance Topics discussed in this chapter include Configuring FTP Virus Scanning on page 7 4 Configuring FTP Anti Spyware on page 7 8 Confi...

Page 182: ...an Gateway Security Appliance can prevent potentially dangerous files or files contain ing prohibited or privileged information from being transferred Enabling Scanning of FTP Traffic To allow InterSc...

Page 183: ...red port in the FTP listening service port s field 3 Click Save A message displays informing you that the appliance must reboot in order for this change to take effect 4 Click OK to dismiss the messag...

Page 184: ...hen it detects a virus or other malware Action tab Finally decide whom to notify when InterScan Gateway Security Appliance detects a virus or other malware Notification tab Note Infected item FTP infe...

Page 185: ...d file extensions Manually specify the files to scan based on their extensions by clicking Specified file extensions and then clicking the link A Scan Specified Files by Extension window appears FIGUR...

Page 186: ...client Enabling deferred scan helps prevent HTTP downloads of large files from timing out Start sending parts of the file to the client after The appliance starts loading parts of a large file to cli...

Page 187: ...y action from the drop down menu Block InterScan Gateway Security Appliance deletes all items Pass not recommended InterScan Gateway Security Appliance allows all items to be downloaded Block If more...

Page 188: ...s helpful variables for use in customizing messages A list of these variables is accessible from the View variable list link at the top right of the Notification tab 5 Click Save Configuring FTP Anti...

Page 189: ...nu click FTP Anti Spyware The Target tab appears 2 Select the Enable FTP Anti spyware check box 3 Optional Configure the Spyware Grayware Exclusion List Click the Search for spyware grayware link Inte...

Page 190: ...lude Returning to the Target screen copy paste or type the name of the spyware grayware in the Enter name of spyware grayware field The spyware grayware exclusion list is case sensitive and has exact...

Page 191: ...InterScan Gateway Security Appliance to take when it detects a spyware Block InterScan Gateway Security Appliance blocks the file transfer and then notifies recipients with an in line user notificati...

Page 192: ...he appliance detects a spyware threat edit the inline message under User Notification 3 Select the Administrator check box to enable InterScan Gateway Security Appliance to send the administrator a no...

Page 193: ...InterScan Gateway Security Appliance blocks a file it sends a notification if enabled to the administrator Notification tab FTP File Blocking Target FIGURE 7 10 FTP File Blocking Target To configure F...

Page 194: ...more information on Blockable File Types see Appendix C File Formats Blockable File Formats FTP File Blocking Notification FIGURE 7 11 FTP File Blocking Notification To configure FTP File Blocking Not...

Page 195: ...administrator when the appliance blocks a file 5 Optionally customize the text of any of the email notifications The appliance supports the use of some helpful variables in customized messages A list...

Page 196: ...Trend Micro InterScan Gateway Security Appliance M Series Administrator s Guide 7 16...

Page 197: ...opics discussed in this chapter include Configuring POP3 Virus Scanning on page 8 4 Configuring POP3 Anti Spyware on page 8 10 Configuring POP3 IntelliTrap on page 8 15 Configuring POP3 Web Reputation...

Page 198: ...ers for viruses malware spyware grayware bots spam inappropriate content links to phishing sites and links to malicious URLs Enabling Scanning of POP3 Traffic To allow InterScan Gateway Security Appli...

Page 199: ...ired port in the POP3 listening service port s field 3 Click Save A message displays instructing you that the appliance must reboot in order for this change to take effect 4 Click OK to dismiss the me...

Page 200: ...e to take when it detects a virus or other malware Action tab Finally decide whom to notify when InterScan Gateway Security Appliance detects a virus or other malware Notification tab Note Infected it...

Page 201: ...e file type scanning and exact extension name filtering Specified file extensions Manually specify the files to scan based on their extensions by selecting this and clicking the link A Scan Specified...

Page 202: ...6 Extracted file size compressed file size ratio exceeds 5 Choose the action on unscannable files Pass Remove 6 Click Save POP3 Scanning Action FIGURE 8 4 POP3 Scanning Action To configure the POP3 Sc...

Page 203: ...nterScan Gateway Security Appliance responds to them Pass not recommended InterScan Gateway Security Appliance delivers all items to the recipient Quarantine InterScan Gateway Security Appliance quara...

Page 204: ...Scanning Notification To select POP3 Scanning Notification recipient s 1 From the left side menu click POP3 Scanning 2 Click the Notification tab 3 Select one or more of the following recipients and w...

Page 205: ...ifications Inline text when an email is scanned and determined to be free of viruses or malware the recipient receives this message in the body of the email Unscannable File Notifications Inline text...

Page 206: ...ware gray ware Action tab Finally decide whom to notify when InterScan Gateway Security Appliance detects an item containing spyware grayware Notification tab Note Infected item POP3 infected items ar...

Page 207: ...database FIGURE 8 7 Trend Micro Spyware Grayware Online Database Search for the spyware to exclude Returning to the Target screen copy paste or type the name of spyware grayware in the Enter name of s...

Page 208: ...nu click POP3 Anti Spyware 2 Click the Action tab 3 Choose one of the following actions for InterScan Gateway Security Appliance to take when it detects spyware Quarantine InterScan Gateway Security A...

Page 209: ...at contain spyware grayware 4 Click Save POP3 Anti Spyware Notification FIGURE 8 9 POP3 Anti Spyware Notification To select POP3 Anti Spyware Notification recipient s 1 From the left side menu click P...

Page 210: ...ient 4 Optionally customize the text of any of the email notifications The appliance supports the use of some helpful variables in customized messages A list of these variables is accessible from the...

Page 211: ...cts a bot Action tab Finally decide whom to notify when InterScan Gateway Security Appliance detects a bot Notification tab Note Infected item POP3 infected items are email attachments that contain co...

Page 212: ...configure POP3 IntelliTrap Action 1 From the left side menu click POP3 IntelliTrap 2 Click the Action tab 3 Select one of the following actions for InterScan Gateway Security Appliance to take if it d...

Page 213: ...on and delivers the message 4 Click Save POP3 IntelliTrap Notification FIGURE 8 12 POP3 IntelliTrap Notification To select POP3 IntelliTrap Notification recipient s 1 From the left side menu click POP...

Page 214: ...king area 5 Click Save Configuring POP3 Web Reputation Configuring Web Reputation for POP3 is a three step process You must first enable real time Web Reputation checking for POP3 and then select the...

Page 215: ...eputation checking check box 3 Select a security level The higher the security level the more messages will classified as spam High Filter more messages with embedded malicious URLs but risk more fals...

Page 216: ...detects an embedded URL with a rating lower than the specified security level it will insert the stamp into the Subject line before it delivers the message 4 Click Save POP3 Web Reputation Notificatio...

Page 217: ...rking area to display a list of available variables and their descriptions 4 If you want to insert an inline stamp into the body of suspicious messages select the Message check box under Inline Notifi...

Page 218: ...down menu The higher the detection level the more messages are classified as spam Low This is the default setting This is the most lenient level of spam detection InterScan Gateway Security Appliance...

Page 219: ...xceptions Messages containing identified keywords will not be considered spam separate multiple entries with a semicolon 5 Optional Approved Senders Add approved senders email addresses or domain name...

Page 220: ...ail if InterScan Gateway Security Appliance detects spam 4 Click Save Configuring POP3 Anti Phishing You can enable InterScan Gateway Security Appliance to scan POP3 email for links to known phishing...

Page 221: ...shing sites 3 Click Save POP3 Anti Phishing Action FIGURE 8 16 POP3 Anti Phishing Action To configure POP3 Anti Phishing Action 1 From the left side menu click POP3 Anti Phishing 2 Click the Action ta...

Page 222: ...ator and Recipient InterScan Gateway Security Appliance sends notifications to the selected recipients when it detects a known phishing site 4 Optionally customize the text of any of the email notific...

Page 223: ...is a four step process 1 Enable scanning of SMTP traffic 2 Select what to filter for Target tab 3 Set the action for InterScan Gateway Security Appliance to take when one or more filters is triggered...

Page 224: ...trator s Guide 8 28 POP3 Content Filtering Target FIGURE 8 18 POP3 Content Filtering Target To configure POP3 Content Filtering Target 1 From the left side menu click POP3 Content Filtering The Target...

Page 225: ...Filter by Text in Body i Enter one or more words for InterScan Gateway Security Appliance to check for when scanning content in the body of email ii Click Add iii Optional If you select match case on...

Page 226: ...ment triggers one of the content filtering rules Quarantine InterScan Gateway Security Appliance sends the email and any attachments to the quarantine folder and then sends the recipient a quarantine...

Page 227: ...ave POP3 Content Filtering Notification FIGURE 8 20 POP3 Content Filtering Notification To select POP3 Content Filtering Notification recipient s 1 From the left side menu click POP3 Content Filtering...

Page 228: ...4 Optionally customize the text of any of the email notifications The appliance supports the use of some helpful variables in customized messages A list of these variables is accessible from the View...

Page 229: ...functions in InterScan Gateway Security Appliance Topics discussed in this chapter include The Outbreak Defense Services on page 9 2 Current Status on page 9 3 Configuring Internal Outbreak on page 9...

Page 230: ...break Prevention Services Outbreak Prevention Services protects your system by deploying Trend Micro Outbreak Prevention Policy Outbreak Prevention Policy Outbreak Prevention Policy OPP is a set of re...

Page 231: ...n regarding the threat the alert type or actions for you to take The Current Status screen contains the following basic information Threat Status Brief description of the threat Threat Threat name Inf...

Page 232: ...eate a rule to look for a specific word or words phrase or sentence Attachment How the threat attachment is usually labeled Stopping the Outbreak Prevention Policy Stop the currently deployed Outbreak...

Page 233: ...ng and TrendLabs issues a new OPP InterScan Gateway Security Appliance stops the current OPS and moves the OPP to the top of the Outbreak Prevention Policy list If OPS is currently running and you wan...

Page 234: ...should be in effect The default is 2 days 4 Click Apply Selected OPP Tip View the Summary screen for the current status of Outbreak Prevention Services Configuring Damage Cleanup FIGURE 9 4 Outbreak...

Page 235: ...the client s machine To configure the Damage Cleanup Setting 1 From the left side menu click Outbreak Defense Damage Cleanup 2 Select the Enable Damage Cleanup check box 3 Optional Add non Windows ba...

Page 236: ...omatic Deployment options Enable automatic deployment for Red Alerts check to enable automatic deployment of Outbreak Prevention Policies when InterScan Gateway Security Appliance detects an outbreak...

Page 237: ...ncy Every number minutes define how often InterScan Gateway Security Appliance checks for updated Outbreak Prevention Policies 4 Click Save Note This screen is disabled greyed out if you are managing...

Page 238: ...lating on the Internet and spreading to mail servers and computers on local networks Red Alerts trigger the Trend Micro 45 minute Red Alert solution process This process includes deploying an official...

Page 239: ...ter describes the Quarantine function in InterScan Gateway Security Appliance Topics discussed in this chapter include Quarantines Screen on page 10 2 Querying the Quarantine Folder on page 10 5 Perfo...

Page 240: ...The maximum limit for the quarantine folder is 1 million email messages If you allow this limit to be exceeded InterScan Gateway Security Appliance will not quarantine any new messages that meet the...

Page 241: ...rary directory If the message resend succeeds the appliance permanently removes the message from the quarantine folder If the message resend fails the appliance moves the message back to the quarantin...

Page 242: ...click Quarantines Settings The Quarantine Settings screen appears 2 In the Inline Message for Resend section select the Append the following text in the resend message check box 3 Accept the default w...

Page 243: ...1 From the left side menu click Quarantines Query 2 Under Criteria set the following options Time period select a predefined period of time or specify a range of time Sender search by sender Recipien...

Page 244: ...tine Query Results Note The Sender Recipient and Subject fields are all case insensitive and have partial match capability The Quarantine Query Results screen displays a list of quarantined email mess...

Page 245: ...he quarantine folder When you use this option the appliance first scans the message according to your message scanning settings and then attempts to resend it Follow the procedure below to scan and re...

Page 246: ...ges a new name and a new txt extension InterScan Gate way Security Appliance then zips up all the files including an index file that it cre ates After you unzip the file you will see a folder that con...

Page 247: ...menu next to Rows per page to select the number of entries to display per screen Click Done to return to the Quarantine Query screen Performing Query Maintenance Performing Quarantine maintenance is v...

Page 248: ...arantines Maintenance Manual To manually delete messages from the Quarantine folder 1 From the left side menu click Quarantines Maintenance The Manual tab appears 2 Select the email to delete Delete a...

Page 249: ...ges from the Quarantine folder 1 Click the Maintenance Automatic tab 2 Select the Enable automatic purge check box 3 Type a value in the Delete files older than days days field 4 Click Save Note The I...

Page 250: ...Trend Micro InterScan Gateway Security Appliance M Series Administrator s Guide 10 12...

Page 251: ...onents This chapter describes the Update function in InterScan Gateway Security Appliance Topics discussed in this chapter include Update on page 11 2 Updating Manually on page 11 3 Configuring Schedu...

Page 252: ...trendmicro com download When the Update Center screen appears select your product Patches are dated If you find a patch that you have not applied open the readme document to determine whether the pat...

Page 253: ...indicator appears as InterScan Gateway Security Appliance searches for updates followed by the Manual Update screen 2 Select from the following options for updating components Component to select all...

Page 254: ...k Update Manual 2 Select from the following options for rolling back components Component selects all components Or Select specific components 3 Click Rollback Note Note You can only roll back compone...

Page 255: ...ble scheduled updates check box 3 Select from the following options for updating components Select all selects all components Or Select specific components 4 Specify an update duration and frequency 5...

Page 256: ...appears 2 Select and configure one of the following update sources Trend Micro ActiveUpdate Server default Or Other update source type the URL for the location of the other update source 3 Select Ret...

Page 257: ...mponents 11 7 Note This screen is disabled greyed out if you are managing the appliance using Trend Micro Control Manager For more information on using Control Manager to manage the appliance see Intr...

Page 258: ...Trend Micro InterScan Gateway Security Appliance M Series Administrator s Guide 11 8...

Page 259: ...ogs This chapter describes the Log function in InterScan Gateway Security Appliance Topics discussed in this chapter include Logs on page 12 2 Querying Logs on page 12 3 Configuring Log Settings on pa...

Page 260: ...t it performs and writes this information to various logs The log query feature allows you to create reports that show detection activity for the different protocols for the various types of scanning...

Page 261: ...for the different protocols for the various types of scanning tasks that InterScan Gateway Security Appliance performs You can also view the event log To perform a Log Query 1 From the left side menu...

Page 262: ...ding on the log type queried Additional screen actions Click Export List on the upper left side of the table to export query results for inclusion in reports Click the log navigation arrows top and bo...

Page 263: ...will not be able to query them Configuring Log Settings FIGURE 12 4 Logs Settings By default InterScan Gateway Security Appliance creates a log for each type of scanning supported Some scans such as a...

Page 264: ...ure Log Settings 1 From the left side menu click Logs Settings 2 Select the Send logs to syslog server check box 3 Enter the syslog server s IP address and port number in the IP address and Port field...

Page 265: ...rs 2 In the Target section select from the following options Select all at the far right side of the target section header Or Select one or more of the predefined log categories 3 In the Action sectio...

Page 266: ...tic tab The Automatic tab appears 3 Select the Enable automatic purge check box 4 In the Target section select from the following options Select all at the far right side of the target section header...

Page 267: ...Analyzing Your Protection Using Logs 12 9...

Page 268: ...Trend Micro InterScan Gateway Security Appliance M Series Administrator s Guide 12 10...

Page 269: ...iguration Backup on page 13 4 Control Manager Settings on page 13 6 Disk SMART Test on page 13 9 Firmware Update on page 13 10 IP Address Settings on page 13 11 Notification Settings on page 13 17 Ope...

Page 270: ...3 2 Administration FIGURE 13 1 Administration screen From the Administration menu you can configure many InterScan Gateway Security Appliance operational settings access different InterScan Gateway Se...

Page 271: ...ntrol The Access Control screen allows administrators to access the InterScan Gateway Security Appliance Web console from the Internet To enable Access Control 1 From the left side menu click Administ...

Page 272: ...Configuration Backup To back up current Configuration settings 1 From the left side menu click Administration Configuration Backup 2 In the Backup Current Configuration section click Backup A Windows...

Page 273: ...ings from a backup file 1 From the left side menu click Administration Configuration Backup 2 From the Restore Configuration from backup section click Browse to find a configuration file 3 Click Resto...

Page 274: ...y Appliances with Trend Micro Control Manager sold separately Control Manager provides aggregate reporting for all managed InterScan Gateway Security Appliances with several new useful tem plates You...

Page 275: ...y Security Appliance Web console Before registering InterScan Gateway Security Appliance to a Control Manager server ensure that both the device and the Control Manager server belong to the same netwo...

Page 276: ...roxy server and the Port that it uses c If the proxy server uses authentication type the User ID and Password 8 If your InterScan Gateway Security Appliance resides behind an NAT Network Address Trans...

Page 277: ...n the product directory For more detailed guidance on using InterScan Gateway Security Appliance with Trend Micro Control Manager see Appendix B Introducing Trend Micro Control Manager Disk SMART Test...

Page 278: ...test can be viewed in the system logs To configure the Disk SMART Test utility 1 From the left side menu click Administration Disk SMART Test 2 Select the Enable scheduled disk SMART test check box 3...

Page 279: ...e Browse field 5 Click Update Firmware A countdown screen appears and counts down from 3 minutes while the appliance is updating its firmware When the appliance has rebooted the Web console login scre...

Page 280: ...o remove the existing static route before you can make these changes To configure the IP address that InterScan Gateway Security Appliance uses to check for component and firmware updates 1 From the l...

Page 281: ...URE 13 8 Administration IP Address Settings Static Routes Static routes are special routes that the network administrator manually enters into the InterScan Gateway Security Appliance configuration St...

Page 282: ...elp ensure that you do not lose the connection with the appliance For example if the gateway IP address has changed but the static route has not yet been updated on IGSA you may not be able to access...

Page 283: ...nistration IP Address Settings 2 Click the Network ID link The Modify Static Route screen appears with the current values 3 Enter a value for the Network ID 4 Enter a value for the Netmask 5 Enter a v...

Page 284: ...inistrator s Guide 13 16 FIGURE 13 10 Static Routes Multiple Segment Network Router IP address 10 4 4 254 Client in Segment A with IP address 10 1 1 1 A B C Client in Segment B with IP address 10 2 2...

Page 285: ...urs up to the number specified by the administrator in the Events screen Events tab TABLE 13 1 Static routes example settings Static Route Fields for Segment A Example Settings Network ID 10 1 1 0 Net...

Page 286: ...2 SMTP server Type the SMTP server name or IP address in the SMTP Server field 3 Port Type the SMTP server port number in the Port field 4 SMTP user name Type the SMTP server user name in the SMTP use...

Page 287: ...fications InterScan Gateway Security Appliance will send out per hour 1 From the left side menu click Administration Notification Settings 2 Click the Events tab 3 In the Maximum notifications per hou...

Page 288: ...nfigured to act as a bridge or a router To configure what mode InterScan Gateway Security Appliance should operate in 1 From the left side menu click Administration Operation Mode 2 Select a mode Full...

Page 289: ...per user basis Password FIGURE 13 14 Administration Password The default InterScan Gateway Security Appliance console password was chosen at the time of installation After logging on to the InterScan...

Page 290: ...ole password 1 From the left side menu click Administration Password 2 In the Old password field type the console s current password 3 In the New password field type a new password 4 In the Confirm pa...

Page 291: ...opens a browser window on the Renewal Instructions screen FIGURE 13 16 Online License Update Renewal 3 Follow the instructions that appear To view detailed information about your license 1 Select Adm...

Page 292: ...terScan Gateway Security Appliance supports automatic online updates as long as the Activation Code has not expired To perform online Updates for the product license manually 1 Check the network statu...

Page 293: ...inistration Product License to display the Product License screen 2 Click New Activation Code The New Activation Code screen appears FIGURE 13 18 Administration Product License New Activation Code 3 T...

Page 294: ...nterScan Gateway Security Appliance needs the proxy information to Update pattern engine files Update license information Send virus logs to the World Virus Tracking WTC server Download Outbreak Preve...

Page 295: ...4 SOCKS5 4 Specify the proxy server name or IP address and port number 5 If your proxy server needs authentication type a valid user ID and password 6 Click Test Connection If the settings are correct...

Page 296: ...nable the SNMP Agent System location physical location of the computer server that contains the SNMP agent software module For example Bottom Floor of building room 44 System contact email address of...

Page 297: ...ting takes precedence To configure system time manually 1 From the left side menu click Administration System Time The System Time Settings screen appears 2 In the Date and Time Setting section type t...

Page 298: ...me The System Time Settings screen appears 2 In the NTP Setting section type the domain name or IP address of an NTP server in the NTP Server field 3 Select your time zone from the Time zone drop down...

Page 299: ...Gateway Security Appliance you can reboot the appliance directly from the Web console FIGURE 13 22 Reboot screen Note The Reboot item in the left side menu is far down the screen under Administration...

Page 300: ...nce M Series Administrator s Guide 13 32 FIGURE 13 23 Administration Reboot menu To reboot the appliance from the Web console 1 On the left side menu click Administration Reboot The Reboot screen appe...

Page 301: ...ing Program collects Internet threat data from tens of thousands of corporate and individual computer systems around the world To participate in the World Virus Tracking Program 1 From the left side m...

Page 302: ...dministration World Virus Tracking 2 Click the Virus Map link A browser opens showing the Trend Micro Virus Map with the Top 10 Worldwide viruses listed FIGURE 13 25 Virus Map 3 Position your mouse ov...

Page 303: ...include Contacting Technical Support on page 14 2 Troubleshooting on page 14 4 Frequently Asked Questions FAQ on page 14 7 Recovering a Password on page 14 8 Virus Pattern File on page 14 9 Spam Engi...

Page 304: ...our comments Trend Micro Incorporated provides worldwide support to all of our registered users Get a list of the worldwide support offices http esupport trendmicro com Get the latest Trend Micro prod...

Page 305: ...lable with this release upgrade or patch hot fix 3 Documentation Set Summary of documentation available for the product 4 System Requirements List of hardware and software required to install and use...

Page 306: ...ating in diskless mode Solution Follow the procedure below To initialize the hard disk 1 Log on the appliance Preconfiguration console See Interfacing with the Preconfiguration Console for Device Imag...

Page 307: ...part of the re initialization process 7 Press any key The appliance formats the hard disk and displays the following screen when the formatting is complete FIGURE 14 2 Preconfiguration console output...

Page 308: ...problem connecting to the DHCP server Solution First check that the Ethernet cables are connected By default InterScan Gateway Security Appliance uses a dynamic IP address from a DHCP server Make sur...

Page 309: ...orking or not working properly InterScan Gateway Security Appliance will reboot into diskless mode In diskless mode InterScan Gate way Security Appliance still scans for threats but some features are...

Page 310: ...t current By default both DC ON LAN Bypass and DC OFF LAN Bypass are enabled Why Does the Quarantine Action Fail There are three 3 situations that will cause the quarantine action to fail The number o...

Page 311: ...ure Virus Pattern File As new viruses and other Internet threats are written released to the public and dis covered Trend Micro collects their telltale signatures and incorporates the informa tion int...

Page 312: ...email messages When the appliance detects a message that uses exclamation marks in this way it increases the spam score for that email message Note Rules in spam pattern differ from pattern to pattern...

Page 313: ...end Micro s then current Maintenance fees Maintenance is your right to receive pattern file updates and product updates in consideration for the payment of applicable fees When you purchase a Trend Mi...

Page 314: ...e possible but virus pattern and program updates will stop To prevent this renew the Maintenance as soon as possible To purchase renewal maintenance you may contact the same vendor from whom you purch...

Page 315: ...most antivirus vendors It is not a virus and does not contain any program code Obtaining the EICAR Test File You can download the EICAR test virus from the following URLs www trendmicro com vinfo tes...

Page 316: ...have InterScan Gateway Security Appliance abandon the extraction after 1 000 files Whenever the limit is reached the original archive and any decompressed files is deleted In addition to benefiting o...

Page 317: ...is detected in the first compression layer Decompressed file exceeds x times of compressed x Default setting is 10 The InterScan Gateway Security Appliance provides this feature as a guard against so...

Page 318: ...made between the user s experience and expecta tions and maintaining security The nature of virus scanning requires doubling the download time that is the time to transfer the entire file to InterSca...

Page 319: ...Security Appliance will not scan files larger than the size specified The default is 50MB WARNING This option effectively allows a hole in your Web security large files will not be scanned Trend Micr...

Page 320: ...uses 1 From the InterScan Gateway Security Appliance console menu click SMTP HTTP or POP3 Anti Phishing 2 Click the Notification tab 3 Click the Submit a Potential Phishing URL to TrendLabs link 4 Typ...

Page 321: ...d the BIOS firmware This chapter includes the following topics Updating the Device Image Using the AFFU on page 15 4 Preparing InterScan Gateway Security Appliance for the Device Image Update on page...

Page 322: ...which instructions to follow for updating firmware based on what kind of update you want to do Type of Update Tool to Use Follow These Instructions Program file keeping exist ing configuration InterSc...

Page 323: ...ty Appliance section of the Trend Micro Update Center http www trendmicro com download product asp prod uctid 73 Insert the InterScan Gateway Security Appliance Solutions Disc containing the new firmw...

Page 324: ...onsole Tip Trend Micro recommends updating the program file through the Web console unless you have a compelling need to maintain the restore previous configuration feature Preparing InterScan Gateway...

Page 325: ...gateway and primary and secondary DNS addresses Before the Update Before updating the device image ensure that you have followed these steps Back up your configuration unless you have not yet configur...

Page 326: ...ltering Damage Cleanup File Blocking IntelliTrap System Update URL Filtering Viruses malware To back up the appliance configuration information 1 Log on to the appliance Web console by pointing an Int...

Page 327: ...ance to Deliver the Update Before you upload the device image to the appliance designate a computer to interface with the appliance console port Use a computer that has terminal configuration software...

Page 328: ...mask to 255 255 255 0 while being careful to avoid the IP addresses 192 168 252 1 and 192 168 252 2 to avoid an IP conflict as these are the default IP addresses for the appliance rescue mode and for...

Page 329: ...2 or any other available COM port on a computer See figure 15 1 Back panel of appliance showing console port management port and INT port Tip Trend Micro recommends that you configure HyperTerminal pr...

Page 330: ...ick OK The Connect To screen appears FIGURE 15 3 The HyperTerminal Connect To screen 4 In the Connect To screen using the drop down menu choose the COM port that your local computer has available and...

Page 331: ...HyperTerminal screen type the appliance Preconfiguration console password or if this is the first time you use the device use the default password admin and press ENTER The console accepts the passwo...

Page 332: ...ain The appliance Preconfiguration console Main Menu appears as shown below FIGURE 15 6 The appliance Preconfiguration console main menu accessed via HyperTerminal Getting the IP Address of the Local...

Page 333: ...f your local computer 3 Closely watch this display in the HyperTerminal window As soon as you see the Press ESC to enter the menu prompt firmly press ESC the Escape key The appliance goes into rescue...

Page 334: ...ee the prompt FIGURE 15 8 The appliance rescue mode main menu Uploading the New Device Image The steps for uploading the new device image vary based on whether you plan to keep the existing appliance...

Page 335: ...configuration is 3 Update Device Image Keep Current Configuration When using this option only the system partition will be updated To upload the new device image using existing configuration 1 Choose...

Page 336: ...ge 15 16 Using the Appliance Firmware Flash Utility with Option 3 Before launching the Appliance Firmware Flash Utility AFFU ensure that the IP of your PC is within the same segment as the IP of the a...

Page 337: ...Appliance Firmware 15 17 FIGURE 15 11 The appliance Solutions CD splash screen Note If for some reason the above screen does not appear after you put the CD in the CD ROM drive locate the file setup...

Page 338: ...he following screen appears FIGURE 15 12 The appliance Solutions CD Firmware Flash Utility section 3 On the Product Information tab click Launch The Trend Micro Appliance Firmware Flash Utility opens...

Page 339: ...en uploading with option 3 emphasizing Flash DOM 5 After you click Flash DOM the Appliance Firmware Flash Utility DOM screen appears as shown below FIGURE 15 15 AFFU DOM screen 6 In the Device field t...

Page 340: ...n below FIGURE 15 16 AFFU browse to device image 8 Click Open to select the device image The AFFU DOM screen reappears with the full path to the device image in the DOM firmware field 9 Click OK to st...

Page 341: ...re that the uploading client is in the same IP segment as the appliance IP address which you can see on the appliance rescue mode console You can use the ping command to check the appliance connection...

Page 342: ...1 Choose option 5 Update Device Image Restore Default Configuration The following screen appears FIGURE 15 19 Preconfiguration console screen that appears when you select option 5 in rescue mode 2 Co...

Page 343: ...you select option 5 Update Device Image Restore Default Configura tion see figure 15 19 Preconfiguration console screen that appears when you select option 5 in rescue mode For more information on how...

Page 344: ...ity The following screen appears FIGURE 15 22 The appliance Solutions CD Firmware Flash Utility section 3 On the Product Information tab click Launch The Trend Micro Appliance Firmware Flash Utility o...

Page 345: ...row containing the IP address If you do AFFU will connect to the IP address of that entry which is the IP address of the appliance s BMC and an IP conflict will result To upload the device image the a...

Page 346: ...the appliance uses the 192 168 252 1 as the default rescue mode IP address type 192 168 252 1 in the Device field 7 Click Browse next to the DOM firmware field and browse to the device image file in...

Page 347: ...sage Troubleshooting Device Image Upload with Option 5 If you are unable to upload the appliance device image in rescue mode using option 5 verify the following Make sure that the Ethernet cable is co...

Page 348: ...he protocol that the appliance uses to communicate with the uploading client Tip Many personal firewalls block UDP traffic by default TFTP uses UDP so if the local computer you are using has a persona...

Page 349: ...ives the image the appliance automatically reboots Note It can take two or three minutes for the appliance to finish updating its device image The Preconfiguration console display in the HyperTerminal...

Page 350: ...ous build number as shown below FIGURE 15 31 The appliance preconfiguration console login screens before and after device image update Reverting to the Previous Version of the Program File InterScan G...

Page 351: ...e and getting into Rescue mode as described in Preparing InterScan Gateway Security Appliance for the Device Image Update starting on page 15 4 and Putting the Appliance into Rescue Mode starting on p...

Page 352: ...sical hardware and the software system For firmware updates that is updates for BIOS BMC and LCM LCD module the appliance uses the IP address 192 168 252 2 Preparing to Upload the BMC Firmware Before...

Page 353: ...puter to 192 168 252 x and the subnet mask to 255 255 255 0 while being careful to avoid the IP addresses 192 168 252 1 and 192 168 252 2 to avoid an IP conflict as these are the default IP addresses...

Page 354: ...he other end to the serial port COM1 COM2 or any other available COM port on a computer See Figure 15 1 on page 8 Tip Trend Micro recommends that you configure HyperTerminal properties so that the bac...

Page 355: ...Connect To screen appears FIGURE 15 35 The HyperTerminal Connect To screen 4 In the Connect To screen using the drop down menu choose the COM port that your local computer has available and that is co...

Page 356: ...type the appliance Preconfiguration console password or if this is the first time you use the device use the default password admin and press ENTER The console accepts the password displays the Login...

Page 357: ...e IP Address of the Local PC For Windows you can either use the ipconfig command to verify the IP address of your PC or you can ping the appliance IP address that is displayed in HyperTerminal Uploadi...

Page 358: ...Put the appliance Solutions CD into the local computer The following screen appears FIGURE 15 39 The appliance Solutions CD splash screen 3 On the main menu click Firmware Flash Utility The following...

Page 359: ...address of the appliance BMC Note For successful detection configure the IP address of the local computer to be in the same segment as that of the appliance BMC 6 Select the detected entry by clicking...

Page 360: ...BMC firmware uploaded successfully Note During the BMC update the appliance CPU fans run at full speed After the BMC Upload After the BMC has upgraded BMC will auto restart the appliance to re flash...

Page 361: ...1 Follow the instructions in Preparing to Upload the BMC Firmware starting on page 15 32 2 Follow the instructions in Interfacing with the Preconfiguration Console for Firmware Updates starting on pag...

Page 362: ...Put the appliance Solutions CD into the local computer The following screen appears FIGURE 15 43 The appliance Solutions CD splash screen 3 On the main menu click Firmware Flash Utility The following...

Page 363: ...IP address of the appliance BMC Note For successful detection configure the IP address of the local computer to be in the same segment as that of the appliance BMC 6 Select the detected entry by clic...

Page 364: ...10 In the BIOS checksum field type the checksum value that you got from the BIOS release note 11 Click OK AFFU auto powers on the appliance to begin to upload the BIOS firmware and when the upload is...

Page 365: ...ce back panel showing location of management port on page 22 That the uploading client is in IP range 192 168 252 x 255 255 255 0 You can use the AFFU detect function to verify the connection status b...

Page 366: ...Trend Micro InterScan Gateway Security Appliance M Series Administrator s Guide 15 46...

Page 367: ...Administrators and information security professionals invent and adopt a variety of terms and phrases to describe potential risks or uninvited incidents to computers and networks The following is a b...

Page 368: ...access tools password cracking applications and any other unwelcome files and programs apart from viruses that may harm the perfor mance of computers on your network InterScan Gateway Security Applian...

Page 369: ...d in this section such as worms qualify as network viruses Specifically network viruses use network protocols such as TCP FTP UDP HTTP and email protocols such as SMTP and POP3 to replicate InterScan...

Page 370: ...ne messag ing InterScan Gateway Security Appliance protects you against unwanted spam in email and on the Web using a database of known spammers and content filters Spyware Spyware refers to that broa...

Page 371: ...s may only display messages or images they can also destroy files reformat your hard drive or cause other damage InterScan Gateway Security Appliance can detect and delete or quarantine viruses during...

Page 372: ...Trend Micro InterScan Gateway Security Appliance M Series Administrator s Guide A 6...

Page 373: ...ed management console provides a single monitoring point for antivirus and content security products and services throughout the network This chapter discusses the following topics Control Manager Bas...

Page 374: ...ctive steps to secure your network against an emerging virus out break Secure communication infrastructure Control Manager uses a communications infrastructure built on the Secure Socket Layer SSL pro...

Page 375: ...in the protocol design the drawbacks of applying XML as the data format standard for the communication protocol consist of the following XML parsing requires more system resources compared to the oth...

Page 376: ...at for data transmission more than one type of data can be packed in a connection with or without compression With this type of data transfer strategy network bandwidth can be preserved and improved s...

Page 377: ...ver dispatching of commands occurs under a passive mode That is the command deployment relies on the agent to poll the server for available commands HTTPS Support The MCP integration protocol applies...

Page 378: ...unication but has an extra channel to receive server notifications This extra channel is also based on HTTP protocol Two way communication can improve real time dispatching and processing of commands...

Page 379: ...us of InterScan Gateway Security Appliances to offline when a fixed period of time elapses without a heartbeat from the InterScan Gateway Security Appliance Active heartbeats are not the only means Co...

Page 380: ...uct status additional data can upload to Control Manager along with the heartbeat The data usually contains InterScan Gateway Security Appliance activity information to display on the console Using th...

Page 381: ...n Menu of the Preconfiguration console type 2 to select Device Settings and press Enter The Device Settings Screen displays Note Control Manager uses the name specified in the Host name field to ident...

Page 382: ...the Port forwarding IP address and Port forwarding port number for two way communication with Control Manager 6 Use the down arrow to bring the cursor down to Return to main menu and press Enter 7 On...

Page 383: ...ouping of managed products because it affects the following User access When creating user accounts Control Manager prompts for the segment of the Product Directory that the user can access Carefully...

Page 384: ...n Gateway Security Appliance M Series Default Folder Newly registered InterScan Gateway Security Appliances usually appear in the New entity folder depending on the user account specified during the a...

Page 385: ...the folders in the Product Directory depends on the Account Type and folder access rights used to log on to the management console To access the Product Directory 1 Click Products on the main menu 2 O...

Page 386: ...lder or InterScan Gateway Security Appliance 4 On the working area click the Tasks tab 5 Select Deploy component from the Select task list 6 Click Next 7 Click Deploy Now to start the manual deploymen...

Page 387: ...mary displays a week s worth of information ending with the day of your query You can change the scope to Today Last Week Last Two Weeks or Last month available in the Display summary for list Configu...

Page 388: ...e or managed product Web based console or Control Manager generated console appears Issue Tasks to InterScan Gateway Security Appliances and Managed Products Use the Tasks tab to invoke available acti...

Page 389: ...ce To query and view InterScan Gateway Security Appliance logs 1 Access the Product Directory 2 On the left hand menu select the desired InterScan Gateway Security Appliance or folder 3 On the working...

Page 390: ...ed within a specific interval For the latter option you can specify logs for the last 24 hours day week month or cus tom range If you chose Specified range select the appropriate month day and year fo...

Page 391: ...ectory Manager If a Control Manager server s InterScan Gateway Security Appliance records are lost the agents on the products still know where they are registered to The product agent will automatical...

Page 392: ...el needs For example you can group products by location or product type messaging security web security file storage protection and so on The Directory allows you to create modify or delete folders an...

Page 393: ...Delete Rename Undo Redo Cut and Paste Use these options to manipulate and organize InterScan Gateway Security Appliances in your Control Manager network To use and apply changes in the Directory Mana...

Page 394: ...Select New folder from the pop up menu Control Manager creates a new sub folder under the main folder 4 Type a name for the new folder or use the default name and then press Enter 5 Click Save Except...

Page 395: ...eway Security Appliance to the target new location Cut and paste the folder or InterScan Gateway Security Appliance to the target new location 4 Click Save Delete User Defined Folders Take caution whe...

Page 396: ...ing Temp You can manipulate InterScan Gateway Security Appliances in Temp the same way you would with InterScan Gateway Security Appliances in the Product Directory The folders and InterScan Gateway S...

Page 397: ...ty Appliances belonging to different folder groups Note Adding InterScan Gateway Security Appliances to Temp only allows you to collect InterScan Gateway Security Appliances with outdated components d...

Page 398: ...Status table click one of the numeric links indicating the number of InterScan Gateway Security Appliances that are outdated Depending on the link you clicked the Virus Pattern Status Outdated Scan En...

Page 399: ...InterScan Gateway Security Appliance from Temp 1 Access Product Directory 2 On the left hand menu click Temp 3 From the available InterScan Gateway Security Appliances on the Temp list select the fold...

Page 400: ...virus pattern files Damage Cleanup templates Vulnerability Assessment patterns network outbreak rules Pattern Release History and network virus pattern files Anti spam rules refer to import and rule...

Page 401: ...nents to your network Manually Download Components This is the Trend Micro recommend method of configuring manual downloads Manually downloading components requires multiple steps Tip Ignore steps 1 a...

Page 402: ...s Step 1 Configure a Deployment Plan for your components 1 Click Administration on the main menu 2 On the left menu under Update Manager click Deployment Plan The Deployment Plan screen appears 3 On t...

Page 403: ...he update components Control Manager delays the deployment according to the interval you specify Use the menus to indicate the duration in terms of hours and minutes Start at Performs the deployment a...

Page 404: ...InterScan Gateway Security Appliance M Series Administrator s Guide B 32 Step 2 Configure your proxy settings if you use a proxy server 1 Click Administration System Settings The System Settings scre...

Page 405: ...s from the Internet check box in the Download component proxy settings area 3 Type the host name or IP address of the server in the Host name field 4 Type a port number in the Port field 5 Select the...

Page 406: ...Update Manager Manual Download The Manual Download screen appears 2 From the Components area select the components to download a Click the icon to expand the component list for each component group b...

Page 407: ...e URL of the update source in the accompanying field After selecting Other update source you can specify multiple update sources Click the icon to add an additional update source You can configure up...

Page 408: ...Control Manager but deploy to managed products based on the schedule you select When new updates found Components download to Control Manager when new components are available from the update source b...

Page 409: ...for the selected day s are blocked To schedule an hourly exception under Hourly schedule exceptions select the hour s to prevent downloads and then select the Do not download updates on the specified...

Page 410: ...3 Select the components to update Step 4 Configure the download schedule Step 5 Configure the download settings Step 6 Configure the automatic deployment settings Step 7 Enable the schedule and save s...

Page 411: ...the following options Delay After Control Manager downloads the update components Control Manager delays the deployment according to the interval you specify Use the menus to indicate the duration in...

Page 412: ...stem Settings screen appears 2 Select the Use a proxy server to download update components from the Internet check box in the Download component proxy settings area 3 Type the host name or IP address...

Page 413: ...2 From the Components area select the components to download a Click the icon to expand the component list for each component group b Select the following components to download From Pattern files Cle...

Page 414: ...ce M Series Administrator s Guide B 42 From Engines Virus Scan Engine 32 bit Spyware Scan Engine 32 bit Virus Cleanup Engine 32 bit Anti Spam Engine The Component Name screen appears Where Component N...

Page 415: ...Download components from the official Trend Micro ActiveUpdate server Other update source Type the URL of the update source in the accompanying field After selecting Other update source you can specif...

Page 416: ...to Control Manager then deploy to managed products Based on deployment plan Components download to Control Manager but deploy to managed products based on the schedule you select When new updates foun...

Page 417: ...d by the parent server Local reports do not include reports generated by child servers Use the Global Report options to view reports about managed products administered by child servers registered to...

Page 418: ...77 previously available since Service Pack 3 The reports added in Service Pack 3 fall into five categories Desktop Fileserver Gateway MailServer and Executive Summary The new reports in Control Manag...

Page 419: ...documents use a Web browser to view reports in ActiveX format Note Control Manager cannot send reports in ActiveX format as email attachments RPT Crystal Report format use Crystal Smart Viewer to vie...

Page 420: ...rt profile click Global Report Profile under Reports 3 On the left menu under Local Report Profile or Global Report Profile click Create Report Profile Step 2 Configure the Contents tab settings 1 In...

Page 421: ...Introducing Trend Micro Control Manager B 49 5 Select the report format 6 Click Next to proceed to the Targets tab...

Page 422: ...terScan Gateway Security Appliances or folders selected Select the child servers The profile only contains information about the child servers selected Select the parent server to include all child se...

Page 423: ...To dates Daily Contains information from the creation time 12 00 AM yesterday up to the current time Weekly or Bi weekly Contains 7 or 14 days worth of information select the day of the week that will...

Page 424: ...tely The report server collects information as soon as you save the report profile Start at The report server collects information at the specified date and time 3 For scheduled reports click Number o...

Page 425: ...rom the Users and groups list to the Recipient list Use to remove recipients from the Recipient list 2 Click Send the report as an attachment to send the report as an attachment Otherwise recipients w...

Page 426: ...screen To enable scheduled report profiles 1 Access Local or Global Scheduled Reports 2 On the working area under Report Profiles column select the profile check box Select the check box adjacent to...

Page 427: ...g and then viewing reports as email attachments you can also use the Local Report Profile or Global Report Profile screen to view the available local or global reports To view reports 1 Click Reports...

Page 428: ...Trend Micro InterScan Gateway Security Appliance M Series Administrator s Guide B 56...

Page 429: ...C 1 Appendix C Technology Reference This appendix contains explanations of some of the technologies and terms mentioned most frequently mentioned in this manual...

Page 430: ...der on the local computer with a partial file in it Because the file is incomplete it presents no danger Diskless Mode InterScan Gateway Security Appliance can operate in diskless mode when there is a...

Page 431: ...a job seeking filter does not distinguish between resume to start again and r sum a summary of work experience You can reduce the number of future false positives in the following ways 1 Update to the...

Page 432: ...n page C 5 Link State Failover Link state failover is a feature by which if either the INT or the EXT port stops functioning both ports are automatically shut down This feature is disabled by default...

Page 433: ...to the serial port COM1 COM2 or any other available COM port on a computer See Figure 15 1 Back panel of appliance showing console port management port and INT port on page 8 Tip Trend Micro recommend...

Page 434: ...ick OK The Connect To screen appears FIGURE C 2 The HyperTerminal Connect To screen 4 In the Connect To screen using the drop down menu choose the COM port that your local computer has available and t...

Page 435: ...if this is the first time you use the device use the default password admin and press ENTER The console accepts the password displays the Login screen and moves the cursor to the Login prompt Tip Tren...

Page 436: ...Menu appears as shown below Main Menu 1 Device Information Status 2 Device IP Settings 3 Interface Settings 4 System Tools 5 Advanced Settings 6 SSH Access Control 7 Change Password 8 Log Off with Sa...

Page 437: ...ver value toggles between disabled and enabled 7 Use the TAB key to select the Return to Main Menu field and press ENTER The Main Menu screen appears 8 Select option 8 Log Off with Saving and press EN...

Page 438: ...ns SMTP and POP3 traffic to catch packed malicious executables sent as attachment to email messages It is the Scan Engine technology that heuristically catches packed malware at the gateway IntelliTra...

Page 439: ...t are commonly used by worms such as APIs used for mass mailing and network propagation It uses a pattern file that contains the list of APIs to check To minimize false positives which may be due to t...

Page 440: ...er ERS Content Filtering Content Scanning Anti phishing Scanning Anti spyware IntelliTrap POP3 Feature Execution Order Content Filtering Anti Spam Anti phishing Scanning Anti spyware IntelliTrap HTTP...

Page 441: ...the Hard Disk The InterScan Gateway Security Appliance hard disk needs to be removed only if it develops a problem or fails Follow the procedure in this appendix to remove the InterScan Gateway Secur...

Page 442: ...ove the InterScan Gateway Security Appliance Hard Disk 1 Remove the bezel from the front of the device 2 To remove the bezel locate the two 2 bezel release clasps on the bottom of the bezel FIGURE D 1...

Page 443: ...ntion to the clasps at the top of the bezel 5 Pull the hard disk release lever outward and towards the right to unlock the hard disk tray FIGURE D 3 The hard disk tray While pressing the thumb release...

Page 444: ...Trend Micro InterScan Gateway Security Appliance M Series Administrator s Guide D 4 FIGURE D 4 Hard disk release lever 6 Gently slide the hard disk tray out of the device...

Page 445: ...n Gateway Security Appliance hard disk Note The InterScan Gateway Security Appliance hard disk needs to be equal to or greater than 80GB InterScan Gateway Security Appliance only uses 80GB of hard dis...

Page 446: ...Trend Micro InterScan Gateway Security Appliance M Series Administrator s Guide D 6...

Page 447: ...can be changed after preconfiguration TABLE E 1 Device address checklist Information required Sample Your value InterScan Gateway Security Appliance Information Device Address IP address 10 1 104 50...

Page 448: ...Trend Micro InterScan Gateway Security Appliance M Series Administrator s Guide E 2...

Page 449: ...F 1 Appendix F File Formats Supported This appendix includes the following topics Compression Types on page F 2 Blockable File Formats on page F 4 Malware Naming Formats on page F 6...

Page 450: ...eck for viruses being smuggled within nested compressions for example an infected file that is zipped ARJ compressed MS compressed and zipped again The maximum number of recursive scan layers is 20 Yo...

Page 451: ...File Formats Supported F 3 MSCOMP LZEXE PKLite Diet UNIX LZW compress Z UNIX pack z TABLE F 1 Supported compression types Continued...

Page 452: ...amaha tx 16w Con vox V8 File Psion Audio Files Audio Microsoft RIFF Creative Lab CMF MIDI MP3 Real Media Creative Voice Format VOC Compressed MSCOMP unix cpio archive LHA unix ar archive ARC TAR RAR T...

Page 453: ...EN SURFACE TER RAGEN TERRAIN TERRAGEN WORLD BITMAP IMAGE YUV12 WEBSHOTS COLLECTION WINDOWS METAFILE COREL PHOTO PAINT WINDOWS BMP JPEG HP WINDOWS FONT MICROSOFT PAINT v1 x MICROSOFT PAINT v2 x TIFF SU...

Page 454: ...assigned a special suffix GEN for generic detection or DAM if the variant is damaged or malformed TABLE F 3 Malware naming Prefix Description No prefix Boot sector viruses or file infector 1OH File i...

Page 455: ...ot virus HKTL Hacking tool HTML HTML virus IRC Internet Relay Chat malware JAVA Java malicious code JOKE Joke program JS JavaScript virus NE File infector NET Network virus PALM Palm PDA based malware...

Page 456: ...dministrator s Guide F 8 SYMBOS Trojan that affects telephones using the Symbian operating system TROJ Trojan UNIX Linux UNIX script malware VBS VBScript virus WORM Worm W2KM W97M X97M P97M A97M O97M...

Page 457: ...Appendix G Specifications and Environment This appendix includes the following topics Hardware Specifications on page G 2 Dimensions and Weight on page G 2 Power Requirements and Environment on page...

Page 458: ...curity Appliance TABLE G 1 Hardware specifications Component Specification CPU LGA 775 Pentium 3 4GHz Chipset 915GV Memory 1GB 512MB x 2 Compact Flash 512MB HDD 80GB SATA I hard disk LAN Devices PCI L...

Page 459: ...VAC 100 to 240 nominal AC input current 90VAC 8 0A AC input current 180VAC 4 0A Frequency 47 to 63Hz 50 60 nominal NORMAL OPERATING AMBIENT TEMPERATURE AT SEA LEVEL Minimum operating and idle 32 F 0 C...

Page 460: ...Trend Micro InterScan Gateway Security Appliance M Series Administrator s Guide G 4...

Page 461: ...3 21 fig 13 15 Administration Product License 13 22 fig 13 16 Online License Update and Renew al 13 23 fig 13 17 My Product Details 13 24 fig 13 18 Administration Product License New Activation Code 1...

Page 462: ...ti phishing services 1 7 approved and blocked senders lists 3 8 email links 3 15 outbound URL requests 3 15 URL rating database 3 15 Anti Spam anti spam engine 3 7 Email Reputation Services 3 11 Dynam...

Page 463: ...shooting 15 45 update auto restart of IGSA 15 40 CPU fans run at full speed 15 40 IP range 15 45 troubleshooting 15 45 Bot defined 3 2 Browser support Internet Explorer 6 x 1 3 Mozilla Firefox 1 x 1 3...

Page 464: ...B 47 contents B 48 creating B 47 frequency B 51 PDF B 47 recipient B 53 RPT B 47 RTF B 47 targets B 50 report templates B 46 report types B 45 reports B 45 global B 45 local B 45 on demand scheduled...

Page 465: ...Appliance 1 2 Device address checklist E 1 connectivity ping 1 17 2 20 testing 1 17 2 20 dimensions and weight G 2 image 15 4 downloading it from the Trend Micro Web site 15 7 update 15 4 Device imag...

Page 466: ...when upload ing with option 3 emphasizing Flash DOM 15 19 fig 15 15 AFFU DOM screen 15 19 fig 15 16 AFFU browse to device image 15 20 fig 15 17 AFFU DOM screen showing progress of the update 15 20 fig...

Page 467: ...15 40 uploading the IGSA BIOS firmware 15 41 BMC 15 37 changing the IP address of the local computer 15 8 checklist 15 5 connecting a local computer to deliver the update 15 7 CONSOLE port 15 34 getti...

Page 468: ...7 08 FTP Anti spyware Action 7 11 fig 7 09 FTP Anti spyware Notification 7 12 fig 7 10 FTP File Blocking Target 7 13 fig 7 11 FTP File Blocking Notification 7 14 Fully transparent proxy mode 2 12 G G...

Page 469: ...e extensions 6 35 configure target 6 35 enable 6 35 select notification recipients 6 36 scanning support 1 4 URL Filtering configure notification 6 33 configure proxy settings 6 32 configure settings...

Page 470: ...ort 1 16 2 19 15 8 IntelliScan 3 18 6 7 7 5 IntelliScan defined C 10 IntelliTrap 5 16 5 18 defined C 10 detecting bots in compressed files 3 13 Log 3 13 virus scan engine 3 13 Internal outbreak 9 6 In...

Page 471: ...unication Protocol Management Communication Protocol See also MCP MIME types list of common types 6 8 Mozilla Firefox 1 x support for 1 3 My Product Details 13 24 N Naming of malware F 6 NAT 2 2 deplo...

Page 472: ...urrent Status 9 3 Outbreak Defense Damage Cleanup 9 6 Outbreak Defense Internal Outbreak 9 5 Outbreak Defense Settings Notification 9 9 Outbreak Defense Settings Setting 9 8 Outbreak Defense Services...

Page 473: ...ss 8 17 enable 8 16 Quarantine 8 16 select notification recipients 8 17 scanning support 1 4 POP3 Anti phishing Action 8 25 POP3 Anti phishing Notification 8 26 POP3 Anti phishing Target 8 24 POP3 Ant...

Page 474: ...en that appears when you select option 5 in rescue mode 15 22 Preconfiguration console output screen when the ap pliance has finished formatting the hard disk 14 5 Preliminary tasks 4 2 Primary Functi...

Page 475: ...perTerminal Connect To screen C 6 fig C 03 HyperTerminal COM Properties screen C 7 fig C 04 The appliance Preconfiguration con sole login screen C 7 fig C 05 The appliance Preconfiguration con sole ma...

Page 476: ...iTrap configure action 5 17 configure target 5 16 select notification recipients 5 18 scanning support 1 4 SMTP services described 5 2 Spyware grayware online search 5 12 SMTP Enable 5 3 SMTP Anti phi...

Page 477: ...6 scan SMTP traffic for 5 27 select detection level for SMTP traffic 5 27 Standard Reputation database 5 25 wildcard matching 3 9 Spam See Anti spam Specifications hardware G 2 Spyware 6 17 6 18 allow...

Page 478: ...s improperly installed the second part of the re initialization process 14 5 fig 14 02 Preconfiguration console output screen when the appliance has finished for matting the hard disk 14 5 fig 14 03 C...

Page 479: ...navigation menu 4 13 Online Help 4 13 password entering the 4 3 working area 4 13 Web console Firmware Update screen 13 10 Web Console Log On screen 4 3 Wildcard matching 3 9 Windows 13 4 Windows Save...

Page 480: ...Trend Micro InterScan Gateway Security Appliance M Series Administrator s Guide I 20...

Reviews: