Page 74
CP390i and CPF390i
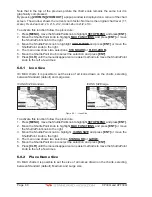
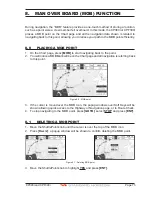
6. The GPS Chart Plotter is in Cursor mode, to switch to Home mode press
[CLR]
so the
vessel will stay in the center of the page.
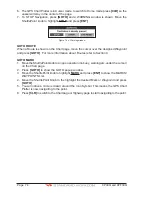
7. To STOP Navigation, press
[GOTO]
and a WARNING window is shown. Move the
ShuttlePoint knob to highlight
STOP
and press
[ENT]
.
Figure 7.4c - Warning window
GOTO ROUTE
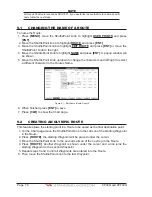
When a Route is shown on the Chart page, move the cursor over the designed Waypoint
and press
[GOTO]
. For more information about Routes refer to Section 9.
GOTO MARK
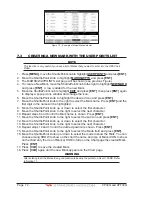
1. Move the ShuttlePoint knob to an open position (no buoy, warning etc. under the cursor)
on the Chart page.
2. Press
[GOTO]
to show the GOTO popup window.
3. Move the ShuttlePoint knob to highlight
MARK
and press
[ENT]
to show the MARKS/
WAYPOINTS List.
4. Move the ShuttlePoint Knob to the highlight the desired Mark or Waypoint and press
[GOTO]
.
5. You will notice a circle is drawn around the Icon Symbol. This means the GPS Chart
Plotter is now navigating to the point.
6. Press
[CLR]
to switch to the Chart page or Highway page to start navigating to the point.
Summary of Contents for CP390i
Page 1: ......
Page 5: ...Page 6 CP390i and CPF390i ...
Page 15: ...Page 16 CP390i and CPF390i ...
Page 29: ...Page 30 CP390i and CPF390i ...
Page 43: ...Page 44 CP390i and CPF390i ...
Page 53: ...Page 54 CP390i and CPF390i ...
Page 67: ...Page 68 CP390i and CPF390i ...
Page 75: ...Page 76 CP390i and CPF390i ...
Page 83: ...Page 84 CP390i and CPF390i ...
Page 87: ...Page 88 CP390i and CPF390i ...
Page 109: ...Page 110 CP390i and CPF390i ...
Page 145: ...Page 146 CP390i and CPF390i Figure 17 16 C Card Restore settings ...
Page 147: ...Page 148 CP390i and CPF390i ...
Page 153: ...Page 154 CP390i and CPF390i ...
Page 157: ...Page 158 CP390i and CPF390i ...
Page 168: ......

