CP390i and CPF390i
Page 27
1. Press
[MENU]
, move the ShuttlePoint knob to highlight
NMEA DISPLAY
and press
[ENT]
.
2. Move the ShuttlePoint knob to highlight
DATA
and press
[ENT]
.
3. The
NMEA DATA
page is shown.
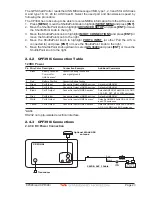
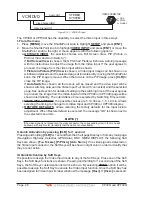
4. Connect the Blue Wire on the GPS Chart Plotter to the junction of the Brown wire and
the VHF wire. The display should look similar to the following picture.
Figure 2.11 - NMEA Data page
2.12 CPF300i VIDEO INPUT
By accessing this menu it is possible to see images on the CP390i or CPF390i display from
an external video signal source, if connected to the CP390i or CPF390i.
It allows the
"picture-in-picture"
functionality, so a Video Input image can be shown on a
window and placed over the Chart, Navigation, Highway, Celestial and NMEA pages image
at full screen.
NOTE
If the Video Input signals is not detected (E.g. the video camera is not connected to the Video Input
connector), the VIDEO INPUT menu item will be grayed out.
Video Connector
Pin
Description
Connection Example
1
Ground
Connect to Video Signal Ground of DVD/VCR/Video Cameras
2
+ 9 / 12 VDC
Connect to Video Cameras Power Input
3
Video
Connect to Video (NTSC/PAL) of DVD/VCR/Video Cameras
2.12.0 Video Camera Input
The CP390i or CPF390i has one connection for video camera. Any NTSC or PAL camera
will operate correctly. To connect use the video output of the camera and connect to the
optional ACVC10 cable.
2.12.1 VCR or DVD Input
A VCR or DVD may be connected to Video port. The CP390i or CPF390i does not have
speakers so the audio from the VCR or DVD would have to be routed to a stereo system.
STANDARD HORIZON offers an optional cable called ACVC10 that allows any VCR or
DVD to simply be plugged into the CP390i or CPF390i.
Summary of Contents for CP390i
Page 1: ......
Page 5: ...Page 6 CP390i and CPF390i ...
Page 15: ...Page 16 CP390i and CPF390i ...
Page 29: ...Page 30 CP390i and CPF390i ...
Page 43: ...Page 44 CP390i and CPF390i ...
Page 53: ...Page 54 CP390i and CPF390i ...
Page 67: ...Page 68 CP390i and CPF390i ...
Page 75: ...Page 76 CP390i and CPF390i ...
Page 83: ...Page 84 CP390i and CPF390i ...
Page 87: ...Page 88 CP390i and CPF390i ...
Page 109: ...Page 110 CP390i and CPF390i ...
Page 145: ...Page 146 CP390i and CPF390i Figure 17 16 C Card Restore settings ...
Page 147: ...Page 148 CP390i and CPF390i ...
Page 153: ...Page 154 CP390i and CPF390i ...
Page 157: ...Page 158 CP390i and CPF390i ...
Page 168: ......

