Chapter 2 — Installing the nTier500
40
User Guide
90990030
2.
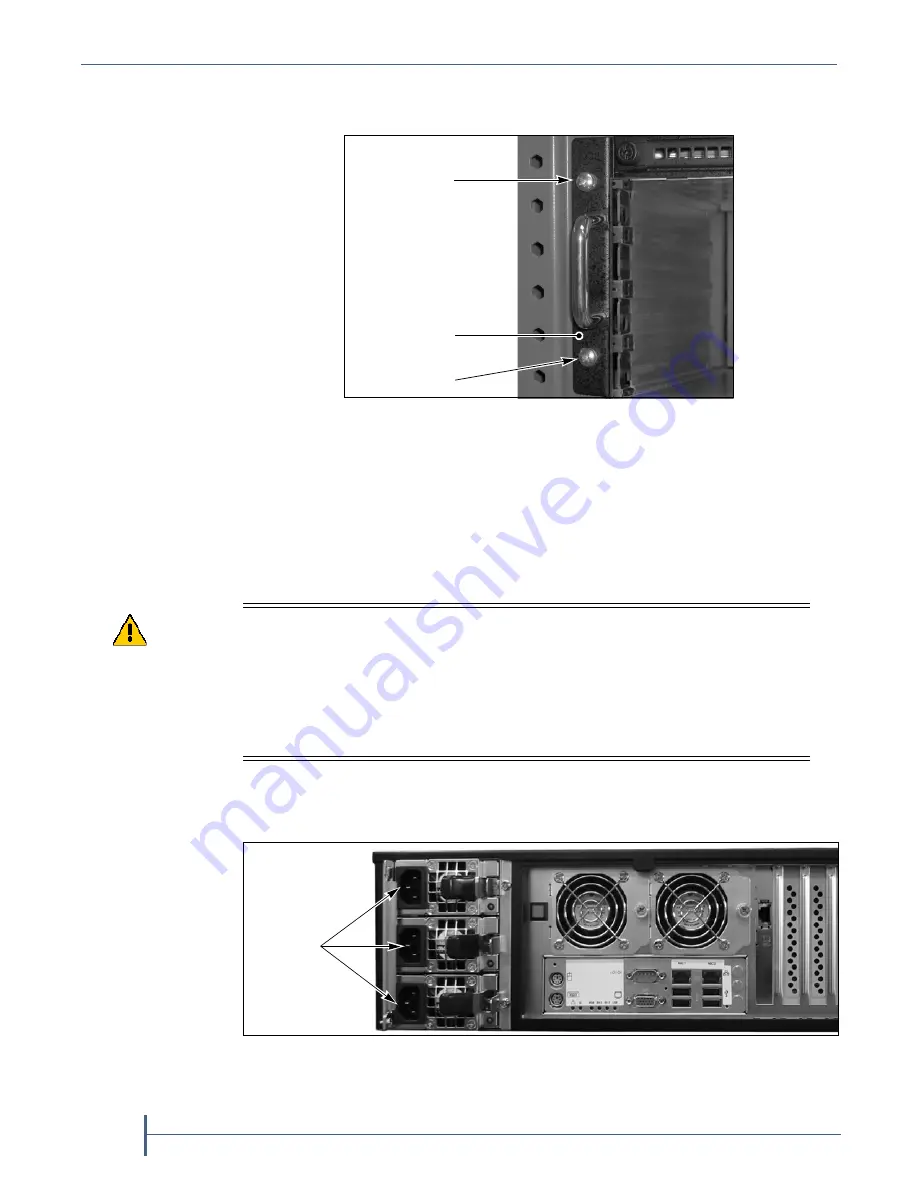
Use a #2 Phillips screwdriver to install the two clip nut screws in each
mounting ear to secure the chassis to the rack.
Connect the Power Cords
To provide chassis grounding and electrostatic discharge protection while
you install the data drives, use the following steps to connect the power
cords to the nTier500.
1.
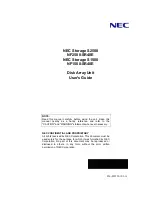
Connect a power cord to each of the power supply connectors on the
back panel.
Figure 16
Secure the chassis to the rack (left side
shown).
Screw
Screw
Mounting ear
Caution
DO NOT
power-on the nTier500 until you finish installing ALL of the drives for the
first time. If you install the drives with the nTier500 powered on, the RAID
controller immediately begins rebuilding the RAID volume, which may destroy the
preconfigured RAID 6 volume.
After the nTier500 validates the RAID volume following the initial power-on, you
can replace drives while the appliance is powered on (see
Replacing a Data Drive
on page 150
).
Figure 17
Connections on the rear panel.
AC power
connectors
Summary of Contents for nTier500
Page 1: ...SpectraLogic com Spectra nTier500 Backup and Archive Appliance User Guide ...
Page 6: ...Contacting Spectra Logic 6 User Guide 90990030 Notes ...
Page 12: ...Contents 12 User Guide 90990030 Notes ...
Page 52: ...Chapter 2 Installing the nTier500 52 User Guide 90990030 Notes ...
Page 64: ...Chapter 3 Using the BlueScale Web Interface 64 User Guide 90990030 Notes ...
Page 82: ...Chapter 4 Configuring the nTier500 82 User Guide 90990030 Notes ...
Page 112: ...Chapter 6 Configuring Logical Volumes 112 User Guide 90990030 Notes ...
Page 160: ...Appendix A Service and Support 160 User Guide 90990030 Notes ...
Page 166: ...Appendix B Specifications 166 User Guide 90990030 Notes ...
Page 176: ...Appendix D Tuning Gigabit Ethernet Network Performance 176 User Guide 90990030 Notes ...


