


7-74
SYSTEM SETTINGS
Contents
Color Adjustments
The following color settings can be configured.
Initial Color Balance Setting
Color balance values obtained using "Color Balance" in
the special modes can be stored in a program (1 to 48),
and those values can be retrieved and stored as the
initial color balance setting.* Use this feature when you
want to repeatedly use a color balance setting for a
favorite color or for correction when a change occurs in
the color balance.
* Preset values displayed when you select "Color
Balance" in the special modes.
Return to the Factory Default Setting
This returns the stored color balance values to the
factory default values (all color balance values are "0" for
the 8 levels of each color).
Auto Color Calibration
This is used to perform automatic color correction when
the color in color copies is off. The machine prints a test
patch, the test patch is scanned, and the color is
automatically corrected.
After the [Execute] key is touched and a test patch is
printed, a message appears prompting you to begin
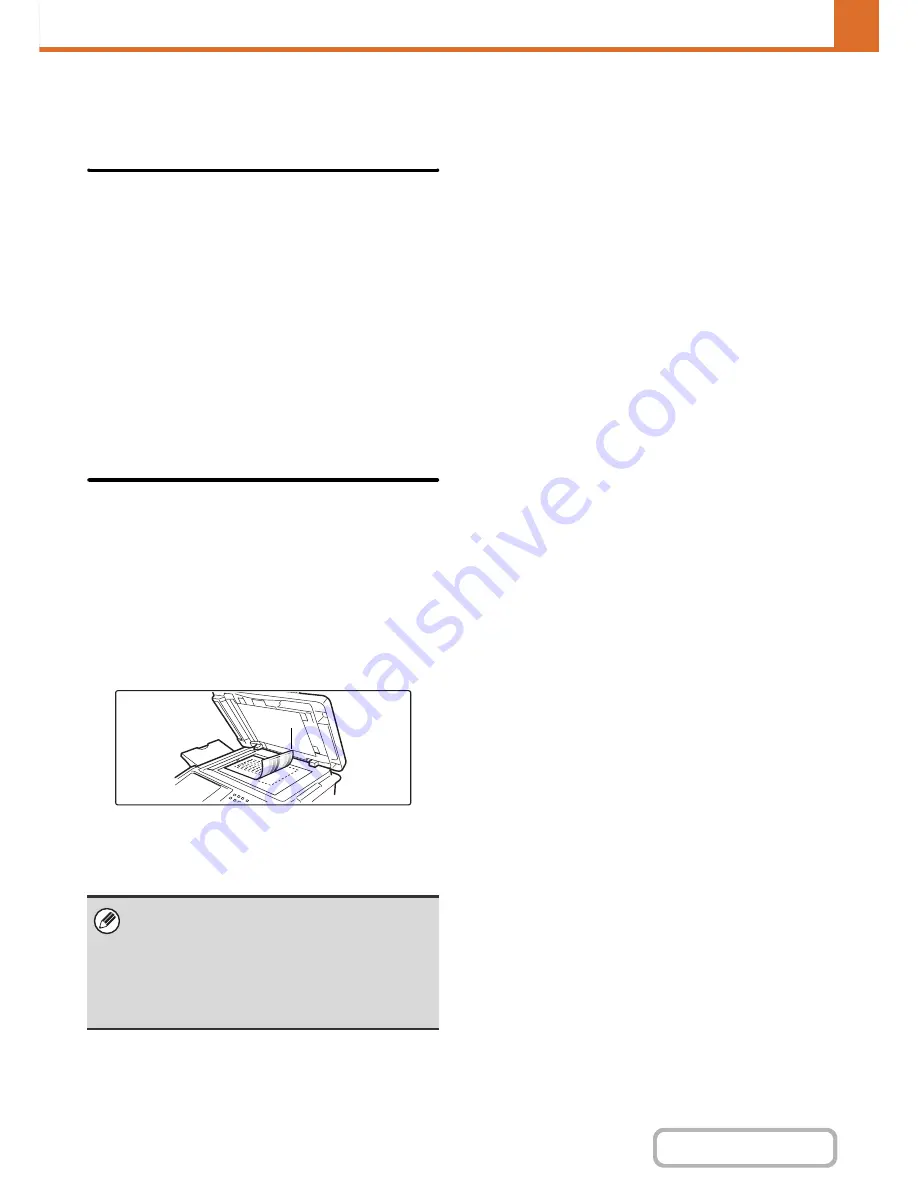
automatic calibration. Place the test patch on the
document glass as shown below (so that the thin line at
the edge of the page is to the left).
Lay copy paper (about five sheets) that is the same size
as the test patch on top of the placed test patch, gently
close the automatic document feeder, and touch the
[Execute] key.
• Before executing Auto Color Calibration, check to
see if the registration adjustment is correct. If the
registration adjustment is not correct, perform
"
Registration Adjustment
" (page 7-68).
• If the color is still off after performing Auto Color
Calibration, repeating Auto Color Calibration once
again may improve the color.
Thin line
Summary of Contents for MX-C402SC
Page 4: ...Reduce copy mistakes Print one set of copies for proofing ...
Page 6: ...Make a copy on this type of paper Envelopes and other special media Transparency film ...
Page 11: ...Conserve Print on both sides of the paper Print multiple pages on one side of the paper ...
Page 35: ...Organize my files Delete a file Delete all files Periodically delete files Change the folder ...
Page 295: ...3 19 PRINTER Contents 4 Click the Print button Printing begins ...