


2-57
COPIER
Contents
2
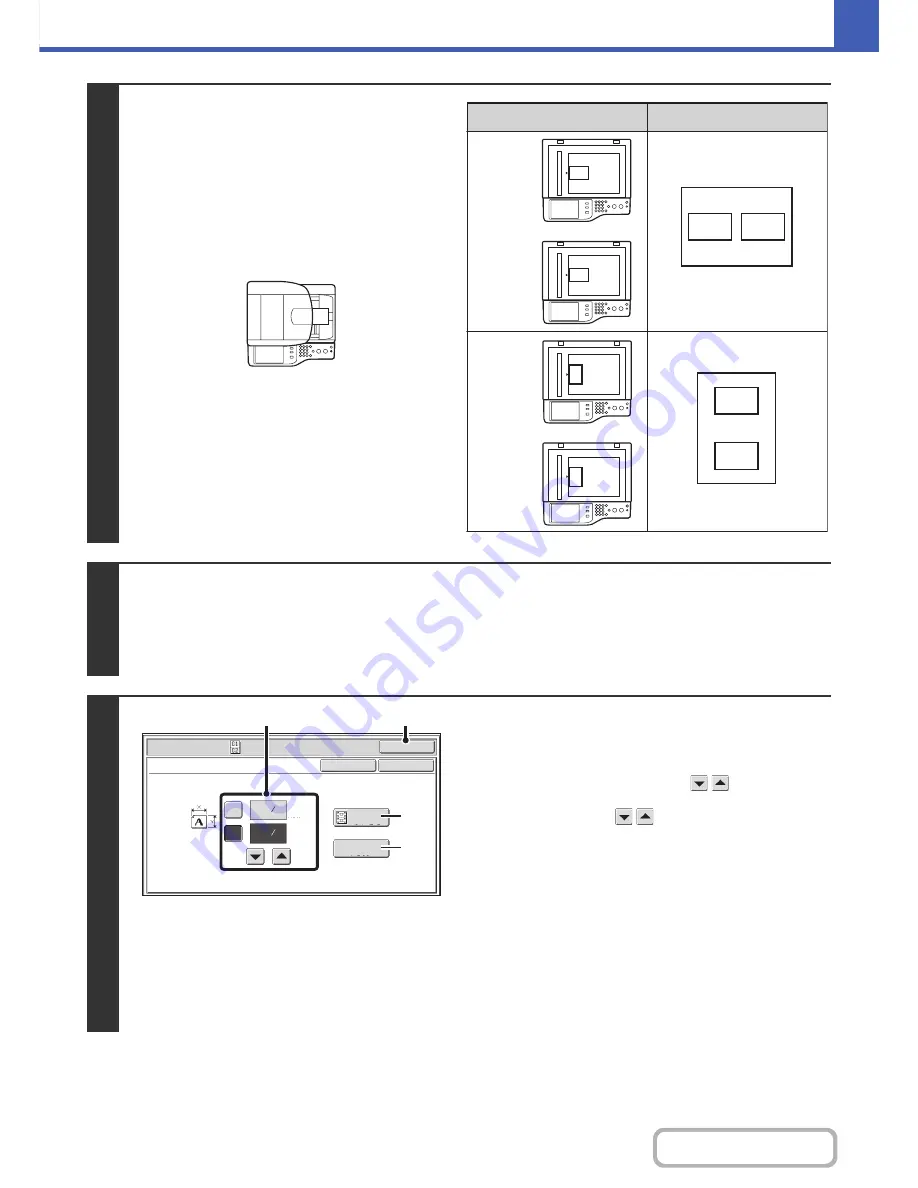
Place the original.
Place the original face up in the document feeder tray, or
face down on the document glass.
• Place the original in the automatic document feeder.
☞
PLACING ORIGINALS IN THE AUTOMATIC
DOCUMENT FEEDER
(page 1-36)
• Set the original on the document glass
➞
Set at the
relative position in the right table.
Place the original as shown below when using the
document feeder tray.
3
Select the special modes.
(1) Touch the [Special Modes] key.
(2) Touch the [Card Shot] key.
☞
Special modes menu (1st screen)
(page 2-41)
4
Select card shot settings.
(1) Enter the original size.
With the [X] key highlighted, enter the X (horizontal)
dimension of the original with the
keys.
Touch the [Y] key and enter the Y (vertical) dimension of
the original with the
keys.
(A) To enlarge or reduce the images to fit the paper
based on the entered original size, touch the [Fit to
Page] key.
(B) The [Size Reset] key can be pressed to return the
horizontal and vertical dimensions to the values set in
"Card Shot Settings" in the system settings
(administrator).
(2) Touch the [OK] key.
You will return to the base screen of copy mode. Make
sure that the entered dimensions appear in the [Original]
key.
A
B
A
A
B
A
B
B
A
Results
Originals
Front page
Back page
Front page
Back page
Size Reset
(1~8 1/2)
inch
(1~8 1/2)
inch
X
Y
3
8
3
2
8
1
Special Modes
OK
Card Shot
OK
Cancel
Fit to
Page
(2)
(1)
(A)
(B)
Summary of Contents for MX-C402SC
Page 4: ...Reduce copy mistakes Print one set of copies for proofing ...
Page 6: ...Make a copy on this type of paper Envelopes and other special media Transparency film ...
Page 11: ...Conserve Print on both sides of the paper Print multiple pages on one side of the paper ...
Page 35: ...Organize my files Delete a file Delete all files Periodically delete files Change the folder ...
Page 295: ...3 19 PRINTER Contents 4 Click the Print button Printing begins ...