


2-18
COPIER
Contents
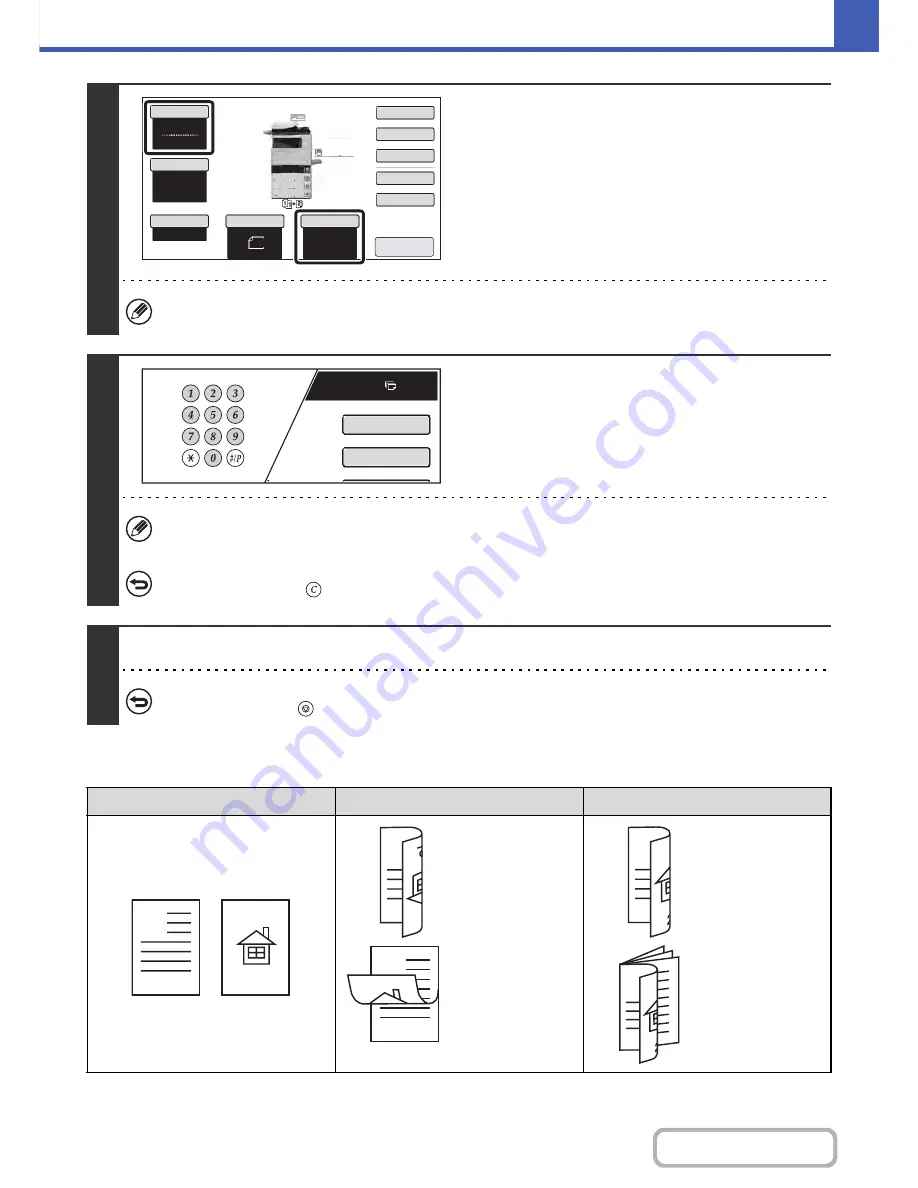
Using the [Binding Change] key
6
Check the paper to be used and the
color mode.
Make sure that the desired paper (tray) and color mode are
selected.
• To change the paper (tray), touch the [Paper Select] key.
☞
PAPER TRAYS
(page 2-10)
• To change the color mode, touch the [Color Mode] key.
☞
COLOR COPY MODES
(page 2-22)
For some original size settings, the same size of paper as the original may not be automatically selected. In this case,
manually change the paper size.
7
Set the number of copies (number of
sets) with the numeric keys.
• Up to 999 copies (sets) can be set.
• If you are only making a single copy, the copy can be made with the copy number display showing "0".
If an incorrect number of copies is set...
Press the [CLEAR] key (
) and then enter the correct number.
8
Press the [COLOR START] key or the [BLACK & WHITE START] key.
To cancel scanning of the original and copying...
Press the [STOP] key (
).
Originals
Binding Change is used
Binding Change is not used
The reverse side
is upside down.
The reverse side
is not upside
down.
Select this when
the pages will be
bound into a
tablet.
Select this when
the pages will be
bound into a
booklet.
Auto
8
½x11
Plain
8
½x11
Color Mode
Special Modes
2-Sided Copy
Output
File
Quick File
Copy Ratio
100%
Original
Paper Select
Full Color
Exposure
Auto
8
½x11
Upper Exit
Preview
8
½x11
8
½x11
5½x
8
½
8
½x14
8
½x11
Plain
3.
2.
1.
4.
Plain
7
8
½ 11
Special Modes
2-Sided Copy
A
1
2
A
A
A
3
A
Summary of Contents for MX-C402SC
Page 4: ...Reduce copy mistakes Print one set of copies for proofing ...
Page 6: ...Make a copy on this type of paper Envelopes and other special media Transparency film ...
Page 11: ...Conserve Print on both sides of the paper Print multiple pages on one side of the paper ...
Page 35: ...Organize my files Delete a file Delete all files Periodically delete files Change the folder ...
Page 295: ...3 19 PRINTER Contents 4 Click the Print button Printing begins ...