


2-21
COPIER
Contents
6
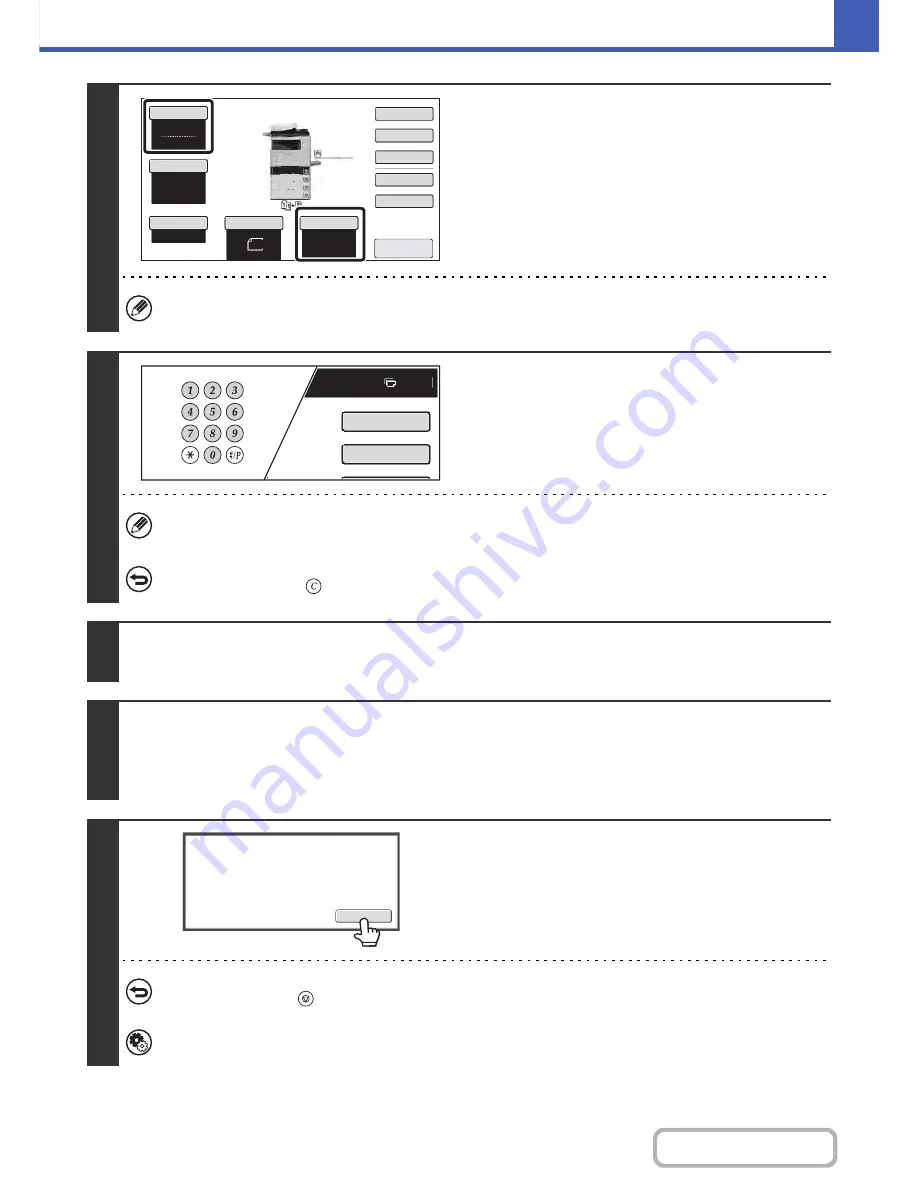
Check the paper to be used and the
color mode.
Make sure that the desired paper (tray) and color mode are
selected.
• To change the paper (tray), touch the [Paper Select] key.
☞
PAPER TRAYS
(page 2-10)
• To change the color mode, touch the [Color Mode] key.
☞
COLOR COPY MODES
(page 2-22)
For some original size settings, the same size of paper as the original may not be automatically selected. In this case,
manually change the paper size.
7
Set the number of copies (number of
sets) with the numeric keys.
• Up to 999 copies (sets) can be set.
• A single copy can be made even if "0" appears for the number of copies.
If an incorrect number of copies is set...
Press the [CLEAR] key (
) and then enter the correct number.
8
Press the [COLOR START] key or the [BLACK & WHITE START] key.
Scanning begins.
9
Remove the original and place the next original, and then press the [COLOR
START] key or the [BLACK & WHITE START] key.
Repeat this step until all originals have been scanned.
For the second original and following originals, use the same [START] key as you did for the first original.
10
Touch the [Read-End] key.
To cancel scanning of the original and copying...
Press the [STOP] key (
).
System Settings (Administrator): Initial Status Settings (2-Sided Copy)
The default 2-sided copy mode can be changed.
Auto
8
½x11
Plain
Color Mode
Special Modes
2-Sided Copy
Output
File
Quick File
Copy Ratio
100%
Original
Paper Select
Full Color
Exposure
Auto
8
½x11
Upper Exit
Preview
8
½x11
8
½x11
5½x
8
½
8
½x14
8
½x11
Plain
3.
2.
1.
4.
Plain
7
8
½ 11
Special Modes
2-Sided Copy
Read-End
Place next original. Press [Start].
When finished, press [Read-End].
Summary of Contents for MX-C402SC
Page 4: ...Reduce copy mistakes Print one set of copies for proofing ...
Page 6: ...Make a copy on this type of paper Envelopes and other special media Transparency film ...
Page 11: ...Conserve Print on both sides of the paper Print multiple pages on one side of the paper ...
Page 35: ...Organize my files Delete a file Delete all files Periodically delete files Change the folder ...
Page 295: ...3 19 PRINTER Contents 4 Click the Print button Printing begins ...