


2-108
COPIER
Contents
CHECKING A PREVIEW IMAGE OF A COPY
(Preview)
You can touch the [Preview] key so that it is highlighted in the base screen and then scan the original to check a preview
image of the copy in the touch panel before printing the copy.
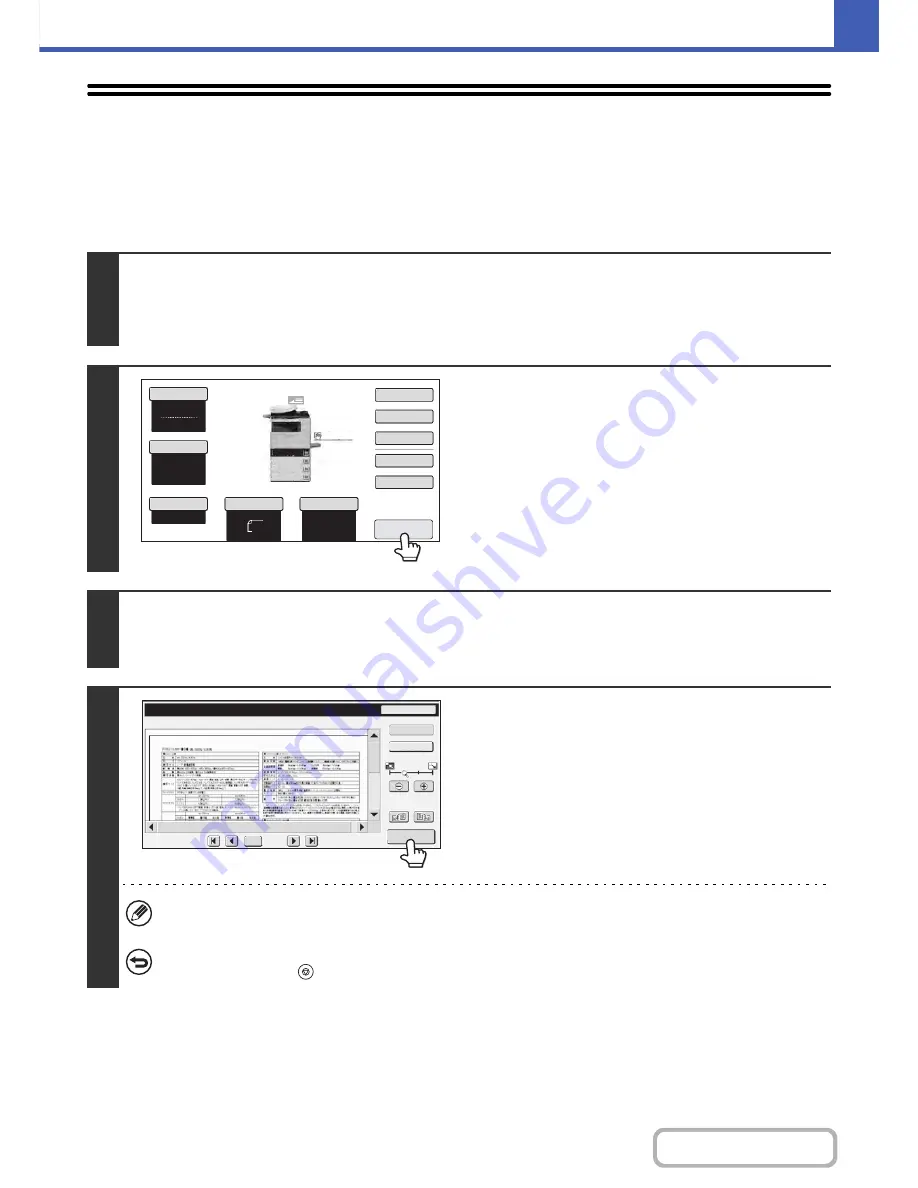
1
Place the original.
Place the original face up in the document feeder tray, or face down on the document glass.
• Place the original in the automatic document feeder.
☞
PLACING ORIGINALS IN THE AUTOMATIC DOCUMENT FEEDER
(page 1-36)
2
Touch the [Preview] key so that it is
highlighted.
3
Select copy settings and press the [START] key.
After the original is scanned, a preview image of the copy appears in the touch panel. The copy is not printed until the [Start
Copy] key is touched in the preview screen.
4
Check the preview image and then touch
the [Start Copy] key.
Copy printing begins.
For details on the preview screen, see "
PREVIEW SCREEN
"
(page 2-110).
If you need to change the copy settings, touch the [Reset] key.
To cancel copying...
Press the [STOP] key (
).
Auto
8
½x11
Plain
8
½x11
Special Modes
2-Sided Copy
Output
File
Quick File
Preview
Copy Ratio
100%
Original
Paper Select
Auto
Exposure
Auto
8
½x11
8
½x11
5½x
8
½
8
½x14
8
½x11
Plain
3.
2.
1.
4.
Auto
8
½x11
Plain
Color Mode
Special Modes
2-Sided Copy
Output
File
Quick File
Copy Ratio
100%
Original
Paper Select
Full Color
Exposure
Auto
8
½x11
Upper Exit
Preview
Preview
Reset
Color
Color
Display Rotation
Start Copy
Function Rev.
Display Output
/0010
0001
Summary of Contents for MX-C402SC
Page 4: ...Reduce copy mistakes Print one set of copies for proofing ...
Page 6: ...Make a copy on this type of paper Envelopes and other special media Transparency film ...
Page 11: ...Conserve Print on both sides of the paper Print multiple pages on one side of the paper ...
Page 35: ...Organize my files Delete a file Delete all files Periodically delete files Change the folder ...
Page 295: ...3 19 PRINTER Contents 4 Click the Print button Printing begins ...