


2-63
COPIER
Contents
ADDING THE DATE TO COPIES (Date)
The date can be printed on copies. The position of the date, color, format, and page (first page only or all pages) can be
selected.
Example: Printing APRIL 4, 2010 in the top right corner of the paper.
1
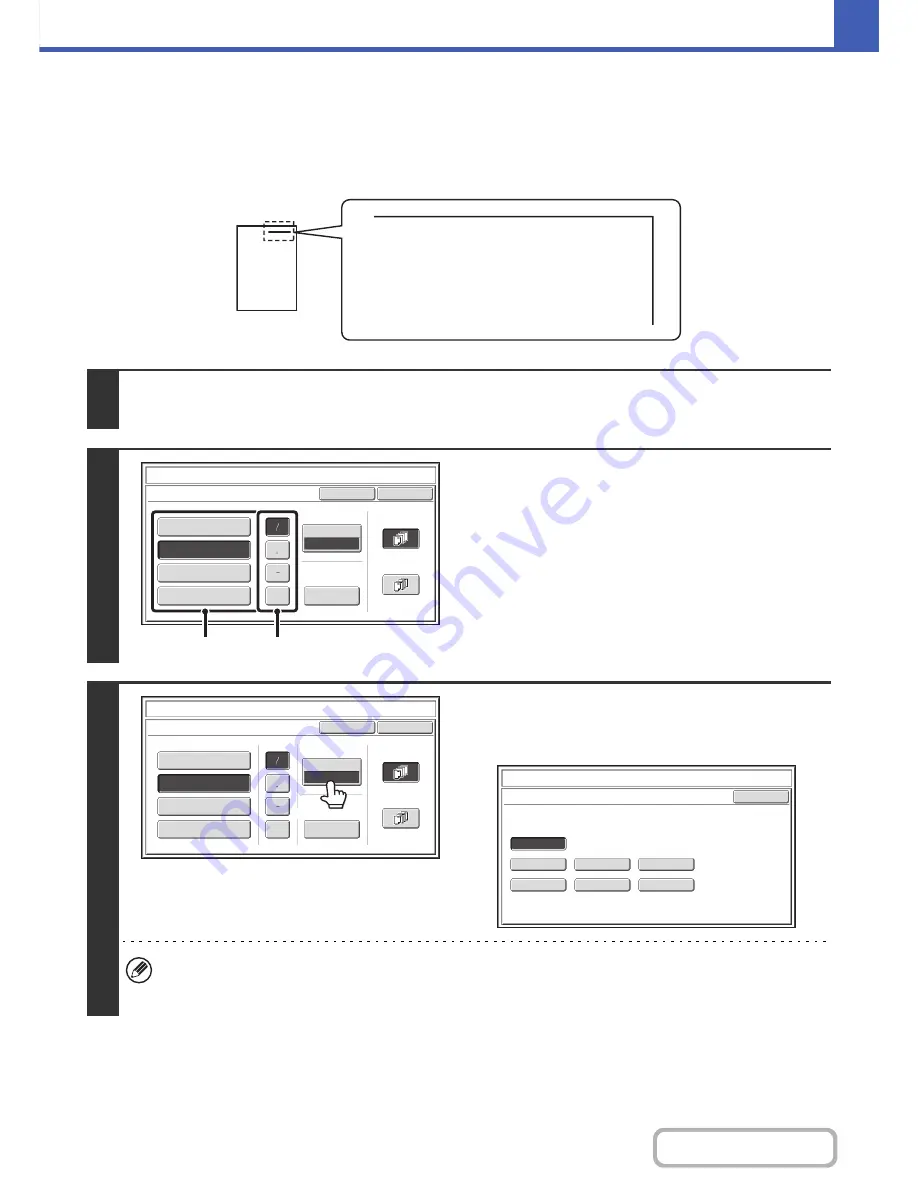
Touch the [Date] key in the stamp selection screen.
See steps 1 to 4 of "
GENERAL PROCEDURE FOR USING STAMP
" (page 2-60).
2
Set the date format.
(1) Touch the key that shows the desired date
format.
(2) If you selected [YYYY/MM/DD],
[MM/DD/YYYY], or [DD/MM/YYYY], touch the
[/], [.], [-], or [ ] key to select the separator.
3
Touch the [Print Color] key and select
the print color.
Touch the desired color and touch the [OK] key.
• If you selected a color other than [Bk (Black)], press the [COLOR START] key. Pressing the [BLACK & WHITE
START] key will print the date in black and white.
• If the date is printed in color on a black and white copy, the copy will be included in the full color count.
APR/04/2010
Cancel
Print Color
Bk(Black)
OK
Date Change
MM DD, YYYY
DD/MM/YYYY
MM/DD/YYYY
YYYY/MM/DD
APR/04/2010
All Pages
First Page
Stamp
Date
(1)
(2)
Cancel
Print Color
Bk(Black)
OK
Date Change
MM DD, YYYY
DD/MM/YYYY
MM/DD/YYYY
YYYY/MM/DD
APR/04/2010
All Pages
First Page
Stamp
Date
OK
B(Blue)
G(Green)
R(Red)
Bk(Black)
Y(Yellow)
M(Magenta)
C(Cyan)
Stamp
Print Color
Summary of Contents for MX-C402SC
Page 4: ...Reduce copy mistakes Print one set of copies for proofing ...
Page 6: ...Make a copy on this type of paper Envelopes and other special media Transparency film ...
Page 11: ...Conserve Print on both sides of the paper Print multiple pages on one side of the paper ...
Page 35: ...Organize my files Delete a file Delete all files Periodically delete files Change the folder ...
Page 295: ...3 19 PRINTER Contents 4 Click the Print button Printing begins ...