1-16
Setting and Operating Outline
1
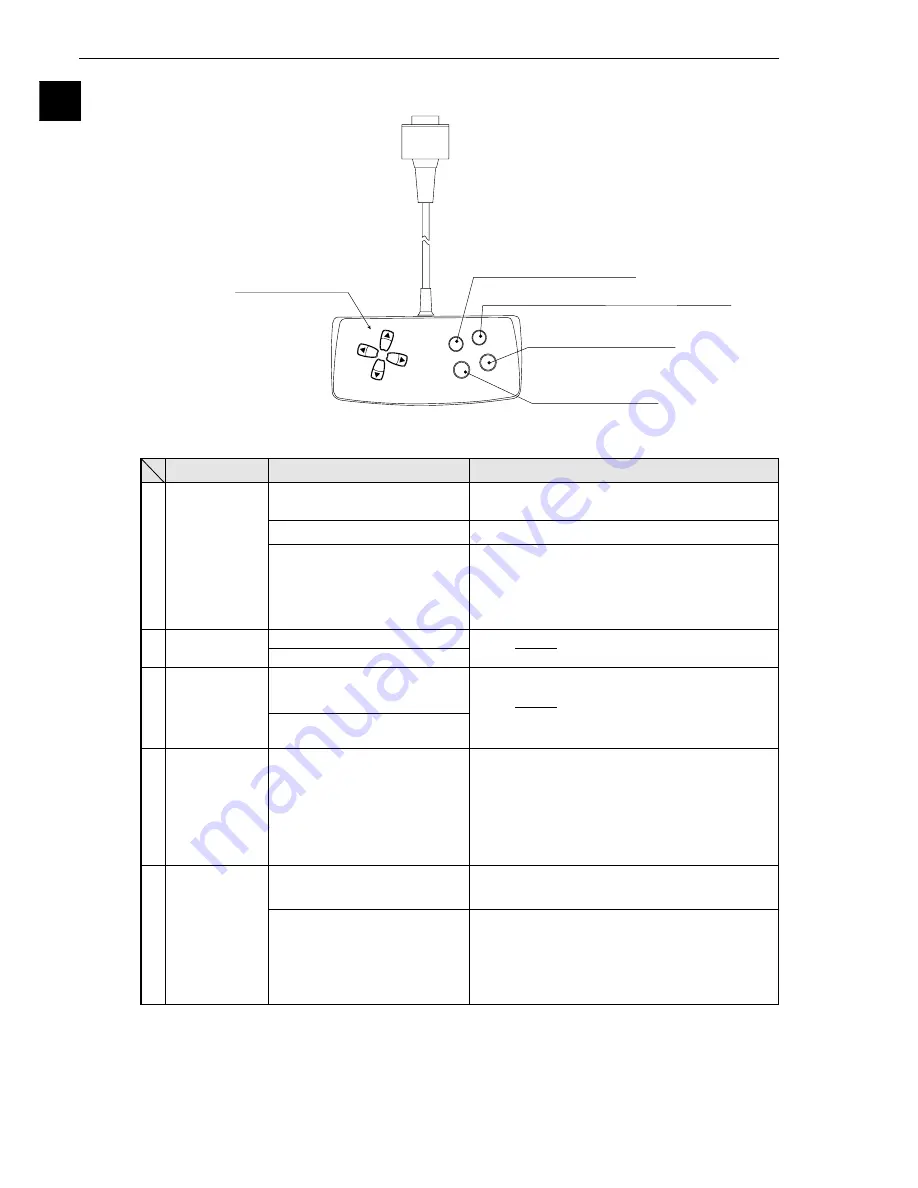
1-7 Remote key pad and specifications
4
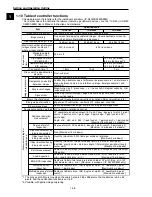
Image change key (SEL)
1
Direction keys
(up, down,
left and right)
5
Measurement start/brightness select key
(TRG/BRT)
2
Set (select) key (SET)
3
Cancel key (ESC)
Selecting an item on a menu
screen
Setting a value
Determine the setting value
Switching the image mode
between the through mode
and freeze mode
Start measurement input
Switching the brightness level
(between H and L)
Description
Function
Key name
- Select a digit or an item with the left and right
keys, and then specify a value with the up and
down keys.
- Specify a value with the up, down, right and left
keys.
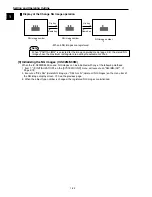
Switch the image mode between through and
freeze on the setting screen. (See the
preceding page.) When the mode is switched
from through to freeze, a new image is
captured.
Note: The "Gain/offset adjustment" screen is
only displayed in the through mode.
Press this key on the MAIN OPS MENU, and a
new measurement is triggered.
Change the displayed image brightness.
- Use this key when the image is so bright that
characters are difficult to see.
- The brightness can be changed on any
screen other than the run screen.
Direction keys
(up, down, left
and right)
Set (select) key
(SET)
Cancel key
(ESC)
Image change
key (SEL)
Measurement
start/brightness
select key
(TRG/BRT)
1
2
3
4
5
Select an item with the up, down, left and right
keys.
*
* The direction keys have an auto-repeat function
Set each coordinate.
Setting a window
Returning a setting to its
original state before being
changed
Returning to the previous
menu
Determine the highlighted item

