Setting Measurement Conditions
3-22
3
●
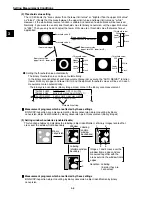
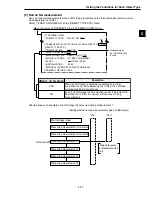
When "MASK SET" is set to "MANUAL."
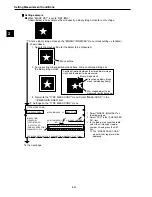
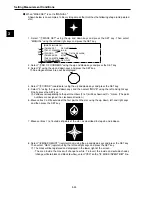
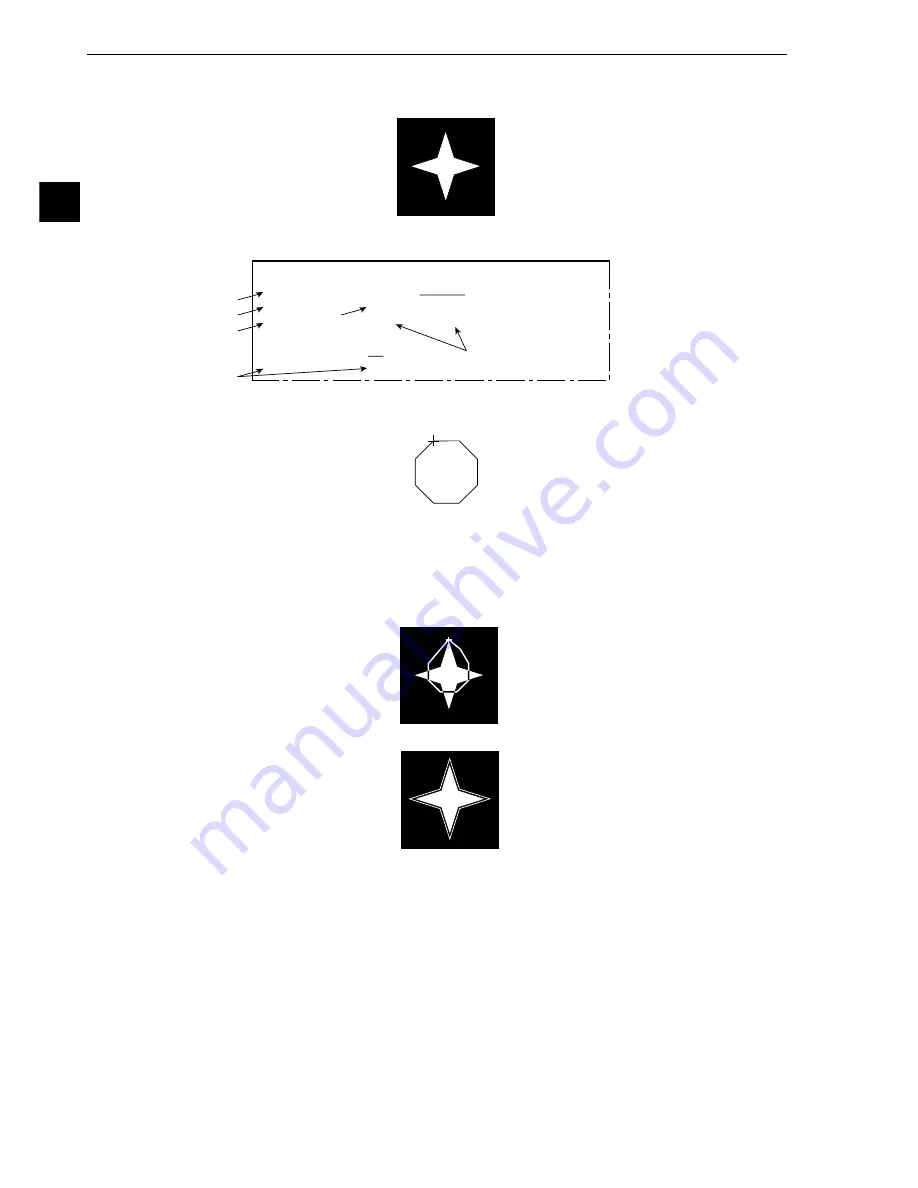
Shown below is an example of a binary image mask that matches the following shape (an 8 pointed
star).
1. Select "
1
MASK SET" using the up and down keys and press the SET key. Then select
"MANUAL" using the left and right keys and press the SET key.
2. Select "
2
NO.OF CORNERS" using the up and down keys and press the SET key.
3. Select "8" using the up and down keys and press the SET key.
-
An octagonal mask area will be displayed.
4. Select "
3
COORD" (coordinate) using the up and down keys and press the SET key.
5. Select "0" using the up and down keys and then select "MOVE" using the left and right keys.
Finally, press the SET key.
-
Vertexes corresponding to the point numbers (0 to 7) will be shown with "+" marks. (The point
numbers are assigned in a clockwise direction.)
6. Move vertex 0 a little outside of the first point on the star using the up, down, left, and right keys,
and then press the SET key.
7. Move vertices 1 to 7 outside of points of the star, as described in steps 5 and 6 above.
8. Select "
6
MASK REGIST" (register mask) using the up and down keys and press the SET key.
Then select "REG" (register) using the left and right keys and press the SET key.
-
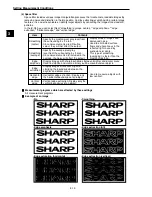
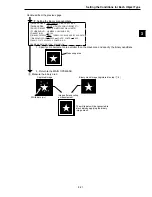
The mask will be registered and displayed in the lower right of the screen.
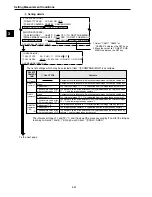
- The area inside the mask will change to white. To invert the inside and outside shades
(change white to black and black to white), select "YES" on the "
5
MASK INVERT B/W" line.
[BINARY IMG MACK]
1
MASK SET
REF-IMG MANUAL
2
NO. OF COURNERS 8(3~8)
3
COORD
PNT0(0~7) MOVE(224,208)
4
MASK AREA
MOVE
5
MASK INVERT B/W NO YES
6
MASK REGIST. REG DISP
4
5
2
3
1
8

