4-1
Positional Deviation Measurement
4
Chapter 4: Positional Deviation Measurement
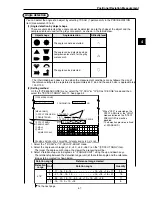
[Measurement results]
Center coordinates: (X2, Y2)
Amount of deviation: X2-X1, Y2-Y1
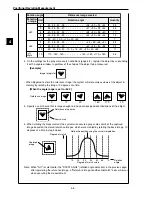
The gray scale search function makes it possible to measure positional deviation as
well as the absolute position.
- It is possible to detect the work position with high accuracy, at a sub-pixel level.
- A rotation angle of 360
°
can be detected. (When a one point gray search is
selected).
Purpose
Examples
Application
(2) 2-point search: Detection of positional deviation in X and Y directions and
angle
[Detection of the position of the substrate alignment mark (fiduciary mark)]
(1) 1-point search: Detection of positional deviation in X and Y directions
Positioning of parts and substrates
[Measurement results]
- Center coordinates of image a: (Xa2, Ya2)
- Image a positional deviation: Xa2 - Xa1, Ya2 - Ya1
- Center coordinates of image b: (Xb2, Yb2)
- Image b positional deviation: Xb2 - Xb1, Yb2 - Yb1
- Angular deviation
θ
- The angular deviation
θ
detected in the 2-point search mode will be used to correct
the rotation of the image in order to make measurements 1 to 4.
For details about rotation correction, see section 3-2, item [6] Position correction.
Search area
Y2
−
Y1
Ya2
−
Ya1
Yb2
−
Yb1
Xb2
−
Xb1
Xa2
−
Xa1
Search area (image a)
Search area (image b)
θ
: Angular deviation
X2
−
X1
Reference image: Center coordinates (X1, Y1) Inspection image: Center coordinates (X2, Y2)
θ
Reference image a: Center coordinates (Xa1, Ya1)
Inspection image a: Center coordinates (Xa2, Ya2)
Inspection image b: Center coordinates
(Xb2, Yb2)
Reference image b: Center coordinates (Xb1, Yb1)

