background image

Distance and angle measurement

9-63

9

q

BINARY NOIS FILTR 

(eliminating binary noise)

w

NUM. OF FILTR PASS 

(number of noise     
elimination cycles)

e

AREA FILTER 

r

UPPER MENU

Select a method for eliminating binary noise.

-

See methods for eliminating noise from binary images, 

expansion/contraction and eliminating binary noise in shared settings on 
page 9·10.

Set the number of times that the elimination of binary noise process is 
carried out (0 to 5). Set separately for expansion and contraction cycles.

After object identification, the area filter is a function used to identify small 
islands whose area is less than a specified amount. It eliminates them from 
the object which is being measured.

· Set the maximum number of pixels. Areas with fewer pixels will be ignored. 

Enter any number from 0 to 245760.

This will return you to the [MEASURING COND] menu.

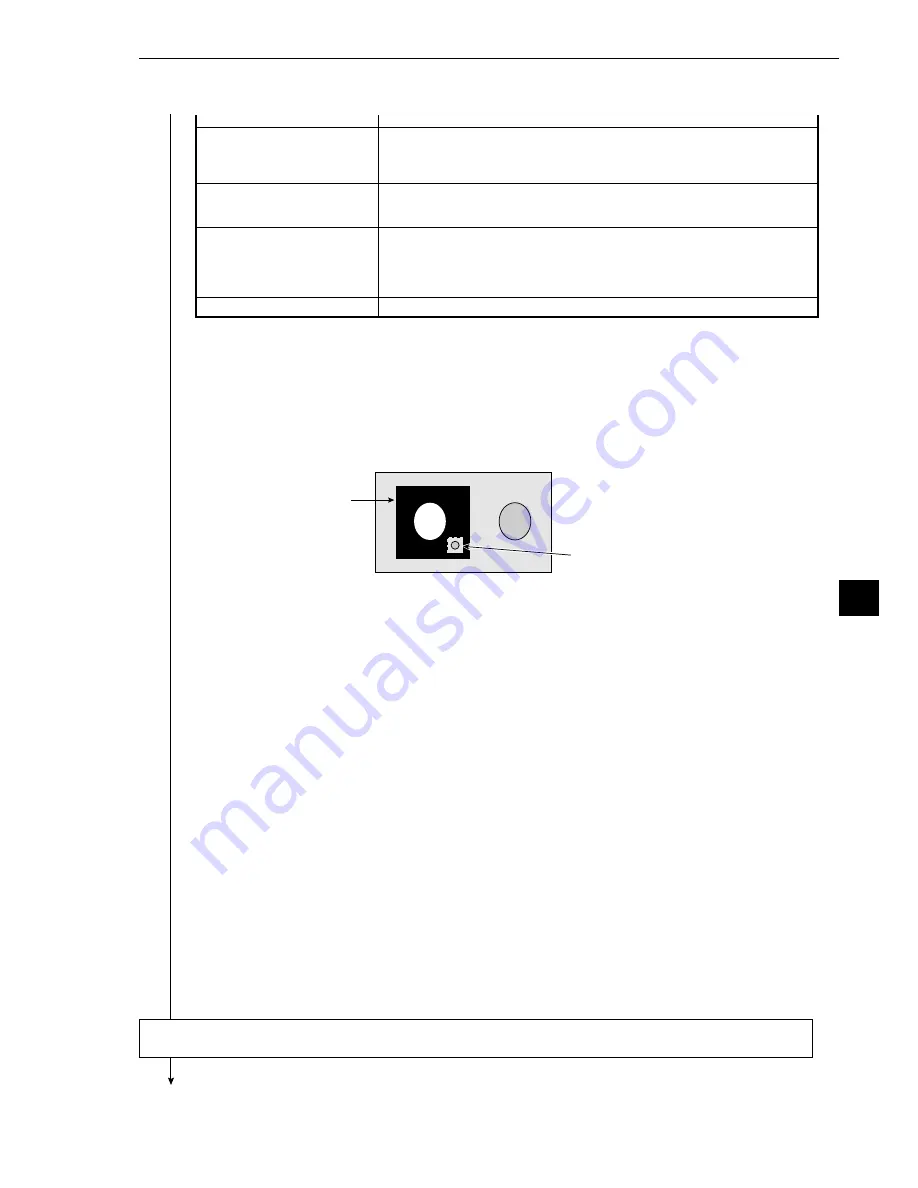
Measurement window

Mask window

Continued from the previous page: Setting the DST &AGL MES. (measurement of distance and angle) for
GRAV.(center of gravity operations).

[Information about the window settings]
- In order to set a window it is necessary to freeze the frame.
- First freeze the frame. Then operate the camera normally. Finally, freeze the frame again. The first

frozen image that was taken will be converted to binary values and this will be the final binary
image.
The second frozen image that was taken may also be converted to a binary image by repeating
steps 

1

 to 

e

 above.

[Example of recording]

- The binary image will be the contents of the measurement window, after the portion excluded by the

mask window has been removed.

Return to the [MEASURING COND] (measurement condition) menu and select item


2

 AUX

CONDITIONS (auxiliary condition).

Continued on the next page

Summary of Contents for IV-S20

Page 1: ...R SCompact image sensor camera IV S20 Version 2 3 Produced in July 2002 User s Manual Model name Applied for software version 2 09 S2 09 ...

Page 2: ...es you with information about the IV S20 softwares version 2 09 All IV S20 cameras with an S2 09 mark are compatible with software version 2 09 See page 5 1 For details about the upgrade version of the software see Appendix 2 Important This manual was written with the utmost care However if you have any questions or inquiries concerning the product please feel free to contact our dealers or us Cop...

Page 3: ... if excessive vibration or impact occurs Install only as described in the manual An improper installation may cause the equipment to fail breakdown or malfunction Never leave wire cuttings or any other foreign matter lying about A fire breakdown or malfunction may result from objects left near the equipment 2 Wiring Caution Do not connect cameras other than those specified IV S20C1 S30C1 S30C2 to ...

Page 4: ...e or modify the camera Fires breakdowns or malfunctions may occur if the camera is disassembled Caution Turn OFF the power source before connecting or disconnecting the IV S20 If you don t electric shocks malfunctions or breakdowns may occur ...

Page 5: ...9 Setting the Condition of Each Object Type Chapter 10 PC functions Chapter 12 Other Settings and Operation Chapters 3 7 to 12 13 14 and Chapter 15 Troubleshooting Chapter 15 Troubleshooting Review the system configuration sys tem equipment measurement items in stallation requirements etc Make connections assemble and wire the system equipment an IV S20 camera peripheral equipment etc Run the soft...

Page 6: ......

Page 7: ...hapter 7 Setting and Operating Outlines Chapter 8 Run Menu Conditions and Settings Chapter 9 Setting the Conditions for Each Object Type Chapter 10 PC Function Chapter 11 Setting the Input Output Conditions Chapter 12 Other Settings and Operations Chapter 13 Communication Chapter 14 Computer Link Chapter 15 Troubleshooting Chapter 16 Specifications Glossary Appendix and Arphabetical index ...

Page 8: ......

Page 9: ...8 3 3 Degree of match inspection for shape and size 3 15 3 4 Distance measurement 3 22 3 5 Lead inspection 3 31 3 6 Existence inspection by point measurement 3 38 3 7 Position correction example of point measurement 3 44 3 8 Use of numeric calculations example of shape and size inspection 3 45 Chapter 4 System Configuration 4 1 to 7 4 1 Basic system configuration 4 1 4 2 System configuration examp...

Page 10: ...lling and connecting the IV S30C1 6 23 3 Installing and connectiong the IV S30C2 6 27 Chapter 7 Setting and Operating Outlines 7 1 to 14 7 1 Setting and operating procedures 7 1 7 2 Screen specifications 7 2 1 Operation run screen 7 2 2 Menu configuration 7 4 3 Set condition configuration 7 7 4 Image display 7 8 7 3 Remote key pad specifications 7 9 7 4 Operation flow 7 10 1 Processing after power...

Page 11: ...s 9 115 1 Illuminance light level monitor 9 115 2 Shutter speed 9 117 Chapter 10 PC Function 10 1 to 16 10 1 Operation cycle 10 1 1 Power ON sequence 10 2 2 PC scan clycle 10 2 3 Measurement processing cycle 10 2 10 2 Ladder circuit program creation 10 3 1 Procedure for creating measurement output condition and a ladder circuit 10 3 2 Procedure for setting the final output conditions in a ladder c...

Page 12: ...3 4 13 4 Processing functions 13 6 1 Measurement execution functions 13 6 2 Result reading 13 9 3 Setting initialization and diagnosis of the operation screen 13 12 13 5 Measurement data blocks 13 15 1 Number of blocks 13 15 2 Contents of the measurement result block for each measurement function 13 15 Chapter 14 Computer Link 14 1 to 31 14 1 Compatible models 14 1 14 2 Data flow 14 2 14 3 Registe...

Page 13: ... 3 2 Camera IV S30C1 C2 16 4 3 Camera lens IV S20L16 16 5 4 Camera conversion cable IV S20HC3 16 5 5 Camera extension cable IV S30EC2 EC4 16 5 16 3 Peripheral device 16 6 1 Monochrome monitor IV 09MT specifications 16 6 2 LED lighting equipment IV 60LD specifications 16 7 Glossary G 1 to 11 Appendix A 1 to 6 Support tool available on the markert A 1 Software version information A 3 Arphabetical in...

Page 14: ...peration can be triggered by an external signal or by the CCD It can be used to mesure moving object 4 Reading full and partial images Since the IV S20 can be used to capture just the part of the image needed for image processing it can read images at very high speeds 5 CCD trigger The IV S20 samples a part of the CCD which can be set to any position with according to item and it will starts shutt...

Page 15: ...ting two points with a gray scale search and edge detection 8 Calculation between images Calculation of difference between images captured by camera 1 and camera 2 and calculation of differences between a stored standard image and captured images are both possible Subtraction and absolute difference in value can be used for calculation 9 Integrated PC function The integrated calculation functions ...

Page 16: ... the fiducial mark mark that identifies the position of the substrate 1 1 point search Detecting the deviation in position in X and Y directions The deviation angle θ determined in the 2 point search is used to readjust the rotation of the image for measurements 1 to 3 2 2 point search Determining positional deviation in X and Y directions as well as rotational deviation Used to determine the posi...

Page 17: ...tion 2 Correct the position of the object being measured from the coordinates for the criterion image obtained in item 1 above 3 If the matching level of the object image is low the IV S20 can determine that the label position is NG Detailed instruc tion Operating instruction example _ See 3 3 Degree of match inspection for shape and size Setting measurement program _ See 9 4 Degree of match inspe...

Page 18: ...128 pieces Appli cation Inspect IC leads or connector pins Inspect the layout of the IC leads or connector pins Workpiece Detailed instruc tion Operating instruction example _ See 3 1 Area measurement by binary conversion Setting measurement program _ See 9 7 Area measurement by binary conversion Inspection procedure Pur pose Exam ple Appli cation Detect the existence absence and size of a workpie...

Page 19: ... Æ Object identification labeling and numbering number of objects present total area Æ Area center of gravity main axis angle fillet diameter and circumf erence of each object No 1 to No 6 Measurement of 6 objects Measurement area gravity center spindle axis angle fillet diameter and circumference Image capture Convert to binary values Label with serial numbers 6 Counting quantities by binary conv...

Page 20: ...orking condition of LEDs or fluorescent character display tubes and sorting household electric appliances Inspection at 6 points The presence or absence of target objects is examined A simple black or white evaluation is made in the specified pixel area of binary images The light level in the specified pixel area is averaged and a decision is made whether or not it is within the specified lightnes...

Page 21: ...unicating with external equipment Turning OFF the power may erase the data settings 4 Data saving The data set by using the remote setting key is temporarily stored in the memory RAM of the IV S20 However it is not stored in the flash memory yet Therefore make sure to save the data settings before returning to the operation screen from the SYSTEM SETUP menu by pressing the SET key If you do not sa...

Page 22: ...eration procedures described in this chapter Preparation for operation 1 Connection Before turning ON the power connect the IV S20 main housing the camera monitor remote key pad and power supply 24 VDC Connect the camera to the camera 1 connector CAMERA 1 on the main housing See Chapter 6 Installation Conditions and Method for connecting procedures 2 Turning ON the power Turn ON the monitor and th...

Page 23: ...iven using the following object The area will be measured by counting the number of pixels after binary conversion 1 Operation on the MAIN OPS MENU after initialize all conditions 1 Move the cursor to SET SCRN item using the left and right keys and press the SET key The SYSTEM SETUP menu will be displayed 2 Operation on the SYSTEM SETUP menu 1 Move the cursor to 2 OBJECT TYPE COND conditions of ob...

Page 24: ...T MEAS ON NG NO YES uUPPER MENU F C1 H 1 3 2 MEASURING COND TYPE00 MEAS 1 MEAS BIN AREA 1REGST NO 00 0 15 REG NO YES 2BINARY AREA COND TO NEXT SUB MENU 3UPPER MENU Continued from the preceding page 3 Operation on the OBJECT TYPE COND menu 1 Move the cursor to 0 MEASUREMENT 1 and press the SET key The TYPE00 MEAS1 type 00 measurement 1 menu will be displayed 4 Operation on the TYPE00 MEAS1 menu 1 M...

Page 25: ...to enter the freeze image mode The indicator in the upper right corner of the screen will change from T through to F freeze To set a threshold value during the following binary zone setting procedure the screen must be in the freeze image mode See section 7 2 Screen specifications for details about the through freeze mode 7 Operation on the BIN AREA SET menu screen setting a measurement window 1 P...

Page 26: ...just the lower limit threshold value with the up and down keys Adjustment of threshold value An example of adjustment is shown below using a white object on a black background When the dotted line in the window is converted to a binary image if the lower limit is set higher the black part in the binary image will become larger If the lower limit is set lower the white part will become larger Incre...

Page 27: ...urning to the MAIN OPS MENU 1 Press the ESC key The screen will return to the OBJECT TYPE COND conditions of object type menu 2 Press the ESC key again The screen will return to the SYSTEM SETUP menu Move the cursor to 9 SAVE IN FLASH MEM save data in flash memory or 0 OPERATIONS and press the SET key The following message will be displayed on the upper part of the screen Press the SET key The dat...

Page 28: ...t 1 The final evaluation result will be displayed as OK in the upper left corner of the screen when all of the items have been evaluated acceptable If there is a single unacceptable item NG will be displayed When measuring an object area with the binary image only the size of the object is measured If the object meets to the conditions specified in step 9 within the range between the upper and low...

Page 29: ...of the operation for measuring the deviation from an absolute position of a positioning mark is shown below 1 Operation on the MAIN OPS MENU after initialize all condetions 1 Move the cursor to SET SCRN item and press the SET key The SYSTEM SETUP menu will be displayed 2 Operation on the SYSTEM SETUP menu 1 Move the cursor to 2 OBJECT TYPE COND conditions of object type and press the SET key OBJEC...

Page 30: ...E COND TO NEXT SUB MENU 4EDGE DETECT COND TO NEXT SUB MENU 5UPPER MENU 1 2 3 1 Continued from the preceding page 3 Operation on the OBJECT TYPE COND menu 1 Move the cursor to 4 MEAS 0 CAMERA1 measurement 0 camera 1 and press the SET key The TYPE00 MEAS0 type 00 measurement 0 menu will be displayed 4 Operation on TYPE00 MEAS0 menu 1 Move the cursor to 1 SELECT MEAS TYPE selection of measurement and...

Page 31: ...ture iris of the camera lens see page 5 1 so that the object to be measured is clear and easily distinguished 3 Press the SEL key to enter the freeze image mode The indicator in the upper right corner of the screen will change from T through to F freeze To store an image for the following gray scale search matching setting operations the screen must be in the freeze image mode See section 7 2 Scre...

Page 32: ...y The screen will return to the MEASURING COND measurement conditions menu 7 Press the ESC key The screen will return to the TYPE00 MEAS0 type 00 measurement 0 menu 8 Operation on the EVALUATION COND evaluation condition menu 1 Move the cursor to 5 EVALUATION COND and press the SET key The EVALUATION COND menu will be displayed 2 Move the cursor to 1 REGST NO register number and press the SET key ...

Page 33: ...ND conditions of object type menu move the cursor to r FINAL OUTPUT COND final output conditions and press the SET key The RESULTS OUTPUT final evaluation conditions menu will be displayed 2 Move the cursor to 1 PAGE NO register number and press the SET key Move the cursor to YES and press the SET key Items 2 to 5 will be displayed 3 Move the cursor to 2 SET POSITION position to set and press the ...

Page 34: ...the screen Press the SET key The data saving operation will start and the progress will be displayed on the bottom of the screen When the data has been saved in the IV S20 flash memory the display will change from SAVING to SAVING COMPLETE Note If the ESC key is pressed the settings you entered will not be saved in the IV S20 flash memory In this case if the power to the IV S20 main housing is tur...

Page 35: ...table If there is a single unacceptable item NG will be displayed 2 MATCH 09735 means that the degree of match percentage of pixels that match between pixels in the new image and the stored image is 97 35 The acceptance and rejection criteria based on the degree of match In order to evaluate acceptability based on the degree of match first an image of a good specimen is stored for reference Then a...

Page 36: ...size Below is an example of an operation to determine the degree of match of the images 0 and 1 and the coordinates of the detection points with respect to the following object 1 Operation on the MAIN OPS MENU after initialize all conditions 1 Move the cursor to SET SCRN item and press the SET key The SYSTEM SETUP menu will be displayed 2 Operation on the SYSTEM SETUP menu 1 Move the cursor to 2 O...

Page 37: ...AD MEASR BIN AREA CNT BIN OBJ LABEL BIN OBJ POINT MEAS 3SELECT CAMERA CAM1 CAM2 4COPY EXEC TYPE00 MEAS1 NO 5INITIALIZATION EXEC 6MEAS PROG COND TO NEXT SUB MENU 7EVALUATION COND TO NEXT SUB MENU 8NUMERIC CALC COND TO NEXT SUB MENU 9OUTPUT CONDITIONS TO NEXT SUB MENU 0UPPER MENU Continued from the preceding page 3 Operation on the OBJECT TYPE COND conditions of object type menu 1 Move the cursor to...

Page 38: ...the upper right corner of the screen will change from H to L 2 Adjust the focus and aperture iris of the camera lens see page 5 1 so that the object to be measured is clear and easily distinguished 3 Press the SEL key to enter the freeze image mode The indicator in the upper right corner of the screen will change from T through to F freeze To store an image for the following gray scale search matc...

Page 39: ... hindered press the ESC key Only item 1 will be displayed 2 Move the cursor to 2 REF IMAGE MDL0 reference image with the up and down keys and press the SET key 3 Create an image window solid line for use as the reference image Move the cursor to MOVE UP L or LO R with the left and right keys and press the SET key Then position the window When the position is correct press the SET key After the ima...

Page 40: ...ter the number 01 with the up and down keys move the cursor to YES with the left and right keys and press the SET key 3 Move the cursor to 3 MODEL 0 POSITION model 0 positioning with the up and down keys and press the SET key Move the cursor to SEARCH enable search with the left and right keys and press the SET key 4 Move the cursor to 5 EVALUATE CRITERIA criteria conditions with the up and down k...

Page 41: ...output the result of the final evaluation externally see the following page The final evaluation result is always output to the auxiliary relay C112 When the final evaluation result is OK C112 is ON and when the result is NG it is OFF The result of final evaluation can be externally output by using the auxiliary relay C112 The setting procedures are the same as described in item 9 in section 3 2 P...

Page 42: ...s have been evaluated as acceptable If there is a single unacceptable item NG will be displayed 3 MATCH 09735 means that the degree of match percentage of pixels that match between an object image and the reference image is 97 35 The acceptance and rejection criteria based on the degree of match In order to evaluate acceptability based on the degree of match first an image of a good specimen is st...

Page 43: ...DIAGNOSTICS EXEC 9SAVE IN FLASH MEM EXEC 0OPERATIONS Length L Object to be measured rectangle 3 4 Distance measurement Below is an example of the operation for determining the length L of a target object 1 Operation on the MAIN OPS MENU after initialize all conditions 1 Move the cursor to SET SCRN with the left and right keys and press the SET key The SYSTEM SETUP menu will be displayed 2 Operatio...

Page 44: ...NU qMEASUREMENT 2 NO TO NEXT SUB MENU wMEASUREMENT 3 NO TO NEXT SUB MENU eFINAL CALC RESULT TO NEXT SUB MENU rFINAL OUTPUT COND TO NEXT SUB MENU tSYSTEM IN OUT TO NEXT SUB MENU yHALT MEAS ON NG NO YES uUPPER MENU Continued from the preceding page 3 Operation on the OBJECT TYPE COND conditions of object type menu 1 Move the cursor to 0 MEASUREMENT 1 with the up and down keys and press the SET key T...

Page 45: ...the SET key Move the cursor to GRAY SEARH gray scale search with the left and right keys and press the SET key 3 Move the cursor to 3 START POINT COND start point conditions with the up and down keys and press the SET key The gray scale search matching setting menu image window and search window will be displayed 6 Image adjustment 1 Press the SEL key The image taken by camera 1 will be displayed ...

Page 46: ...sor to 2 REFERENCE IMAGE reference image with the up and down keys and press the SET key 3 Create an image window solid line for reference image Move the cursor to MOVE UP L or LO R with the left and right keys and press the SET key Then position the window When the position is correct press the SET key After the image window position has been defined move the cursor to REG registration with the l...

Page 47: ... condition menu 8 Operation for gray scale search matching setting setting the starting point 01 1 On the MEASURING COND measurement condition menu move the cursor to 1 START POINT NO start point number with the up and down keys and press the SET key 2 Move the number to 01 with the up and down keys move the cursor to YES with the left and right keys and press the SET key 3 Move the cursor to 3 ST...

Page 48: ...T key Change the measurement start point to 01 with the up and down keys and press the SET key 5 Move the cursor to 5 UPPER MENU with the up and down keys and press the SET key The screen will return to the MEASURING COND measurement conditions menu 6 Press the ESC key The screen will return to the TYPE00 MEAS1 measurement conditions menu 10 Operation on the EVALUATION CONDITION evaluation conditi...

Page 49: ...wer and upper limits press the SET key and ESC key 12 Move the cursor to 7 UPPER MENU with the up and down keys and press the SET key The screen will return to the TYPE00 MEAS1 type 00 measurement 1 menu 13 Press the ESC key The screen will return to the OBJECT TYPE COND conditions of object type menu 11 Setting the final evaluation output condition This setting is used to output the result of the...

Page 50: ... the screen Press the SET key The data saving operation will start and the progress will be displayed on the bottom of the screen When the data has been saved in the IV S20 flash memory the display will change from SAVING to SAVING COMPLETE Note If the ESC key is pressed the settings you entered will not be saved in the IV S20 flash memory In this case if the power to the IV S20 main housing is tu...

Page 51: ...uring the distance Press the TRG BRT key and the distance between the specified detection point 0 start point 00 and detection point 1 start point 01 and the coordinates of these points will be displayed in pixel 1 Move the cursor to REG CHNG registration change with the left and right keys and press the up or down key The coordinates of the start point 00 and point 01 and the degree of match with...

Page 52: ...xample of the operations used to inspect IC lead pitches is given below 1 Operation on the MAIN OPS MENU after initialize all conditions 1 Move the cursor to SET SCRN with the right and left keys and press the SET key The SYSTEM SETUP menu will be displayed 2 Operation on the SYSTEM SETUP menu 1 Move the cursor to 2 OBJECT TYPE COND conditions of object type with the up and down keys and press the...

Page 53: ...d down keys and press the SET key The gray scale search matching setting menu image window and search window will be displayed Continued on the following page 1 F C1 H OBJECT TYPE COND 1OBJECT TYPE NO 00 0 15 2EDIT COPY OBJ TYPE00 INITIALIZE 3TITLE REGISTRATION TO NEXT SUB MENU 4MEAS 0 CAMERA1 NO TO NEXT SUB MENU 5POS ADJ CAMERA1 NO ADJ REG 0 1PNTSXY 6MEAS 0 CAMERA2 NO TO NEXT SUB MENU 7POS ADJ CA...

Page 54: ...press the SET key 3 Surround the image for correction of detection line in the image window solid line Move the cursor to MOVE UP L or LO R with the right and left keys and press the SET key Then position the window When the position is correct press the SET key 4 After the image window position has been defined move the cursor to REG registration with the right and left keys and press the SET key...

Page 55: ...the up and down keys and press the SET key The screen will return to the MEASURING COND measurement condition menu 9 On the MEASURING COND menu move the cursor to 3 OBJ NO FOR MEAS with the up and down keys and press the SET key Move the cursor to YES with the right and left keys and press the SET key The items 4 and 5 will be displayed 10 Move the cursor to 5 OBJ CONDFOR MEAS object conditions wi...

Page 56: ...d press the SET key Move the cursor to HORI horizontal _ with the left and right keys and press the SET key 4 Move the cursor to 3 DETECT AREA detection window with the up and down keys and press the SET key Move the cursor to MOVE with the left and right keys and press the SET key Move the detection line to the left of the lead to be measured with the up down left and right keys When the position...

Page 57: ...cessful match 90 00 to 100 00 After defining the lower limit press the SET key and ESC key 5 Move the cursor to 6 NUMBER with the up and down keys and press the SET key Move the cursor to the lower limit position with the right and left keys and enter the value to 005 with the up and down keys Move the cursor to the upper limit position with the right and left keys and enter the value to 005 with ...

Page 58: ...art and the progress will be displayed on the bottom of the screen When the data has been saved in the IV S20 flash memory the display will change from SAVING to SAVING COMPLETE Note If the ESC key is pressed the settings you entered will not be saved in the IV S20 flash memory In this case if the power to the IV S20 main housing is turned OFF or if the type No is changed the settings will be dele...

Page 59: ...ample of an operation for checking the existence of an object by detecting whether the points are white or not 1 Operation on the MAIN OPS MENU after initialize all conditions 1 Move the cursor to SET SCRN with the left and right keys and press the SET key The SYSTEM SETUP menu will be displayed 2 Operation on the SYSTEM SETUP menu 1 Move the cursor to 2 OBJECT TYPE COND condition of object type w...

Page 60: ... 1 NO TO NEXT SUB MENU qMEASUREMENT 2 NO TO NEXT SUB MENU wMEASUREMENT 3 NO TO NEXT SUB MENU eFINAL CALC RESULT TO NEXT SUB MENU rFINAL OUTPUT COND TO NEXT SUB MENU tSYSTEM IN OUT TO NEXT SUB MENU yHALT MEAS ON NG NO YES uUPPER MENU Continued from the preceding page 3 Operation on the OBJECT TYPE COND conditions of object type menu 1 Move the cursor to 0 MEASUREMENT 1 with the up and down keys and...

Page 61: ... page 5 1 so that the object to be measured is clear and easily destinguished 3 Press the SEL key to enter the freeze image mode The indicator in the upper right corner of the screen will change from T through to F freeze To store a threshold value in the following step the screen must enter the free image mode See section 7 2 Screen specifications for the through freeze mode 4 Move the cursor to ...

Page 62: ...ITIONS point registration individual with the up and down keys and press the SET key Enter the number 001 with the up key Move the cursor to YES with the right key and press the SET key Move the window for point No P001 the same as in steps 3 and 4 and press the SET key Create windows for point Nos P002 to P006 the same way 6 Move the cursor to 8 UPPER MENU with the up and down keys and press the ...

Page 63: ...lay C112 The setting procedures are the same as described in item 9 in section 3 2 position measurement 9 Returning to the MAIN OPS MENU 1 Press the ESC key The screen will return to the SYSTEM SETUP menu Move the cursor to 9 SAVE IN FLASH MEM save data in flash memory or 0 OPERATIONS with the up and down keys and press the SET key The following message will be displayed on the upper corner of the...

Page 64: ...NG PC MONTR SET SCRN MANL TYP CHG Continued from the preceding page 10 Existence inspection Press the TRG BRT key and OK or NG will be displayed to indicate the result of the evaluation of the color white or black according to the setting in step 7 2 at each point from P000 to P006 1 The result of the final evaluation will be displayed as OK in the upper left corner of the screen when all of the p...

Page 65: ...tion of the actual object and the measurement can be carried out correctly 1 Set the points using item 1 to 10 in section 3 6 Existence inspection by point measurement 2 Using the decimal point in a 7 segment display as a positioning mark Move the reference point as described in items 1 to 10 in section 3 2 Position measurement After the setting move the cursor to SET SCRN on the MAIN OPS MENU and...

Page 66: ...ulations This example uses the example from section 3 3 Degree of match inspection for shape and size 1 Create the images following the instructions of items 1 to 8 in 3 3 Degree of match inspec tion for shape and size After creating the images move the cursor to 3 NUMERIC CALC COND on the matching level inspection menu and press the SET key The NUMERIC CALC numeric calculation menu will be displa...

Page 67: ... the SET key 00X0 will be displayed in the formula field 00X0 means registration No 00 image 0 X coordinate of the detection point and model Press the ESC key 4 Move the cursor to 4 UPPER LOWER LIMIT with the up and down keys and press the SET key Move the cursor to the upper limit with the left and right keys and press the SET key Select a digit with the left and right keys Enter the number 0160 ...

Page 68: ...e cursor to the 0th column of INPUT 0 for logic setting using the up down left and right keys and press the SET key 4 Move the cursor to 3 INPUT SIGNAL with the up and down keys and press the SET key Move the cursor to CAL N00 0 to 15 with the left and right keys enter CAL N00 with the up and down keys and press the SET key 5 Move the cursor to 4 LOGICAL SYMBOL with the up and down keys and press ...

Page 69: ...o 1 PAGE NO with the up and down keys and press the SET key Move the cursor to YES with the left and right keys and press the SET key Items 2 to 5 will be displayed 3 Move the cursor to 2 SET POSITION with the up and down keys and press the SET key Move the cursor to the 0th column of INPUT 0 for logic setting using the up down left and right keys and press the SET key 4 Move the cursor to 3 INPUT...

Page 70: ... 0 OK LIGT LVL MDL 0 018 4 OK F L C1ALLC2NO VX X MSR CHNG REG CHNG PC MONTR SET SCRN MANL TYP CHG X0 6 Y0 7 BUSY Continued from the preceding page 5 Returning to the MAIN OPS MENU 1 Press the ESC key The SYSTEM SETUP menu will be displayed 2 Move the cursor to 9 SAVE IN FLASH MEM save data in flash memory or 0 OPERATIONS with the up and down keys and press the SET key Press the SET key once more T...

Page 71: ...tion The numbers in circles correspond to the component numbers shown on the following page 2 IV S20C1 camera body 5 Camera angle bracket 8 Housing bracket 1 IV S20L16 camera lens 3 Remote key pad 4 IV S20 main housing 6 Conversion connector Personal computer Monitor Power supply 24 VDC Programmable controller General purpose serial I F Computer link Programmable controller Limit switch Warning la...

Page 72: ...o c n o i s r e v n o C 6 c p 1 c p 1 r o t c e n n o c b u s D n o i t a c i n u m m o c 6 2 M w e r c s k c o r e l a m b u s D n i p 9 g n i s u o h n i a m 0 2 S V I e h t r o f r o t c e n n o c s c p 6 t e k c a r b e l g n a g n i r u c e s r o f 6 x 3 M w e r c S t e s 1 l a u n a m n o i t c u r t s n I M 0 2 S V I g n i s u o h n i a m 0 2 S V I 4 t e s 1 s s e c c A s e i r o t e k c a ...

Page 73: ... I e h t h t i w l a u n a m n o i t c u r t s n I 3 D L 0 6 V I t e s 1 y d o b n i a m t n e m p i u q e g n i t h g i l D E L s s e c c A s e i r o c p 1 t e k c a r b e l g n a a r e m a C s c p 6 t e k c a r b e l g n a a r e m a c g n i r u c e s r o f 6 x 3 M w e r c S t e s 1 l a u n a m n o i t c u r t s n I 4 P S 0 3 S V I c p 1 M O R D C s e i r e s V I r o f e r a w t f o s t r o p p u...

Page 74: ...or and the measurement result is output externally warning lamp The object type number is selected by an external switch 2 When a programmable controller is connected Purpose application Measurement is started by an external trigger a photo sensor or proximity sensor and the measurement data is output to a programmable controller The object type number is selected by the programmable controller IV...

Page 75: ...al CCD trigger can be used with camera 1 but with camera 2 1 When IV S20 is used in a stand alone mode Purpose application Measurement is started by a CCD trigger and the measurement result is output externally warning lamp etc In this case sampling operation is automatically started Personal computer Type selection data IV S20 main housing Power supply 24 VDC Monitor Camera 1 image Camera 2 image...

Page 76: ...Remote key pad Camera 1 image CCD trigger Camera 2 image IV S20 main housing Power supply 24 VDC Monitor 2 When a programmable controller is connected Purpose application Measurement is started by a CCD trigger sampling start input a photo sensor etc and the measurement data is output to a programmable controller The object type number is selected by the programmable controller Start sampling inpu...

Page 77: ...rpose application Measurement is started by a trigger from a personal computer and the measurement data is output to the personal computer The object type number is selected by the personal computer IV S20 main housing Power supply 24 VDC Monitor Camera 1 image Camera 2 image Personal computer Remote key pad Command response ...

Page 78: ...t voltage power supply in accordance with class 3 grounding procedures _ See page 6 12 Name The block has 7 input terminals and 9 output terminals External devices are connected to these terminals for input and output parallel I F _ See page 6 14 1 Power terminal block POWER 24V 0V 2 Power lamp POWER 3 Monitor connector VIDEO 4 Camera 1 connector CAMERA1 5 Camera 2 connector CAMERA2 6 Remote key p...

Page 79: ...n housing Plug 2 Camera cable 3 m long 1 Lens holder Front view view A of the CCD A Lock screw for securing the lens holder 5 2 Camera section 1 Camera 1 Camera body IV S20C1 2 Cable connector CCD section 1 Lens holder Front view view A of the CCD Lock screw for securing the lens holder A Lens holder Function Name The holder is used to make fine adjustment to the distance back plane fo cus between...

Page 80: ... a i d e d i s t u o m u m i x a m e h T m m 5 0 x 5 5 1 M s i t e k c a r b t n u o m s n e l 2 y d o b a r e m a C e l b a c n o i s r e v n o c a r e m a c 3 H 0 2 S V I e h t g n i s u a r e m a c e h t t c e n n o C 3 Micro camera IV S30C2 Lens mount section M 15 5 x 0 5 mm Cable connector 2 Camera body 1 Camera head Cable length 1 m Head cable CCD section φ 17m m Camera head installation sec...

Page 81: ...istance from an object is 50 mm to infinity from the front of lens 1 Iris 2 To adjust the image brightness The iris aperture can be set from 1 6 to closed 3 Camera conversion cable IV S20HC3 1 Camera connector Threaded type 2 Controller connector Quick connect type Cable length 3 m Camera connector Function Name Connect to a connector of camera cable IV S30C1 C2 C3 C4 1 Controller connector 2 Conn...

Page 82: ...reen Setting a window Setting a value Determine a highlighted item Determine the setting value Switching the image mode between the through mode and the freeze mode see page 7 8 Start measurement input Switching the brightness level H and L Contents Function Key name Direction keys up down left and right Set select key SET Cancel key ESC Image change key SEL Measurement start brightness select key...

Page 83: ...about the right lighting equipment for your application Backlighting Light should uniformly illuminate the field behind an object so that the IV S20 measure the object with it s shadow Since the shadow picture will be converted to binary values reliable measurements can be executed Example IV S20 IV S20 Miss processed product Inspection of a processed part Conveyor Backlighting equipment Light Lig...

Page 84: ... Object to be measured Lighting distance 150mm 87mm A 50mm 50mm Camera angle bracket IV 60LD body Lighting section 77 3mm yyIV 60LD body IV 60LD body IV S20 camera IV S20 camera IV 60LD body yy When the light is projected from above the object and if reflection off the object influences the image processing try the following countermeasures 1Tilt the camera center axis within a range that does not...

Page 85: ...ing object or to increase the image processing speed set the shutter speed to 1 1000 sec or 1 2000 sec or faster However an extremely high shutter speed will require intense lighting thereby increasing the cost Illuminance lux 32000 16000 8000 4000 2000 1000 500 250 125 1 30 1 60 1 125 1 250 1 500 Relation between illuminance and shutter speed IV S20L16 camera lens focal length 16 mm with an apert...

Page 86: ...onships as shown on page 6 6 and 6 7 among the camera installation distance the field of view in the vertical horizontal direction the lens focal length f the aperture setting the focal length and the resolution Example When the camera installation distance is 500 mm and the field of view in the horizontal direction is 110 mm the optimum lens can be selected as described in the following procedure...

Page 87: ...n When the displayed image fills the whole monitor screen and the view in the horizontal direction is 114 6 mm wide the resolution is 223 9 µm See Glossary for the diefinition of resolution 114 6mm 512 pixelcount 223 9 µm 400 0 0 0 1 0 2 0 3 0 4 0 5 0 6 0 7 0 8 0 9 1 0 500 600 700 Wave length nm Relative response 800 900 1000 The spectral sensitivity characteristics of the CCD element used in the ...

Page 88: ... 3 4 3 4 3 4 3 4 2 4 2 4 2 4 2 4 2 4 2 4 2 4 2 4 2 4 2 4 2 4 2 4 2 4 2 4 2 4 2 4 2 4 2 4 2 4 2 4 2 4 2 4 2 4 2 4 2 82 8 91 6 109 2 126 9 144 5 162 1 197 3 232 6 267 8 303 1 338 3 426 4 514 5 602 6 690 7 778 8 866 9 1043 1 1219 3 1395 5 1571 7 1747 9 1924 1 2100 3 2276 5 2452 7 2628 9 2805 1 2981 3 3157 5 3333 7 3509 9 4390 9 5271 9 6152 9 7033 9 7914 9 8795 9 9676 9 10557 9 11438 9 12319 9 13200 9...

Page 89: ...3 4 8 6 2 7 6 9 0 12 6 16 1 19 7 23 2 26 8 30 3 37 4 44 5 51 6 58 8 65 9 73 0 80 1 87 2 94 3 101 4 108 5 115 6 122 7 129 8 136 9 172 4 207 9 243 5 279 0 314 5 350 0 385 5 421 1 456 6 492 1 527 6 3 6 5 1 6 6 8 1 9 6 13 4 17 2 21 0 24 8 28 6 32 4 39 9 47 5 55 1 62 7 70 2 77 8 85 4 93 0 100 6 108 1 115 7 123 3 130 9 138 5 146 0 183 9 221 8 259 7 297 6 335 5 373 4 411 3 449 1 487 0 524 9 562 8 103 2 8...

Page 90: ...ull it straight out A camera connected to the camera 1 connector CAMERA1 is treated as camera 1 by this system and a camera connected to the camera 2 connector CAMERA2 is treated as camera 2 Note You must have a camera connected to the camera 1 connector The camera cable length is 3m If you need a longer cable order extension camera cable IV S20EC2 cable length 2m or IV S20EC4 cable length 4m Exte...

Page 91: ...e Y0 Y1 Y2 Y3 Y4 Y5 Y6 Y7 BUSY C X0 X1 X2 X3 X4 X5 X6 C 24V 0V 9mm 9mm 130mm 148mm 92mm 100mm minimum Do not bend the camera cables repeatedly Make sure the installation location allows enough space for the input output wires going to the I O terminal block and the power terminal block on the IV S20 2 Plug the remote key pad connector into the connector REMOTE on the IV S20 main housing 3 Connect ...

Page 92: ... the IV S20 IV S20N and IV S20M to attach the brackets 2 Secure the housing on the mounting surface with the brackets The external dimensions of the housing brackets and the IV S20 main housing are shown on the following page Mounting surface IV S20 main housing Housing bracket IV S20 VIDEO CAMERA1 CAMERA2 RS232C RS422 REMOTE POWER OUTPUT INPUT POWER Y0 Y1 Y2 Y3 Y4 Y5 Y6 Y7 BUSY C X0 X1 X2 X3 X4 X...

Page 93: ...20 Mounting position 2 places for securing the bracket to the mounting surface 70 10 5 4 5 10 5 23 5 91 10 10 5 7 1 6 IV S20 VIDEO CAMERA1 CAMERA2 RS232C RS422 REMOTE POWER OUTPUT INPUT POWER Unit mm Y0 Y1 Y2 Y3 Y4 Y5 Y6 Y7 BUSY C X0 X1 X2 X3 X4 X5 X6 C 24V 0V 130 130 30 92 2 tapped holes M3 for attaching the housing bracket 2 tapped holes M3 for attaching the housing bracket 30 92 92 92 130 30 ...

Page 94: ...housing Use a 24 VDC 10 350 mA or more constant voltage power supply Use an individual power supply to supply power to the IV S20 main housing If the power supply is used to power other equipment measurement errors may occur Check the polarity of the power supply terminals 24 V and 0 V If power is supplied with the polarity inverted the IV S20 main housing may be damaged Only connect or disconnect...

Page 95: ...ough the SG line inside the IV S20 and may destroy the circuit or cause smoke or a fire If the positive terminal of the 24 VDC power supply must be grounded for facility construction reasons make sure to provide an independent power supply exclusively for use with the IV S20 which does not ground either the positive or negative terminals RS 232C RS 422 SG FG SG FG Grounded positive line External e...

Page 96: ...to X4 Measurement start input output setting condition 1 External input Measurement start input output setting condition 2 Measurement start input Measurement start input output setting condition 1 External input Measurement start input output setting condition 2 Object type input 0 to 15 X0 X1 to 4 X4 OFF OFF OFF OFF OFF OFF OFF OFF 0 1 2 3 4 5 6 7 X3 OFF OFF OFF OFF ON ON ON ON X2 OFF OFF ON ON ...

Page 97: ...Y7 and BUSY Result of logical calculation output Specify in item rFINAL OUTPUT COND on the OBJECT TYPE COND menu See page 10 8 to 13 Y0 to Y7 BUSY When BUSY is active this terminal outputs an ON signal while the IV S20 is executing the measurement and opening the all set menu When READY is active this terminal outputs an ON signal while the IV S20 is waiting for a trigger To specify BUSY or READY ...

Page 98: ...rd Signal name Pin No Details Direc tion RS 232C Connector shield 2 3 5 RD SD SG Transmitted data IV S20 personal computer Input Output Frame ground Signal ground Received data personal computer IV S20 FG 1 When communicating through the RS 232C port 1 6 FL1 FL2 Memory protection 1 Memory protection 1 Communication connector on the IV S20 RS232C RS422 9 pin D sub 2 3 5 RD SD SG Received data Trans...

Page 99: ... 1 km or less Function Connector case 2 2 2 2 2 2 wire system SHIELD RD RD FG TD RD RS SG 1 2 3 4 7 FG TD RD RS SG 1 6 FL1 FL2 Memory protection 1 Memory protection 2 RS 232C 422 converter Z 101HE IV S20 9 pin D sub 4 7 8 9 FG TA TB RA RB Pin No RS 232C Shielded twisted pair cable Transmitted data IV S20 Personal computer Received data Personal computer IV S20 Connector frame ground Personal compu...

Page 100: ...own on page 6 16 to 6 17 In the case of RS 232C the maximum communication cable length depends on the c o m munication speed Y0 Y1 Y2 Y3 Y4 Y5 Y6 Y7 BUSY C X0 X1 X2 X3 X4 X5 X6 C 24V 0V IV S20 VIDEO CAMERA1 CAMERA2 RS232C RS422 REMOTE POWER OUTPUT INPUT POWER side view Communication connector RS232C RS422 RS 232C RS 422 Input output terminals 1 2 plan view Communication port O I Programmable contr...

Page 101: ...ush the convex side of the connector into the concave side of the mating connector When the connector is all the way on it clicks To disconnect the connector hold the plug of the connector and pull it straight out A camera connected to the camera 1 connector CAMERA1 is treated as camera 1 by this system and a camera connected to the camera 2 connector CAMERA2 is treated as camera 2 Note You must h...

Page 102: ...ied with the IV S20 IV S20N and IV S20C1 for attaching the angle 2 Attach the camera controller angle to the mounting surface with the slotted holes 3 2 mm wide 20 mm mounting pitch or 1 4 20 UNC threaded hole The external dimensions of the camera angle bracket camera body and extension camera cable are shown on the following page Installation example 1 Installation example 3 Installation example ...

Page 103: ... threaded hole for attachment to the mounting surface 2 slotted holes 3 2 mm wide for attachment to the mounting surface 4 slotted holes wide for securing on the camera body Unit mm Unit mm 30 32 20 30 5 5 37 20 32 5 7 37 7 2 M3 tapped holes 2 M3 tapped holes 2 M3 tapped holes Attach the camera angle bracket to one of the tapped M3 holes 20 mm mounting pitch 3 places 28 5 34 3 37 25 20 32 5 7 2863...

Page 104: ... the camera cable and extension camera cable IV S20EC2 4 leading to the camera body IV S20C1 is bent its bending radius should be longer than 40 mm If the camera cable will be bent repeatedly during operation design the cable layout so that the bending radius is 75 mm or more and use components that can be flexed up to 2 million times Camera cable Bending radius Min 40 mm ...

Page 105: ...s treated as camera 1 by IV S20 system and a camera connected to the camera 2 connector CAMERA2 is treated as camera 2 Note You must have a camera connected to the camera 1 connector The IV S20HC3 camera cable is 3m long If you need a longer cable order extension camera cable IV S20EC2 cable length 2m or IV S20EC4 cable length 4m 2 Plug the other end of the IV S20HC3 camera conversion cable into t...

Page 106: ...a for attaching the angle 2 Attach the camera controller angle to the mounting surface with the slotted holes 3 2 mm wide 20 mm mounting pitch or 1 4 20 UNC threaded hole The external dimensions of the camera angle bracket and camera body are shown on the following page Installation example 1 Installation example 3 Installation example 2 Mounting surface Mounting surface Mounting surface Camera an...

Page 107: ... 7 Unit mm 2 M3 tapped holes 2 M3 tapped holes 2 M3 tapped holes Attach the camera angle bracket to one of the tapped M3 holes 20 mm mounting pitch 3 places 1 28 5 to 34 3 37 43 20 32 5 7 φ7 3000 52 2 φ16 9 28 22 5 5 5 39 31 17 10 10 60 20 20 3 2 28 25 1 4 20 UNC threaded hole for attachment to the mounting surface 2 slotted holes 3 2 mm wide for attachment to the mounting surface 4 slotted holes ...

Page 108: ...ent its bending radius should be larger than 40 mm If the IV S20HC3 camera conversion cable will be bent repeatedly during operation design the cable layout so that the bending radius is 75 mm or more and use components that can be flexed up to 2 million times IV S20HC3 Bending radius Min 40 mm ...

Page 109: ...e plug housing and pull it straight out Any camera plugged into the CAMERA 1 connector will be system camera 1 and any camera plugged into the CAMERA 2 connector will be system camera 2 in the IV S20 system Note 2 Make sure to connect a camera to CAMERA 1 The camera cable is 3 m long If you need a longer cable purchase the IV S20EC2 camera extension cable 2 m or the IV S20EC4 camera extension cabl...

Page 110: ... head of the IV S30C2 1 Screw the lens in until the camera image is focused 2 Secure the lens using the lens locking ring on the camera head External dimensions of the IV S30C2 camera head Unit mm Lens commercially available Camera head Lens locking ring 22 0 1 8 0 1 6 8 3 M15 5x0 5 φ 16 35 6 φ17 ...

Page 111: ...acket Note The camera head bracket supplied with the camera is for simple installations and is not vibration damping To meet specific needs the user may have to make a specialized bracket External dimensions of the camera head bracket Shape before installation 7 to10 6 5 φ15 9 M3 hole φ3 4 φ3 4 φ3 4 31 4 20 8 27 9 0 4 Unit mm Front view Side view Installation surface Installation surface Screws M3...

Page 112: ...et on the installation surface using a 3 2mm long 20 mm difference screw or a 1 4 20 UNC screw hole Installation example External dimensions of the camera IV S30C2 Unit mm Installation surface Camera mounting bracket accessory Camera body Camera mounting bracket Camera body Front view Side view 44 7 28 5 20 5 Attach the camera angle bracket to one of the tapped M3 holes 20 mm mounting pitch 3 plac...

Page 113: ...g operation design the cable layout so that the bending radius is 75 mm or more and use components that can be flexed up to 2 million times Note 28 22 5 5 5 39 31 17 10 10 60 20 20 3 2 28 25 1 4 20 UNC threaded hole for attachment to the mounting surface 2 slotted holes 3 2 mm wide for attachment to the mounting surface 4 slotted holes wide for securing on the camera body Unit mm Head cable Bendin...

Page 114: ...bleshooting 12 1 Settings See the setting procedures start ing on page 9 1 2 Installation assembly Connection of cameras and monitor to the IV S20 main housing Installation of the IV S20 main housing and camera body Connection of a power supply input output terminals and external devices 3 Turning ON the power supply the IV S20 main housing and monitor 4 Environment settings Input output condition...

Page 115: ...played if any single evaluation result is unacceptable Error message Description Output monitor status Camera 1 C1 camera 2 C2 All upper middle lower none Image brightness H Original brightness of captured image L Brightness reduced to half that in the captured image Image display mode F Freeze mode N No camera input LOCK VX X System program version number Run menu lock LOCK is not displayed while...

Page 116: ... be changed using the up and dow keys The object type number can be changed manually by setting the OBJ NO MANL MODE item to YES See page 8 9 Every time the object type is changed the image will be cleared However the image will not be cleared when CAPTURE AN IMAGE has been set to NO Press the SET key and the screen will change to the next SYSTEM SETUP menu When the screen is returned from the SYS...

Page 117: ...UTER LINK 11 19 ADJUST GAIN OFFSET 11 22 NUMERIC CALC 9 18 RESULTS OUTPUT 10 8 OBJECT TYPE I O 11 17 MONITOR LIGHT LVL 9 115 LIGHT LEVEL COND TRIGGER CCD START 11 16 CCD TRIGGER COND COMPUTER LINK OUT SERIAL OUTPUT 11 20 SHUTTER SPEED 9 117 STORE REF IMAGE 9 26 UPPER MENU TYPE00 MEAS2 The same as TYPE00 MEAS1 TYPE00 MEAS3 The same as TYPE00 MEAS1 1 Go to the next page EVALUATION COND 9 41 NUMERIC ...

Page 118: ...C COND 9 54 OUTPUT CONDITIONS 9 55 EVALUATION COND 9 67 NUMERIC CALC 9 68 OUTPUT CONDITIONS 9 69 MEAS SELECTION Continued on the following page In GRAY EDGE MEASURING COND 9 59 1START POINT NO 2START POINT MODE GRY SRH EDG DET 3START POINT COND 4AUX CONDITIONS 5DISTANCE COND 6ANGLE CONDITIONS 7UPPER MENU In label center of gravity measurement mode MEASURING COND 9 62 1START POINT MODE 2AUX CONDITI...

Page 119: ...ondition 9 75 Edge detection conditions 9 76 MEASURING COND 9 84 1REGST NO 2BINARY AREA COND 3UPPER MENU Point measurement Counting quantities by binary conversion MEASURING COND 9 92 Label measurement by binary conversion MEASURING COND 9 100 1REGST NO 2BINARY AREA COND 3FIND CENT GRAVITY 4MAIN AXIS ANGLE 5FILLET DIAMETER 6PERIMETER LENGTH 7UPPER MENU BINARY AREA COND 9 101 BINARY AREA COND 9 93 ...

Page 120: ...a position adjustment display mode all parameter receiving all initialization self diagnosis saving to flash memory Measure ment programs The same as Type 00 Chapter 8 Title registration position correction calculation using two images camera selection final numerical calculation final output conditions system I O setting halt on NG measurement Chapters 9 and 11 Chapters 12 Chapters 11 The chapter...

Page 121: ...2NO VX X TYPE00 OK MEAS XXXXXXms MEAS1 CAM1 MEAS BIN AREA OBJECT TYPE COND OBJECT TYPE NO 00 0 15 EDIT COPY OBJ TYPE00 INITIALIZE TITLE REGISTRATION TO NEXT SUB MENU MEAS 0 CAMERA1 NO TO NEXT SUB MENU POS ADJ CAMERA1 NO ADJ REG 0 1PNTSXY F C1 H The image captured by the camera is displayed at the original brightness of the image The image captured by the camera is displayed at half the brightness ...

Page 122: ...ew image is captured Note The run screen is only displayed in the freeze mode and the ADJUST GAIN OFFSET screen is only displayed in the through mode Press this key on the run screen and a new measurement is triggered Change the displayed image brightness See the preceding page Use this key when the image is so bright that characters are difficult to see The brightness can be changed on any screen...

Page 123: ...r each object type Processing after the power is turned ON Power ON Data setting CPU variables Gate array Obtaining images capturing specific lines of an image To the next page ESC key Initializing NG type conditions Checksum checking Settings for all types completed Initializing CPU gate array Start up Transmitting from flash memory to RAM Transmitting from flash memory to RAM Memory check Settin...

Page 124: ...Main loop processing From the preceding page Process key strokes Processing on sub menu See page 7 4 to 7 7 for the menu configuration Measurement result output processing Executing measurements Communication processing Data received Key input Communication processing Measurement start PC calculation PC calculation Message display Pattern display Crosshair cursor display Receiving a measurement st...

Page 125: ...d An error was detected Executing measurement 1 Executing measurement 2 Executing measurement 3 Setting the coordinate correction value X Y θ To the next page To the next page Positional correction Executing measurement 0 using camera 2 Executing measurement 0 using camera 1 Measurement timer start Reading the object type No Image capturing camera 1 2 The range of the lines to be captured as set i...

Page 126: ...SY OFF External interface enabled communications External interface enabled key parallel Determining the measuring time timer stop Serial output Pattern display Positional correction yes Pattern display during setting General purpose serial output Computer link output Waiting for a measurement start input signal or key input If HALT MEAS ON NG halt operation on NG measurement has been set to YES p...

Page 127: ... comes with the IV S30SP Cable length 1 5m Connector 9 pin D sub male IV S20 side 9 pin D sub female personal computer side The IV S30SP software can be used on any personal computer that has the operating environment described below m e t I s n o i t a c i f i c e p S r e t u p m o c l a n o s r e P e n i h c a m e l b i t a p m o c T A C P M B I U P C e r o m r o z H M 3 3 1 m u i t n e P e r o ...

Page 128: ...g selection 1 MONITOR OUTPUT 2 CAMERA1 2 Item 2 will be displayed if CAM1 2 has been selected in item 1 Select the camera whose image will be displayed on the screen If CAM1 2 is selected the picture taken by camera 1 will be displayed on the upper half of the screen and the picture taken by camera 2 will be displayed on the lower half of the screen Each images taken by cameras 1 and 2 is divided ...

Page 129: ... I F PARALLEL SERIAL CCD TRG 3SERIAL OUTPUT NO PC LINK SERIAL INPUT PARALLEL 4CHG MEAS NO X5 X6 NO YES 5PARALLEL INPUT X5 EXT INP REG REF IMG MSR0 6PARALLEL INPUT X6 EXT INP CHG IMG OUT CAM CAM MEAS 7OUTPUT STATUS BUSY READY 8SERIAL CONDITIONS TO NEXT SUB MENU 9COMPUTER LINK TO NEXT SUB MENU 0GAIN OFFSET TO NEXT SUB MENU qUPPER MENU IN OUT SETTINGS Item 2 is displayed when CCD TRG CCD trigger has ...

Page 130: ...ill be carried out with an image being displayed This mode only used to carry out measurements on an image transmitted from a personal computer to the IV S20 1MONITOR OUTPUT CAM1 CAM2 CAM1 2 2CAMERA1 2 CAM1 MD CAM2 MD 3CAPTURE AN IMAGE PARTIAL IMAGE WHOLE IMAGE NO 4MESSAGE DISPLAY YES RESULT OK YES RESULT NO NO 5PATTERN DISPLAY MEAS RESULT OUT NO 6SHOW BINARY IMAGE YES NO 7SHOW CORRECT IMG YES NO ...

Page 131: ...GE WHOLE IMAGE NO 4MESSAGE DISPLAY YES RESULT OK YES RESULT NO NO 5PATTERN DISPLAY MEAS RESULT OUT NO 6SHOW BINARY IMAGE YES NO 7SHOW CORRECT IMG YES NO 8DISPLAY CURSOR NO YES MANL MESR 9OBJ NO MANL MODE NO YES 0IMAGE DISPLAY FREEZE THROUGH qUPPER MENU YES RESULT NO When the display mode has been set to YES RESULT OK When the display mode has been set to YES RESULT NO When the display mode has bee...

Page 132: ...RESULT NO NO 5PATTERN DISPLAY MEAS RESULT OUT NO 6SHOW BINARY IMAGE YES NO 7SHOW CORRECT IMG YES NO 8DISPLAY CURSOR NO YES MANL MESR 9OBJ NO MANL MODE NO YES 0IMAGE DISPLAY FREEZE THROUGH qUPPER MENU 4 Pattern display Select MEAS RESULT OUT or NO to determine whether to display windows and other marking over an image displayed on the MAIN OPS MENU F H C1ALLC2NO VX X TYPE00 OK MEAS XXXXXXms MEAS0 C...

Page 133: ...e MAIN OPS MENU Note When the monitor camera mode has been set to the 2 screen divided display mode cameras 1 and 2 the binary image will not be displayed even if YES is selected A binary image will not be displayed on the MAIN OPS MENU Operation procedure 1 On the RUN MENU SETTINGS menu move the cursor to item 6 SHOW BINARY IMAGE with the up and down keys and press the SET key 2 Move the cursor t...

Page 134: ... MAIN OPS MENU Description RUN MENU SETTINGS 7SHOW CORRECT IMG 1MONITOR OUTPUT CAM1 CAM2 CAM1 2 2CAMERA1 2 CAM1 MD CAM2 MD 3CAPTURE AN IMAGE PARTIAL IMAGE WHOLE IMAGE NO 4MESSAGE DISPLAY YES RESULT OK YES RESULT NO NO 5PATTERN DISPLAY MEAS RESULT OUT NO 6SHOW BINARY IMAGE YES NO 7SHOW CORRECT IMG YES NO 8DISPLAY CURSOR NO YES MANL MESR 9OBJ NO MANL MODE NO YES 0IMAGE DISPLAY FREEZE THROUGH qUPPER ...

Page 135: ...he MAIN OPS MENU The initial coordinates of the crosshair cursor position are 255 240 A crosshair cursor will not be displayed on the MAIN OPS MENU 8 DISPLAY CURSOR Description MANL MESR The distance X coordinate distance and Y coordinate distance of the two points that were manually designated on the MAIN OPS MENU can be measured RUN MENU SETTINGS 1MONITOR OUTPUT CAM1 CAM2 CAM1 2 7SHOW CORRECT IM...

Page 136: ...ES or NO with the left and right keys and press the SET key Changing the object type on the MAIN OPS MENU 1 Move the cursor to MANL TYPE CHG with the left and right keys 2 Change the object type number displayed in the uppermost area with the up and down keys 8 Manually setting the object type On the MAIN OPS MENU the object type 00 to 15 can be changed manually using the remote key pad 3 Select N...

Page 137: ... UNLOCK or LOCK with the left and right keys and press the SET key 3 Move the cursor to item 2 OPERATION with the up and down keys and press the SET key Press the SET key once more The screan returns to the MAIN OPS MENU Display when the MAIN OPS MENU is locked 9 Image display Select the desired measurement image status FREEZE or THROUGH on the MAIN OPS MENU Operation procedure 1 On the RUN MENU S...

Page 138: ...sh memory Enter the object type number 0 to 15 Selecting the difference between images calculation Setting the measurement program conditions Set position correction value Set final output condition Setting the system input output conditions 1OBJECT TYPE NO Editing copying and initialization 2EDIT See Editing in section 9 2 7 and 8 4MEAS 0 CAMERA 1 6MEAS 0 CAMERA 2 0MEASUREMENT 1 qMEASUREMENT 2 wM...

Page 139: ... CHECK DEG OF MATCH DST AGL MES GRAY EDGE GRAV INSPECT LEAD MEASR BIN AREA CNT BIN OBJ LABEL BIN OBJ POINT MEAS 2COMPARE IMAGES NO YES CAM1 3SELECT CAMERA CAM1 CAM2 4COPY EXEC TYPE00 MEAS1 NO 5INITIALIZATION EXEC 6MEAS PROG COND TO NEXT SUB MENU 7EVALUATION COND TO NEXT SUB MENU 8NUMERIC CALC COND TO NEXT SUB MENU 9OUTPUT CONDITIONS TO NEXT SUB MENU 0UPPER MENU 4MEAS 0 CAMERA 1 6MEAS 0 CAMERA 2 Di...

Page 140: ...tion measurement edge distance and angle measurement edge Distance and angle measurement center of gravity Area measurement by binary conversion counting quantities by binary conversion identifying objects by binary conversion Up key 3 Specifying the lower right corner 2 Specifying the upper left corner 1 Moving the mask Down key Left key Right key Up key Down key Left key Right key Up key Down ke...

Page 141: ...rch The up and down keys function the same as in the move item The up and down keys function the same as in the move item Left key Right key Left key Right key Left key Right key Down key Up key 3 Specifying the ending point 2 Specifying the starting point 1 Move The left and right keys function the same as in the move item Left key Right key The left and right keys function the same as in the mov...

Page 142: ...age window mask Measurement programs Distance and angle measurement center of gravity area measurement by binary conversion counting quantities by binary conversion identifying objects by binary conversion Distance and angle measurement center of gravity area measurement by binary conversion counting quantities by binary conversion identifying objects by binary conversion 3 Circle window How to se...

Page 143: ...el contraction to 3 Reference image Standard Search coordinates use a 1 pixel level of precision High precision Search coordinates use a sub pixel level of precision 1 10 Degree of match Degree of match 0 1 2 3 4 5 6 7 8 9 1 2 3 4 5 6 7 8 9 5CONTR PIXEL MDL 0 1 2 3 0CONTR PIXEL MDL 1 1 2 3 qDETECT ACCURACY STANDARD HI PRC 5CONTR PIXEL MDL0 1 2 3 qDETECT ACCURACY STANDARD HI PRC Positional deviatio...

Page 144: ...age 9 101 Point measurement binary images page 9 109 3 Setting window boundaries enable disable This function enables and disables the labeling object identification of binary images located that cross over the window frame boundary Measurement programs which are affected by these settings Distance and angle measurement center of gravity page 9 62 Counting quantiities by binary conversion page 9 9...

Page 145: ...t the image due to a variation in lighting Threshold correction value Binary conversion Object identification in order of scanning Object identification in order of area 1 1 2 2 3 3 4 4 Island Island Measurement programs which are affected by these settings Degee of match inspection for shape and size binary conversion page 9 51 Distance and angle measurement center of gravity page 9 62 Area measu...

Page 146: ...ngs Distance and angle measurement center of gravity page 9 62 Area measurement by binary conversion page 9 85 Counting quantities by binary conversion page 9 93 Identifying object by binary conversion page 9 101 Smoothing Edge emphasis Edge extraction Display smooth images decreasing the noise Use to eliminated surface flaws and unevenness in the reflected light caused by protrusions or dents Dis...

Page 147: ...ed white noise is eliminated by contraction the areas shrunk by contraction are returned to their original size by expanding them again The IV S20 has both contraction _ expansion and expansion _ contraction functions for eliminating binary noise Number of times of expansion and number of times of contraction can be set independenly When the number of contraction cycles is set to 0 and the number ...

Page 148: ... to top Detection direction Detection direction A Moving right horizontally from light to dark B Moving right horizontally from dark to light C Moving left horizontally from dark to light D Moving left horizontally from light to dark Edge detection point 8 Edge detection The edge refers to the boundaries between the brighter white and darker black parts in an image The edge detection function is u...

Page 149: ...the target object is detected by computing the average duration of the dark area in the scan line which is much longer for a target object than for an artifact Example of detection An example of light to dark averaging DETECT MODE BRT_DRK while scanning horizontally DETECT DIR HORI _ with artifact processing enabled PRC PROJECT YES When artifact processing is disabled in the above example the edge...

Page 150: ... Set the range for the total surface area which will produce an OK judgment To carry out a MAKE A TEST RUN of the evaluation conditions push the SET key The results will be displayed This will also record the details of the settings Return to the TYPE00 MEAS 0 to 3 menu Not done Done The recording is finished Return to the TYPE00 MEAS 0 to 3 menu 5 UPPER MENU Make the measurements 1 REGST NO regis...

Page 151: ...EASUREMENT 3 e FINALL CALC RESULT final numerical calculations Degree of match inspection distances and angles measurement lead inspection area measurement by binary conversion counting quantities by binary conversion identifying object by binary conversion 4 Numerical calculations Numeric calculation fuction of the IV S20 consisits of numeric calculations which is set individually for each measur...

Page 152: ...ll change according to the selection made in item Note Please enter a smaller number for N 00 to 15 in the formula than N 00 to 15 of item 1CALC RESULT Enter the upper and lower limits for making a judgment This setting will be displayed in N00 to N15 at position 4 above Setting the output of the calculation results The output can be set to Y0 to Y7 or C000 to C107 This setting is displayed in N00...

Page 153: ... NUMERIC CALC numerical calculation menu Note Make sure that a test is run using the EVALUATION COND evaluation condition menu before making any calculations Setting procedure Output error An error will be output if there are too many digits as well as if there is an attempt to divide by zero Order of calculation The calculation results are produced in order from N00 to N15 Parallel output based o...

Page 154: ... Starting point 00M to 15M Starting point 00X to 15X Starting point 00Y to 15Y 00B to 15B 00HX to 15HX 00HY to 15HY 00D to 15D N00 to N15 Lead inspection 0M to 3M 0X to 3X 0Y to 3Y 0K0 to 0K7 3K0 to 3K7 0MXD0 to 0MXD7 3MXD0 to 3MXD7 0MND0 to 0MND7 3MND0 to 3MND7 0MXL0 to 0MXL7 3MXL0 to 3MXL7 0MNL0 to 0MNL7 3MNL0 to 3MNL7 N00 to N15 Input types Total area A Number of objects K Area with each labeli...

Page 155: ... where the rule 4 calculation result of the specified output data is stored may be set from 00 to 15 Select the type of data being calculated A number of style settings are used The first line will change according to the selection made in item 2 Note Please use a smaller number for entering numbers at AN 00 to 15 than that 1 CALC RESULT calculations results AN 00 to 15 Enter the upper and lower l...

Page 156: ...ent 1 N00 to 15 2N00 to 2N15 Calculation result for measurement 2 N00 to 15 3N00 to 3N15 Calculation result for measurement 3 N00 to 15 INDV MEAS RSLT N Results of the calculations for measurements FINAL RESULT AN Results of final calculations CNST C Constant NUM CALC NC Numerical calculations 99999999 9 to 99999999 9 ABS TAN ATAN 00 to 15 AN00 to AN15 Based on the settings at items 2 and 3 the nu...

Page 157: ...because of a detected angular deviation in rotation 2 point search 2 point edge 1 point search 1 point edge from measurement 0 The high precision angular correction settings allows the IV S20 to display a very precisely corrected image But this selection lowers rotation processing speed Scanned image High precision Standard θ image after angular correction Image after correction Scanned image An i...

Page 158: ... using the left and right keys and then select XY or X or Y using the up and down keys In the case of angular correction it is unnecessary to perform step 4 5 Press the SET key Move the cursor to item u UPPER MENU and press the SET key This completes the settings for positional correction On the MAIN OPS MENU move the cursor to SET SCRN item and press the SET key On the SYSTEM SETUP menu move the ...

Page 159: ...ent 2 Measuring a point using measurement 1 If the first point is X only the X position will be corrected Likewise if the first point is Y only the Y position will be corrected X2 X1 Y2 Y1 Search area Target object coordinates X2 Y2 Coordinates X1 Y1 of object in the reference image model 0 Measured results Detected coordinates X2 Y2 Deviation amount X2 X1 Y2 Y1 X2 X1 Y2 Y1 Point ...

Page 160: ... model 1 Position of reference image θ Detecting the amount of angular deviation Image that has been rotated around its center in step 1 Example of angular correction 1 Detection of the amount of angular deviation using measurement 0 2 point search positional deviation measurement 2 Performing measurement 1 of distance and angle measurement on an image that has been rotated around its center by th...

Page 161: ...he differences between the current image and the already stored reference image 1 Type of calculation There are two types of calculation subtraction and the absolute value of the differences Example of comparative calculations between images Light level in image 1 0 to 255 Light level in image 2 0 to 255 Light level after calculation However a result less than 0 will give a result of 0 Light level...

Page 162: ...ween I2 T2 Subtraction I1 I2 Subtraction I2 I1 The absolute value of the difference between I2 I2 Contents Comparative calculations of differences between images will not be carried out Comparative calculations of differences between images will not be carried out The reference image T1 1 is subtracted from the image taken by camera 1 The absolute value of the difference is calculated between the ...

Page 163: ... one of the following MOVE UP L or LO R Then adjust the window to suit your needs Decide on the position of the window for the reference image before every operation and then press the SET key 4 When the position of the image window has been defined record the selection by using the left and right keys to go to REG register Then press SET key Using the left and right keys go to DISP display and th...

Page 164: ...ONDITIONS TO NEXT SUB MENU 0UPPER MENU This indicates that the display is for object type 00 and measurement 1 This indicates that the selected measurement program is the MEASR BIN AREA area meas urement by binary coversion This refers to the camera which has been select ed in item 8 SELECT CAMERA IMG camera selection on the OBJECT TYPE COND con dition of object type menu 1 Using the up and down k...

Page 165: ... not copied with the operation above Make sure reset them Notes 7 Copying editing When there are many common parameters between measurement programs or object types it is most efficient to access those existing sets of parameters in order to copy and then modify them There are two types of copy functions on the IV S20 Copying between object types and copying between measurement programs 1 Copying ...

Page 166: ...ther The procedure for copying measurement program 0 Example Copying the object type number 00 measurement 0 program settings for positional deviation measurements into the settings for object type number 01 measurement 0 program setting no The settings for the same measuring program in a different object type number The data is used to simplify setting the target object s parameters The target of...

Page 167: ...ograms 1 to 3 Example Copying the settings from object type 00 measurement 2 lead inspection into object type 01 measurement 1 degree of match inspection 1 Select item 4 COPY using the up and down keys and press SET 2 Select TYPE00 or MEAS1 with the left and right keys Next enter the object type number 00 to 15 and the measurement program number 1 to 3 for the source of the copy using the up and d...

Page 168: ...U 7EVALUATION COND TO NEXT SUB MENU 8NUMERIC CALC COND TO NEXT SUB MENU 9OUTPUT CONDITIONS TO NEXT SUB MENU 0UPPER MENU On the MAIN OPS MENU move the cursor to SET SCRN and press the SET key On the SYSTEM SETUP menu move the cursor to 2 OBJECT TYPE COND and press the SET key On the OBJECT TYPE COND conditions for object type menu set item 1 OBJECT TYPE NO to 02 and select 0 MEASUREMENT 1 1 TYPE00 ...

Page 169: ...YPE COND condition of object type and press the SET key Do not disconnect the power while IV S20 is initializing The set data other than currently initializing may be corrupted Unless all of the data is initialized it will not be possible to restart the machine i e partial initialization is not possible Note 2 Initialize measurement condition of each type The measurement conditions for a specified...

Page 170: ...ISTRATION and press the SET key Indicates that object type 00 is selected set TITLE REGIST TYPE A to Z 0 to 9 to SP space bar DEL delete END Setting details These characters and symbols are used to enter the title name This is used to make spaces These are used to move the cursor This is used to delete the character to the right of the cursor This key is used to return to the TYPE COND conditions ...

Page 171: ...earch Determining positional deviation in X and Y directions as well as rotational deviation Used to determine the position of machine parts and substrates X2 X1 Y2 Y1 Search area Inspection Image Center coordinates X2 Y2 Reference image Center coordinates X1 Y1 Measured result Center coordinates X2 Y2 Amount of deviation X2 X1 Y2 Y1 Measured result Center coordinates of image a Xa2 Ya2 Amount of ...

Page 172: ... detection 1SELECT MEAS TYPE Select MEAS POSITION DEVIATE positional deviation measurement 2COPY 3INITIALIZATION copy initialization see section 9 2 7 8 5EVALUATION COND evaluation conditions 6NUMERIC CALC COND conditions for numeric calculation 7OUTPUT CONDITIONS output condition 4MEAS PROG COND conditions for measurement programs MAIN OPS MENU These settings are found in the TYPE00 MEAS0 object ...

Page 173: ...or 6 MEAS 0 CAMERA 2 measurement 0 camera 2 on the OBJECT TYPE COND conditions for object types menu Indicates that the object type 00 is selected Select MEAS POSITION DEVIATE measuring positional deviation on the SELECT MEAS TYPE line Items 2 SELECT MODE and 4 EDGE DETECT COND are displayed when item 1 REGST NO is set to YES Measurement conditions 1REGST NO registration number 2SELECT MODE 3GRAY ...

Page 174: ...l contraction 6MEAS WINDOW MDL1 measurement window 7REF IMAGE MODEL1 reference images 8SEARCH AREA MDL1 9DTECT COORD MDL1 detection coordinates 0CONTR PIXEL MDL1 pixel contraction qDETECT ACCURACY accuracy of detection wUPPER MENU Setting details Select the measurement window shape for model 0 Record a reference image for model 0 The upper left or lower right area of the screen specified above wil...

Page 175: ...s when a 1 point search or a 1 point search 1 point edge is selected This is the sequence of events when a 2 point search is selected wUPPER MENU Information about the recording of a reference image In order to record a reference image it is necessary to use the freeze frame The specifications for the windows are as follows In the case of a rectangular window In the case of a horizontal line In th...

Page 176: ...ETECT MODE MDL0 detection mode 2DETECT DIR MDL0 detection direction 3DETECT AREA MDL0 area of detection 4THRESHOLD MODEL0 threshold values 5PRC PROJECT MDL0 artifact processing 6DETECT MODE MDL1 detection mode 7DETECT DIR MDL1 detection direction 8DETECT AREA MDL1 area of detection 9THRESHOLD MODEL1 threshold values 0PRC PROJECT MDL1 artifact processing qREG REF COORD register reference coodinates...

Page 177: ...om light to dark vertical Point of change from dark to light horizontal Point of change from dark to light vertical A Edge detection point B A B Edge detection point A Light Brightness Dark Light Brightness Dark Direction B Width of edge Width of flat A Edge detection point B A B A Difference in light Direction Width of edge Width of flat Difference in light B Detection direction Detection directi...

Page 178: ...E The X and Y coordinates come from either the point of detection in the reference image or from the point at which the edge was detected in the target image Verify your settings by testing the upper and lower limits for decisions that you have set This can be done using item e MAKE A TEST RUN make a test run For more information about evaluation condition see section 9 2 3 Evaluation conditions E...

Page 179: ...tails Set the recording and display of the results from arithmetical operation for specified output data at any value from 00 to 15 Select the type of data being calculated A number of formula settings are used The first line will change according to the selection made in item 2 Note Please use a smaller number for the number of formulas at N 00 to 15 than that used for 1 CALC RESULT N 00 to 15 Se...

Page 180: ...AL N00 0 15 AUXRLY C000 0 127 4LOGIC SYMBOL 5OUTPUT SIGNAL AUX RLYC000 0 127 DEL 6UPPER MENU PAGE0 INPUT0 LOGIC INPUT1 LOGIC INPUT2 LOGIC INPUT3 LOGIC 1 0 2 3 4 5 6 7 OUT The input signals which may be set depend on the selection made at item 3 as follows For more information on output conditions see the PC Function in Chapter 10 Degree of match M Coordinates X Y Coordinate deviation x y Angular d...

Page 181: ...y in these situations will scroll back through the results in the opposite order Unregistered numbers will be skipped When there are no recorded numbers other than those currently on display or if no measurement has actually been carried out then it will not be possible to scroll through the data The displays for other modes are as follows Continued from the previous page F H C1ALLC2NO VX X TYPE00...

Page 182: ...isions about images which have undergone binary conversion Checking the positional deviation of labels checking for the wrong part or other foreign objects mixing in with the desired parts checking for sufficiently high precision in the mounting of electrical components on PC boards checking for misprints check for missing electrical parts such as terminals and simple inspection of lettering Check...

Page 183: ...nal numerical calculations see page 9 2 4 OBJECT TYPE COND rFINAL OUTPUT COND final output conditions see PC function in Chapter 10 These settings are found in the TYPE00 MEAS1 to 3 menu MAIN OPS MENU SET SCRN SYSTEM SETUP 2OBJECT TYPE COND conditions for object type OBJECT TYPE COND 0MEASUREMENT 1 qMEASUREMENT 2 wMEASUREMENT 3 2COMPARE IMAGES comparative calculations between images See page 9 2 6...

Page 184: ... look like this when item 2 MODE is set to GRAY IMG PROC gray scale processing MEASURING COND TYPE00 MEAS 1 DEG OF MATCH 1REGST NO 00 0 15 REG NO YES 2MODE GRAY IMG PROC BINRY IMG PROC 5EVALUATE CRITERIA TO NEXT SUB MENU 6UPPER MENU The display will look like this when item 2 MODE is set to BINRY IMG PROC binary processing On the MAIN OPS MENU move the cursor to SET SCRN item and press SET key On ...

Page 185: ...3SEARCH AREA MDL0 search area 4DTECT COORD MDL0 detection coordinates 5CONTR PIXEL MDL0 pixel contraction 6MEAS WINDOW MDL1 measurement window 7REF IMAGE MODEL1 reference image 8SEARCH AREA MDL1 search area 9DTECT COORD MDL1 detection coordinates 0CONTR PIXEL MDL1 pixel contraction qDETECT ACCURANCY accuracy of detection wUPPER MENU Setting details Select the measurement window shape for model 0 p...

Page 186: ...ement window 3SEARCH AREA MDL0 2REF IMAGE MODEL0 reference image 4DTECT COORD MDL0 detection coordinates 5CONTR PIXEL MDL0 pixel contraction qDETECT ACCURANCY accuracy of detection wUPPER MENU 1MEAS WINDOW MDL0 measurement window 3SEARCH AREA MDL0 2REF IMAGE MODEL0 reference image 4DTECT COORD MDL0 detection coordinates 5CONTR PIXEL MDL0 pixel contraction 6MEAS WINDOW MDL1 measurement window 7REF ...

Page 187: ...CH Return to the MEASURING COND measurement condition menu and select item 6 UPPER MENU Go to page 9 53 The reference image for model 0 positioning The search area for model 0 positioning Measurement window rectangular The reference image for model 1 object to be measured The search area for model 1 object to be measured The detection coordinates for model 0 positioning The detection coordinates f...

Page 188: ...ference image Set the position of the cursor inside the measurement window If FREE is selected then position of cursor is optional Set the upper and lower limits for binary conversion within the range of 0 to 255 See page 9 7 Setting threshold values in Shared settings Set the inversion of black and white in the image to YES or NO Selecting NO means that the white area is measured after the image ...

Page 189: ...ular window are as follows Example of recording Return to the MEASURING COND measurement condition menu and select item 6UPPER MENU Continued on the follwing page 1REFERENCE IMAGE 3THRESHOLD VALUE 2DETECTED COORD detection coordinates 4INVERT B W black and white inversion 9BINARY PROCESS binary conversion process qBINARY NOIS FILTR eliminating binary noise wNUM OF FILTR PASS the number of cycles t...

Page 190: ... switch between displaying all of the headings together and displaying each one separately using the ESC key The X and Y coordinates come from either the point of detection in the reference image Check your selection by testing the upper and lower limits for the evaluations that you have set This can be done using item 0 MAKE A TEST RUN For more information about evaluation conditions see section ...

Page 191: ...etting details Set the specified output data for recording and displaying the results of arithmetical operation to any value from 00 to 15 Select the type of data being calculated A number of formula settings are used The first line will change according to the selection made in item 2 Note Please use a smaller number for the number of formulas at N 00 to 15 than that used for 1 CALC RESULT N 00 t...

Page 192: ... DEL 6UPPER MENU PAGE0 INPUT0 LOGIC INPUT1 LOGIC INPUT2 LOGIC INPUT3 LOGIC 1 0 2 3 4 5 6 7 OUT The numbers ranging from 00 to 15 in front of the characters are registration numbers The input signals which may be set depend on the selection made at item 3 as follows For more information on output conditions see the PC Function in Chapter 10 3INPUT SIGNAL Degree of match M Coordinates X Y Light leve...

Page 193: ...ts of the numerical calculations N00 to N15 The measurements screen also has this feature Pressing the down key in these situations will scroll back through the results in the opposite order Unregistered numbers will be skipped When there are no recorded numbers other than those currently on display or if no measurement has actually been carried out then it will not be possible to switch back and ...

Page 194: ...ess Measurement for mounting electronic components Measuring an IC package Reference images a and b are recorded when the crosshair cursor is placed on the edge of the IC package Measuring sequence 1 Obtain the center points of images a and b by running a 2 point gray scale search 2 Determine the distance between the two center points Applications For details about measuring the distance X coordin...

Page 195: ...ttings are found in the TYPE00 MEAS1 to 3 object type measurement 1 to 3 menu MAIN OPS MENU SET SCRN SYSTEM SETUP 2OBJECT TYPE COND OBJECT TYPE COND 0MEASUREMENT 1 qMEASUREMENT 2 wMEASUREMENT 3 2COMPARE IMAGES comparative calculation between images See page 9 2 6 4COPY 5INITIALIZATION See page 9 2 items 7 8 3SELECT CAMERA select a camera Auxiliary condition Distance condition Angle condition Auxil...

Page 196: ... COND and press SET key Select item 0 MEASUREMENT 1 qMEASUREMENT 2 or w MEASUREMENT 3 on the OBJECT TYPE COND conditions for object types menu This is how the line looks when the object type is set to 00 and the selected measurement is 1 Set the DST AGL MES measurement of distance and angle which can be found under item 1 MEAS SELECTION select measurements to either GRAY EDGE gray scale search and...

Page 197: ... IMAGE 3SEARCH AREA 4DETECTED COORD detection coordinates 5CONTRACT PIXELS pixel contraction qDETECT ACCURANCY artifact processing wUPPER MENU Setting details Select the shape of the measurement window Record a reference image and then set the search area If X LINE horizontal line or Y LINE vertical line are selected then the UP L upper left and LO R lower right choices in the screen above will be...

Page 198: ... order to record a reference image it is necessary to freeze the frame Specifications for the area of detection 1DETECT MODE 3DETECT AREA 2DETECT DIRECTION 4THRESHOLD VALUE 5PROC PRJECTION qUPPER MENU Menu 1DETECT MODE detection mode 2DETECT DIRECTION detection direction 3DETECT AREA area of detection 4THRESHOLD VALUE threshold values 5PROC PROJECTION artifact processing qUPPER MENU Setting detail...

Page 199: ...dary processing 9LABEL ORDER 0IMAGE PRE PROCESS Setting details Select measurement window type RECTANGLE rectangular CIRCLE circular or ELLIPSE elliptical Set the size and position of the window in units of 1 pixel If circle or ellipse is selected in item 1 then the two variables you must set are the center and diameter Decide whether a mask window will be employed and if so which type rectangular...

Page 200: ...ignored Enter any number from 0 to 245760 This will return you to the MEASURING COND menu Measurement window Mask window Continued from the previous page Setting the DST AGL MES measurement of distance and angle for GRAV center of gravity operations Information about the window settings In order to set a window it is necessary to freeze the frame First freeze the frame Then operate the camera norm...

Page 201: ...on the circumference of the circle Point 1 Point 2 Point 1 Aux 2 P line Point 2 Aux 2 P line The center point is the coordinate half way between points 1 and 2 The auxiliary when LEG has been selected The auxiliary when INTRSCT PT has been selected The center of gravity between points 1 to 3 is calculated as the mean of the three A straight line between points 1 and 2 Crosspoint of the two lines t...

Page 202: ...ates has been selected DISTANCE SETTINGS TYPE00 MEAS 1 DST ANGL MEAS 1DISTANCE NUMBER 00 0 15 2DISTANCE TYPE NO DIST BETW 2PT DIST BETW X DIST BETW Y 3POINT NO 1 ST PNT00 AUX NO 4POINT NO 2 ST PNT00 AUX NO 5UPPER MENU Distance settings 1DISTANCE NUMBER distance selection 2DISTANCE TYPE 3POINT NO 1 4POINT NO 2 5UPPER MENU Setting details Set this to any number from 0 to 15 Set the distance type to ...

Page 203: ...le is measured in a counterclockwise direction and at a negative angle if it is measured in a clockwise direction Relative to the vertical line the line from point 2 that intersects point 1 will be said to at a positive angle if the angle is measured in a counterclockwise direction and at a negative angle if it is measured in a clockwise direction Items 3 and 4 will be displayed unless NO is selec...

Page 204: ...NU TEST RESULT OUT Use the up and down keys to select NO Y0 to 7 or C000 to C127 Alternatively EDGE DETECT tip of the edge or GRAVITY label center of gravity may also be displayed here Check your selection by testing the upper and lower limits for the evaluation that you have set This can be done using item 6 MAKE A TEST RUN For more information about evaluation conditions see section 9 2 3 Evalua...

Page 205: ...T make a test run 7UPPER MENU Setting details Set the recording and display the results from arithmetical operation for specified output data at any value from 00 to 15 Select the type of data being calculated A number of formula settings are used The first line will change according to the selection made in item 2 Note Please use a smaller number for the number of formulas at N 00 to 15 than that...

Page 206: ...e MAIN OPS MENU OUTPUT CONDITIONS TYPE00 MEAS 0 DST ANGL MEAS 1PAGE NO 0 0 4 REG NO YES 2SET POSITION MOVE 3INPUT SIGNAL MATCH M00 0 15 AGL B00 0 15 ST PT S00 0 15 AUX H00 0 15 DST D00 0 15 CAL N00 0 15 AUXRLY C000 0 127 4LOGICAL SYMBOL 5OUTPUT SIGNAL AUX RLYC000 0 127 DEL 6UPPER MENU PAGE0 INPUT0 LOGIC INPUT1 LOGIC INPUT2 LOGIC INPUT3 LOGIC 1 0 2 3 4 5 6 7 OUT DEL Selection of 3 Degree of match M...

Page 207: ...s will be skipped When there are no recorded numbers other than those currently on display or if no measurement has actually been carried out then it will not be possible to switch back and forth between data The following are some examples of other displays Continued form the previous page Pressing the TRG BRT key will run a measurement of distance and angle after manually measuring the starting ...

Page 208: ...METER 362 5 095 9 OK ST PT00 259 0 178 0 ST PT01 466 0 178 0 ST PT02 361 0 228 0 Example of the display of starting point results Example of the display of auxiliary results Starting point number mode Coordinates for starting points and results of decision Match with the reference image This is how the display looks when the gray scale mode is selected ST PNT00 GRAY SEARCH 132 0 298 0 OK MATCH 099...

Page 209: ...nts with variations in those measurements within the reference image 3 Check the length of the leads which is measured based the direction specified before by comparing the shortest and longest L measurements against those within the reference image Lead inspection P1 to P3 The distance between the center of 2 adjacent leads K1 to K4 The center points of leads L1 to L4 Length of lead Number of lea...

Page 210: ... gray scale search for line correction is enabled When gray scale search for line adjustment is disabled Conditions for the reference search Conditions for the inspection object length of lead measurement enabled disabled Conditions for the inspection object length of lead measurement enabled disabled 4COPY 5INITIALIZATION See section 9 2 7 8 3SELECT CAMERA MAIN OPS MENU OBJECT TYPE COND eFINAL CA...

Page 211: ...UPPER MENU On the MAIN OPS MENU move the cursor to SET SCRN and press SET key On the SYSTEM SETUP menu move the cursor to 2 OBJECT TYPE COND conditions of objrct type and press SET key Select item 0 MEASUREMENT 1 q MEASUREMENT 2 or w MEASUREMENT 3 on the OBJECT TYPE COND menu This is how the line looks when the object type is set to 00 and the selected measurement is 1 Measurement conditions 1REGS...

Page 212: ...GE 3SEARCH AREA 4DETECTED COORD detection coordinates 5CONTRACT PIXELS pixel contraction qDETECT ACCURACY detection accuracy wUPPER MENU Setting details Select the shape of the measurement window Record a reference image and then set the search area If X LINE horizontal line or Y LINE vertical line is selected then the UP L upper left LO R lower right choices in the screen above will be ST PNT sta...

Page 213: ...cord a reference image it is necessary to freeze the frame Specifications for the area of detection 1DETECT MODE 3DETECT AREA 2DETECT DIRECTION 4THRESHOLD VALUE 5PROC PROJECTION qUPPER MENU 6LEAD LNG MEAS DIR Menu 1DETECT MODE detection mode 2DETECT DIRECTION detection direction 3DETECT AREA area of detection 4THRESHOLD VALUE threshold values 5PROC PROJECTION artifact processing 6LEAD LNG MEAS DIR...

Page 214: ... VERT vertical If the position of the line used in to detect the object is out of position relative to the reference point then it is adjusted accordingly If this correction is unnecessary then set 1 REGST NO registration number to REG NO disable registration which is in the MEASURING COND measurement condition menu see page 9 74 Return to the MEASURING COND menu and select 6 UPPER MENU Continued ...

Page 215: ...istance between the center points of 2 adjacent leads as shown above falls outside the range of the upper and lower limits specified it will result in an NG evaluation Evaluation conditions 1REGST NO registration number 2X COORD X coordinates 3Y COORD Y coordinates 4MATCH degree of match with the reference Image 5MEAS OBJ measurement object 6NUMBER number of objects 7DISTANCE distance between edge...

Page 216: ...play the results from arithmetical operation for specified output data at any value from 00 to 15 Select the type of data being calculated A number of formula settings are used The first line will change according to the selection made in item 2 Note Please use a smaller number for the number of formulas at N 00 to 15 than that used for 1 CALC RESULT N 00 to 15 Set the upper and lower limits for d...

Page 217: ...T D0 0 7 QTY K0 0 7 L LEN L0 0 7 CAL N00 0 15 AUXRLY C000 0 127 4LOGICAL SYMBOL 5OUTPUT SIGNAL AUX RLYC000 0 127 DEL 6UPPER MENU PAGE0 INPUT0 LOGIC INPUT1 LOGIC INPUT2 LOGIC INPUT3 LOGIC 1 0 2 3 4 5 6 7 OUT The numbers ranging from 0 to 3 in front of the characters are registration numbers The numbers ranging from 0 to 7 after the characters are numbers for the object to be mesured Selection of 3 ...

Page 218: ...the object to be measured the second number then the results of the numerical calculations All of these may be scrolled through in this order 0 0 0 0 7 1 1 0 1 7 2 2 0 2 7 3 3 0 3 7 N00 to N15 0 0 is the number on display in the above illustration Pressing the down key in these situations will scroll backwards through the results Unregistered numbers will be skipped When there are no recorded numb...

Page 219: ...ce or when it has a fixed measurement position This function measures the area of the white field after the image has been converted to binary values i e black and white Checking for correctly inserted ball bearings preventing foreign objects from becoming mixed in with parts being processed distinguishing between different types of waterproof lids checking the existence of labels on packages chec...

Page 220: ...conditions for measurement programs These settings are found in the TYPE00 MEAS1 to 3 menu MAIN OPS MENU SET SCRN SYSTEM SETUP 2OBJECT TYPE COND OBJECT TYPE COND 0MEASUREMENT 1 qMEASUREMENT 2 wMEASUREMENT 3 BINARY AREA COND Conditions for binary areas 4COPY 5INTIALIZATION See section 9 2 7 8 3SELECT CAMERA select a camera MAIN OPS MENU OBJECT TYPE COND eFINAL CALC RESULT final numerical calculatio...

Page 221: ...ges Item 2 will be displayed unless NO is selected in item 8 SELECT CAMERA IMG camera selection which is in the OBJECT TYPE COND menu On the SYSTEM SETUP menu move the cursor to 2 OBJECT TYPE COND conditions of object type and press the SET key Go to item 0 MEASUREMENT 1 item q MEASUREMENT 2 or item w MEASUREMENT 3 on the OBJECT TYPE COND menu and press the SET key This is how the line looks when ...

Page 222: ... FILTR eliminating binary noise 0NUM OF FILTR PASS The number of noise elimination cycles qUPPER MENU Setting details Select the measuring window type RECTANGLE rectangular CIRCLE circular or ELLPSE elliptical Set the size and position of the window in units of 1 pixel If a circle or ellipse is selected in item 1 then the two variables you need to set are the center and diameter Decide whether a m...

Page 223: ...ndition on the TYPE00 MEAS 1 to 3 menu Items 2 and 3 will be displayed if the REGST NO registration number is set to YES on the MEASURING COND menu Check your selection by testing the upper and lower limits for evaluations that you have set This can be done using item 3 MAKE A TEST RUN For more information about evaluation conditions see section 9 2 3 Evaluation condition Evaluation conditions 1RE...

Page 224: ...result 2OBJECT TYPE 3FORMULA 4UPPER LOWER LIMIT 5OUTPUT 6RUN A TEST make a test run 7UPPER MENU Setting details See the recording and display the results from arithmetical operation for specified output data at any value from 00 to 15 Select the type of data being calculated A number of formula settings are used The first line will change according to the selection made in item 2 Note Please use a...

Page 225: ...from the previous page Return to the MAIN OPS MENU DEL OUTPUT CONDITIONS TYPE00 MEAS 1 MEAS BIN AREA 1PAGE NO 0 0 4 REG NO YES 2SET POSITION MOVE 3INPUT SIGNAL T AREA A00 0 15 CAL N00 0 15 AUXRLY C000 0 127 4LOGICAL SYMBOL 5OUTPUT SIGNAL AUX RLYC000 0 127 DEL 6UPPER MENU PAGE0 INPUT0 LOGIC INPUT1 LOGIC INPUT2 LOGIC INPUT3 LOGIC 1 0 2 3 4 5 6 7 OUT Continued on the following page Selection of 3 Tot...

Page 226: ...ion numbers The measurements screen also has this feature Unregistered numbers will be skipped When there are no recorded numbers other than those currently on display or if no measurement has actually been carried out then it will not be possible to switch back and forth between data Continued from the previous page F L C1ALLC2NO VX X TYPE00 OK MEAS XXXXXXms MEAS1 CAM1 MEAS BIN AREA REGST NO 00 0...

Page 227: ...n there is more than one object in an image Measurement of the object s position is optional When the specified pixel field has been converted to a binary image the white areas are measured or identified as separate objects and counted Counting the number of food products or parts Measurement result Number of objects total area Inspection sequence Application 9 8 Counting quantities by binary conv...

Page 228: ... conditions for measurement programs These settings are found in the TYPE00 MEAS1 to 3 menu MAIN OPS MENU SET SCRN SYSTEM SETUP 2OBJECT TYPE COND OBJECT TYPE COND 0MEASUREMT 1 qMEASUREMT 2 wMEASUREMT 3 4COPY 5INTIALIZATION see section 9 2 7 8 3SELECT CAMERA select a camera MAIN OPS MENU OBJECT TYPE COND eFINAL CALC RESULT final numerical calculation see section 9 2 4 OBJECT TYPE COND rFINAL OUTPUT...

Page 229: ...unless NO is selected in item 8 SELECT CAMERA IMG camera selection which is in the OBJECT TYPE COND menu On the MAIN OPS MENU move the cursor to SET SCRN and press SET key On the SYSTEM SETUP menu move the cursor to 2 OBJECT TYPE COND conditions of object type and press the SET key Select item 0 MEASUREMENT 1 q MEASUREMENT 2 or w MEASUREMENT 3 on the OBJET TYPE COND menu This is how the line looks...

Page 230: ...th a dotted line using units of 1 pixel If a circle or ellipse is selected in item 1 then the two variables you must set are the center and the diameter It is possible to set the heading so that the mask window is actually bigger than the measurement window Set the upper and lower limits for binary conversion within the range of 0 to 255 See setting threshold values in shared settings on page 9 7 ...

Page 231: ...UN SET KEY 5UPPER MENU Check your selection by testing the upper and lower limits for evaluations that you have set This can be done using item 4 MAKE A TEST RUN For more information about evaluation conditions see section 9 2 3 Evaluation conditions Information about the window settings In order to set a window it is necessary to freeze the frame First freeze the frame Then operate the camera nor...

Page 232: ...T TYPE type 3FORMULA 4UPPER LOWER LIMIT 5OUTPUT 6RUN A TEST RUN make a test run 7UPPER MENU Setting details See the recording and display the results from arithmetical operation for specified output data at any value from 00 to 15 Select the type of data being calculated A number of formula settings are used The first line will change according to the selection made in item 2 Note Please use a sma...

Page 233: ...Function in Chapter 10 Continued from the previous page Return to the MAIN OPS MENU DEL OUTPUT CONDITIONS TYPE00 MEAS 1 CNT BIN OBJ 1PAGE NO 0 0 4 REG NO YES 2SET POSITION MOVE 3INPUT SIGNAL REGT NO 0 0 3 T ARA A QTY K CAL N00 0 15 AUXRLY C000 0 127 4LOGICAL SYMBOL 5OUTPUT SIGNAL AUX RLYC000 0 127 DEL 6UPPER MENU PAGE0 INPUT0 LOGIC INPUT1 LOGIC INPUT2 LOGIC INPUT3 LOGIC 1 0 2 3 4 5 6 7 OUT Continu...

Page 234: ...ipped When there are no recorded numbers other than those currently on display or if no measurement Continued from the previous page F L C1ALLC2NO VX X TYPE00 OK MEAS XXXXXXms MEAS1 CAM1 CNT BIN OBJ REGST NO 00 0 3 NUMBER 00006 OK TOTAL ARA 004434 OK Final evaluation results Measuring time Measurement number camera number and measurement program title Total area in pixels and evaluation results Re...

Page 235: ... is converted to a binary image The number of objects total size of the white area the objects and the area center of gravity main axis angle fillet diameter and circumference of each white area can be measured Counting the number of food products or parts measuring the sloped angle or center of gravity of parts and measuring the size of food products Measurement of 6 objects Measured results Obje...

Page 236: ...n 9 2 4 OBJECT TYPE COND rFINAL OUTPUT COND final output conditions see PC Function in Chapter 10 1 MEAS SELECTION measurement selection Select LABEL BIN OBJ object identification by binary conversion 6 MEAS PROG COND conditions for measurement programs MAIN OPS MENU These settings are found in the TYPE00 MEAS1 to 3 menu MAIN OPS MENU SET SCRN SYSTEM SETUP 2 OBJECT TYPE COND OBJECT TYPE COND 0 MEA...

Page 237: ...2 or w MEASUREMENT 3 on the OBJECT TYPE COND menu TYPE00 MEAS1 1MEAS SELECTION NO CHECK DEG OF MATCH DST AGL MES GRAY EDGE GRAV INSPECT LEAD MEASR BIN AREA CNT BIN OBJ LABEL BIN OBJ POINT MEAS 2COMPARE IMAGES NO YES CAM1 3SELECT CAMERA CAM1 CAM2 4COPY EXEC TYPE00 MEAS1 NO 5INITIALIZATION EXEC 6MEAS PROG COND TO NEXT SUB MENU 7EVALUATION COND TO NEXT SUB MENU 8NUMERIC CALC COND TO NEXT SUB MENU 9OU...

Page 238: ...NO EXP CONTR CONTR EXP wNUM OF FILTR PASS EXPD 0 0 5 CONTR0 0 5 eAREA FILTER 000000PIXEL LOWER LIMIT rUPPER MENU Select whether to invert the black and white in the image YES or NO NO means the white area will be measured after the image has been converted to binary values YES means the black area will be measured after the image has been converted to binary values Select either fixed or threshold...

Page 239: ...rst freeze the image Then operate the camera normally Finally freeze the image again The first frozen image that was taken will be converted to binary values and this will be the final binary image The second frozen image that was taken may also be converted to a binary image by repeating steps 1 to e above Window settings Continued from the previous page Continued on the following page Fillet wid...

Page 240: ...aximum label size area that will produce an OK result The center of gravity main axis angle fillet width perimeter will be displayed when measurement is set to YES on the MEASURING COND menu Items 2 to 6 will be displayed if REGST NO registration number is set to YES on the MEASURING COND measurement conditions menu After performing a MAKE A TEST RUN at item 6 the number of objects identified will...

Page 241: ...X GY Main axis angle of label B Fillet width by label FX FY Circumference by label CR Registration 0 0 to 3 Label 000 0 to 127 N00 0 to 15 Numerical calculation NC Constant C ABS TAN ATAN N00 0 to 15 The second line is not be displayed 00000000 0 The second line is not be displayed Note Please use a smaller number for the number of formulas at N 00 to 15 than that used for 1 CALC RESULT N 00 to 15...

Page 242: ...INPUT1 LOGIC INPUT2 LOGIC INPUT3 LOGIC 1 0 2 3 4 5 6 7 OUT Continued from the previous page If item 1 PAGE NO register number is set to YES then items 2 to 5 will be displayed The input signals which may be set depend on the selection made in item 3 as follows Selection of 3 Total area A Number of objects K Area by label R Calculation N Auxiliary relay C Input signals The numbers ranging from 0 to...

Page 243: ...sed the display can scroll through the data in reverse order The measurements screen also has this feature Unregistered numbers will be skipped When there are no recorded numbers other than those currently on display or if no measurement has actually been carried out then it will not be possible to switch back and forth between data Continued from the previous page When the TRG BRT key is pressed ...

Page 244: ...condition of LEDs or fluorescent character display tubes and sorting household electric appliances Inspection at 6 points The presence or absence of target objects is examined A simple black or white evaluation is made in the specified pixel area of binary images The light level in the specified pixel area is averaged and a decision is made whether or not it is within the specified lightness range...

Page 245: ...ECTION Select the POINT MEAS area measurement by binary conversion 7EVALUATION COND evaluation condition 9OUTPUT CONDITIONS output condition MAIN OPS MENU SET SCRN SYSTEM SETUP 2OBJECT TYPE COND OBJECT TYPE COND 0MEASUREMENT 1 qMEASUREMENT 2 wMEASUREMENT 3 6MEAS PROG COND conditions for measurement programs 4COPY 5INTIALIZATION see section 9 2 7 8 3SELECT CAMERA select a camera MAIN OPS MENU OBJEC...

Page 246: ... item 1 PROCESSING MODEis set to AV LIGHT LEVEL average light level Measurement conditions Setting details 2 BINARY CONV COND processing binary images 3 THRESHOLD VALUE 4 SET POINT point setting Set a point on the next menu 1 PROCESSING MODE Select the processing mode BIN CONV binary or AV LIGHT LEVEL averabe light level When the BIN CONV binary processing mode is selected Select either fixed or t...

Page 247: ...ered as a block in unit of 1 pixel Min 0 pixel Store the settings as a block Delete all of the registered points in a block Returns you to the MEASURING COND measurement condition menu 4 BLOCK LAYOUT 5 BLOCK SPACING 6 STORE BLOCK COND 7 DELETE BLOCK COND 8 PRIOR MENU Set the starting point position A group of pixels used as a point are treated as a single pixel The point identifying a block is the...

Page 248: ...majority of the objects to be measured is seen as black Example When the object to be measured is an 8 x 8 area 64 pixels and white was selected for an OK judgement if the amount of white in the area is 33 pixels or more a judgment of OK will be produced Not displayed for point numbers which have not been previously registered on the point setting menu These displays can be set using the up and do...

Page 249: ... C000 to C127 From page 9 110 When AV LIGHT LEVEL average light level is selected for the processing mode Return to the TYPE00 MEAS1 to 3 menu and select item 9 OUTPUT CONDITIONS EVALUATION COND TYPE00 MEAS 1 POINT MEAS 1 CHG PAGE TEST RUN TEST RESULT OUT 2 P000 000 255 100 OK NO 3 P001 000 255 100 OK NO 4 P002 000 255 100 OK NO 5 P003 000 255 100 OK NO 6 P004 000 255 100 OK NO 7 P005 8 P006 9 P00...

Page 250: ... CONV binary was selected for the processing mode Continued from the previous page When AV LIGHT LEVEL average light level is selected for the processing mode DEL OUTPUT CONDITIONS TYPE00 MEAS 1 POINT MEAS 1 PAGE NO 0 0 4 REG NO YES 2 SET POSITION MOVE 3 INPUT SIGNAL POINT NO 000 0 255 AUXRLY C000 0 127 4 LOGICAL SYMBOL 5 OUTPUT SIGNAL AUX RLYC000 0 127 DEL 6 UPPER MENU PAGE0 INPUT0 LOGIC INPUT1 L...

Page 251: ... registered points Display of the measured results Form the preceding page Object to be measured White display Black display OK NG NG OK White Black Evaluation condi tion OK The following is an example of how the results are displayed when AV LIGHT LEVEL average light level is selected for the processing mode Average light level of registered points and the OK NG evaluation of each When the cursor...

Page 252: ... 2 POSITION using the up and down keys and press the SET key Then set the size and position of the monitoring window using the direction keys The monitoring window should be placed in a location with medium brightness which does not contain any objects to be measured The monitor window is a rectangle 4 to 32 pixels tall and 4 to 64 pixels wide se in multiples of 4 pixels The monitor window can be ...

Page 253: ...level will be registered This average light level is required when threshold value correction is selected in the binary conversion method If the average light level has not been registered you will see error 22 BIN MON LIGHT LVL NOT SET the light level check function has not been enabled The registered light level is the reference value used when threshold values are modified If the current screen...

Page 254: ... the screen The object is blurred across the screen 2 Shutter speed Setting procedure 1 Select item 6 SHUTTER SPEED using the up and down keys and press the SET key 2 Move the cursor to the digit you want to set using the left and right keys 1 0 0 0 6 0 This will move the cursor to the left and right 3 Set the value using the up and down keys 4 Repeat steps 2 and 3 to set each digit After setting ...

Page 255: ...s with external devices Power ON sequence Power ON Input refresh Ladder circuit calculation final output conditions Output refresh Image processing for measurement 0 using camera 1 Ladder circuit calculation based on output conditions for measurement 0 of camera 1 Measurement processing for measurement 0 using camera 2 Ladder calculation based on output conditions for measurement 0 of camera 2 Mea...

Page 256: ...tions have been set calculations will be executed Each measurement obtained is judged to be OK or NG based on the criteria entered by the user If it is OK 1 ON will be used as the input condition for the following calculation on the ladder circuit and if it is NG 0 OFF will be used 2 Ladder circuit calculation based on output conditions for measurements 0 to 3 The values obtained from the measurem...

Page 257: ...circuit program can be created on each page from 0 to 4 consisting of 4 rows each of which has 8 terminals and 1 output relay Therefore a ladder circuit can be created that consists of 20 rows in all one row contains 8 terminals and 1 output relay Calculations will be carried out in the order of the page numbers 0 1 2 3 and 4 1 0 2 3 4 5 6 7 Output Input 0 Input 1 Input 2 Input 3 Page 0 Page 1 Pag...

Page 258: ...ment program and see page 10 7 for details about the auxiliary relays 4 Move the cursor to item 4 LOGICAL SYMBOL with the up and down keys and press the SET key 5 Move the cursor to the logic symbol to be used for the input signal selected in step 3 and press the SET key The logic symbols and the input signals will be displayed as a ladder circuit Display example Logic symbol Function Deletes a co...

Page 259: ...3 Creation example Note Output relays cannot be used in series on a ladder circuit Change circuit a to circuit b 5 Storing the circuit in the IV S20 memory RAM 1 Move the cursor to item 6 UPPER MENU with the up and down keys and press the SET key The screen will return to the TYPE MEAS menu and the ladder circuit creation process will be finished 2 1 OUTPUT CONDITIONS TYPE00 MEAS 0 POS DEVIATION 1...

Page 260: ...ing object 00X1 to 15X1 0X to 3X Model 0 0Y0 to 7Y0 Model 1 0Y1 to 7Y1 Model 0 0x0 to 7x0 Model 1 0x1 to 7x1 Model 0 0y0 to 7y0 Model 1 0y1 to 7y1 Model 0 positioning 00Y0 to 15Y0 Model 1 measuring object 00Y1 to 15Y1 Model 0 positioning 00G0 to 15G0 Model 1 measuring object 00G1 to 15G1 0Y to 3Y Area measurement by binary conversion Counting quantities by binary conversion Label measurement by bi...

Page 261: ...turned OFF when it is out of the range C117 Illuminance monitor error C120 to C127 counter reset Turned OFF when the illumination exceeds the upper or lower warning level of the illuminance monitor set on the MONITOR LIGHT LVL menu page 9 115 Warning light levels can be set for each of the cameras 1 and 2 separately This relay is turned OFF when either one of them exceeds the upper or lower level ...

Page 262: ... TO NEXT SUB MENU 5POS ADJ CAMERA1 NO ADJ REG 0 1PNTSXY 6MEAS 0 CAMERA2 NO TO NEXT SUB MENU 7POS ADJ CAMERA2 NO ADJ REG 0 1PNTSXY 8SELECT CAMERA IMG NO CAM1 CAM1 CAM1 2 0MEASUREMENT 1 NO TO NEXT SUB MENU qMEASUREMENT 2 NO TO NEXT SUB MENU wMEASUREMENT 3 NO TO NEXT SUB MENU eFINAL CALC RESULT TO NEXT SUB MENU rFINAL OUTPUT COND TO NEXT SUB MENU tSYSTEM IN OUT TO NEXT SUB MENU yHALT MEAS ON NG NO YE...

Page 263: ...to 7 consisting of 4 rows each of which has 8 terminals and 1 output relay Therefore a ladder circuit can be created that consist of 32 rows in all one row contains 8 terminals and 1 output relay Calculations will be carried out in the order of the page numbers 0 1 2 3 4 5 6 and 7 2 Ladder circuit creation 1 setting input signals 1 Move the cursor to item 2 SET POSITION with the up and down keys a...

Page 264: ...respective counters is turned ON the corresponding terminal is turned OFF See page 10 7 for details about the auxiliary relays C000 to C127 3 Move the cursor to item 4 LOGICAL SYMBOL with the up and down keys and press the SET key 4 Move the cursor to the logic symbol to be used for the input signal selected in step 3 and press the SET key The logic symbols and the input signals will be displayed ...

Page 265: ...adder circuit 2 setting output signals 1 Move the cursor to item 2 SET POSITION with the up and down keys and press the SET key Move the cursor to the row where a ladder circuit output relay will be placed and press the SET key An output relay can only be placed only on rows where input signals have already been placed 2 Move the cursor to item 5 OUTPUT SIGNAL with the up and down keys and press t...

Page 266: ...erminal will be turned OFF CN0 to CN7 While the counter reset relay is OFF if a counter instruction input is cycled from OFF to ON the number of times you set set value 000 to 999 the counter terminal will be turned ON Decrementing type When the counter reset relay is turned ON the counter terminal is turned OFF Create a circuit to turn the counter reset relay ON and OFF on the row following a row...

Page 267: ... item 6 UPPER MENU with the up and down keys and press the SET key The screen will return to the OBJECT TYPE COND menu and the ladder circuit creation process will be finished PAGE0 INPUT0 LOGIC INPUT1 LOGIC INPUT2 LOGIC INPUT3 LOGIC 1 0 2 3 4 5 6 7 OUT C000 Y00 C001 C001 X0 X1 TM0 Y01 TM0 0150 From the preceding page 1 4LOGICAL SYMBOL 5OUTPUT SIGNAL OUT Y00 0 15 AUXRLY C000 0 127 TMR TM0 0 7 SET ...

Page 268: ... coordinate and degree of match are within acceptable ranges the auxiliary relay C000 is turned ON Reference image registration No 0 Object to be measured Search area Reference image registration window Shape NG degree of match NG Positional deviation NG X coordinate Y coordinate NG 0X0 C000 0Y0 0M0 Coordi nate X Coordi nate Y Degree of match OK C119 Y00 NG output C118 Y01 C117 Y02 C000 Measuremen...

Page 269: ...nal device will not receive the measurement results In this case a pipeline control type of circuit should be created so that the external device can receive the measurement results in the next cycle C119 Y00 NG output C000 Measurement termination OK External trigger input BUSY External output Y00 Y00 C000 OK TM0 C119 TM0 C119 0010 10ms 10 100ms 100ms NG output Measurement termination External tri...

Page 270: ...HNG RUN SCRN MANL TYP CHG F L C1ALLC2NO VX X C1 002 2 OK C2 100 0 OK TYPE00 AREA1 OK C112 MEAS XXXXXXms TMR TM0 250 TM1 TM2 TM3 TM4 TM5 TM6 TM7 CNT CN0 060 CN1 CN2 CN3 CN4 CN5 CN6 CN7 FIAL NUMERIC CALC AN00 00008600 0 AN01 AN02 AN03 AN04 AN05 AN06 AN07 X00 06 Y00 07 C000 007 BUSY 7 1 2 3 4 5 6 The other data displayed is the same as on the MAIN OPS MENU See page 7 2 Select BUSY or READY on the I O...

Page 271: ... e g a p e e S s e g a m i n e e w t e b n o i t a l u c l a C y r o m e m 7 2 l a n i f f o n o i t c e r r o C t n e m e g d u j a e r a D N O C E P Y T T C E J B O e h t n o 5 X t u p n i l e l l a r a p e h t n e h W e h t f o y n a e r a s t n e m e r u s a e m 0 2 S V I e h t f i d n a N O s i n e e r c s t n e m g d u j a e r a l a n i f e h t f o s t i m i l r e w o l d n a r e p p u e h t...

Page 272: ...LLEL SERIAL CCD TRIG 3SERIAL OUTPUT NO PC LINK SERIAL INPUT PARALLEL 4CHG MEAS NO X5 X6 NO YES 5PARALLEL INPUT X5 EXT INP REG REF IMG MSR0 COMPARE IMAGES 6PARALLEL INPUT X6 EXT INP CHG IMG OUT CAM CAM MEAS 7OUTPUT STATUS BUSY READY 8SERIAL CONDITIONS TO NEXT SUB MENU 9COMPUTER LINK TO NEXT SUB MENU 0GAIN OFFSET TO NEXT SUB MENU q UPPER MENU I O SETTING T ARA EVALUATION ADJ 00 1 The display of item...

Page 273: ...t sampling Object type change Result output 2 Measurement number switching terminals X5 and X6 If item 4 CHG MEAS NO X5 X6 on the I O SETTINGS menu has been set to YES the measurement program numbers in combination with measurement number 0 can be specified from the following 4 combinations by turning ON or OFF the input terminals INPUT X5 and X6 1 MEAS TRIG INP I F PARALLEL SERIAL CCD TRIG 4 CHG ...

Page 274: ... auxiliary relays turn OFF Parallel output is valid for PC control after the measurement result is determined Parallel output Y0 to Y7 1 Measurement start input parallel object type change parallel result output parallel The conditions for outputting the results to the output signals Y0 to Y7 are set by the PC function See Chapter 10 PC Function 1 MEAS TRIG INP I F PARALLEL SERIAL CCD TRIG 3 SERIA...

Page 275: ...V S20 to the PC in the following cases When the power is applied to the IV S20 When a write mode nonconformity error code 10 H occurs after a result write command WRG is transmitted when the power is disconnected from the PC When the output method is changed from the serial interface to the computer link Terminate measurement C119 P C P C P C P C P C P C P C P C P C P C P C P C P C P C P C P C P C...

Page 276: ...page 11 20 Time chart Note Result output The data to be sent to the personal computer will be response of general purpose serial command code 11 H P C P C P C P C P C P C P C P C P C P C P C P C P C P C P C P C P C Terminate measurement C119 Result output Result output Result output Result output Measurement start input X0 10 ms or more 10 ms or more 10 ms or more Object type number input X1 to X4...

Page 277: ...nt execution commands codes 10 11 12 and 13 H Time chart P C P C P C P C P C P C P C P C P C P C P C P C P C P C P C P C P C P C P C P C P C P C P C Result output Result output Result output Result output 5 ms or less BUSY output Measurement result is valid at the end of a measurement PC calculation condition Terminate measurement C119 Halt PC operation during measurement Halt PC operation during ...

Page 278: ...terminal is ON When it is turned OFF the sampling will stop During sampling will flash in the upper right corner of the MAIN OPS MENU 2 After the measurement is terminated the sampling will be restarted when the X0 terminal is changed from OFF to ON Time chart P C P C P C P C P C P C P C P C P C P C P C P C P C P C P C P C P C P C P C P C P C P C P C P C P C P C P C P C Result output Result output...

Page 279: ...hile this input terminal is ON When it is turned OFF the sampling will stop During sampling will flash in the upper right corner of the MAIN OPS MENU 2 After the measurement is terminated the sampling will be restarted when the X0 terminal is changed from OFF to ON Time chart P C P C P C P C P C P C P C P C P C P C P C P C P C P C P C P C P C P C P C P C P C P C P C P C P C P C Result output Resul...

Page 280: ...n the start sampling input X0 is turned ON the CCD trigger is enabled Sampling starts Note 1 When the settings listed in section 11 3 CCD trigger have not been made a CCD TRIGGER NOT SET error 34 will occur Note 2 Start sampling input X0 1 Sampling will be performed while this input terminal is ON When it is turned OFF the sampling will stop During sampling will flash in the upper right corner of ...

Page 281: ...mpling by turning ON measurement start input BUSY signal is turned OFF at the clusion of the result output Start accd sampling by turning OFF measurement start input X0 CCD trigger window not highlighted Object type number input X1 to X4 Specified object type number Black White Trigger Trigger Black BUSY output Terminate measurement C119 Measurement result is valid at the end of a measurement PC c...

Page 282: ...have not been made a CCD TRIGGER NOT SET error 34 will occur Time chart Note Result output The data in the block No set in item 5 COMPUTER LINK OUT SERIAL OUTPUT on the OBJECT TYPE I O menu will be transmitted to the personal computer See page 11 20 P C P C P C P C P C P C P C P C P C P C P C P C P C P C P C P C P C P C P C P C P C P C P C P C P C P C P C P C P C P C P C P C Result output Result o...

Page 283: ...n section 11 3 CCD trigger Setting order 1 2 3 9 Measurement start input CCD trigger start sampling auto object type change result output parallel Time chart when auto mode edge is selected for as the CCD sampling start P C P C P C P C P C P C P C P C P C P C P C P C P C P C P C P C P C P C Result output Result output CCD trigger cycle CCD trigger window not highlighted Object type number input X1...

Page 284: ...pleted White White Trigger Trigger Trigger Black Black Black BUSY output Measurement result is valid at the end of a measurement PC calculation condition Parallel output Y0 to Y7 Halt PC operation during measurement Halt PC operation during measurement Halt PC operation during measurement When the object type is changed all Y output and auxiliary relays turn OFF Parallel output is valid for PC con...

Page 285: ...is received Select one of the following Configuration example IV S20 main housing Power supply 24 VDC Monitor Camera 1 image capturing CCD trigger Camera 2 image capturing Remote key pad Data Settings listed in section 11 3 CCD trigger Setting order 1 2 3 8 CCD trigger Work Black White Edge Level Measurement Personal computer 10 Measurement start input CCD trigger start sampling auto object type c...

Page 286: ...el output is valid for PC control after the measurement result is determined When a trigger signal is input during sending object type change command this command will be invalid Turn OFF BUSY signal by termination of result output P C P C P C P C P C P C P C P C P C P C P C P C P C P C P C P C P C P C P C P C P C Result output Result output Result output Result output CCD trigger cycle Serial CCD...

Page 287: ... adjusted every time the object type was changed However since this function eliminates the necessity of physical position adjustments the changeover time can be reduced 11 3 CCD trigger 1 Outline This function samples a specified part trigger window of an image captured by the CCD camera at a high rate and starts the measurement when the sampled image changes Therefore moving objects can be measu...

Page 288: ...e image display mode from the through mode to the freeze mode and capture an image 4 Move the cursor to item 1 SIZE with the up and down keys and press the SET key Set the CCD trigger window size Select the height or width field with the left and right keys set the height or width pixel count with the up and down keys and press the SET key The window size height width must be 4 to 32 and 4 to 64 r...

Page 289: ...Note 1 Use an even address as the write start address Note 2 When 512 bytes are used for a write register on a Sharp model select a write start address from the following addresses 09000 19000 29000 39000 49000 59000 69000 79000 89000 99000 COMPUTER LINK 1 PC MANUFACTURER SHARP COMM PORT LNK MDL MITSUBISHI OMRON 2 STATION NUMBER 00 3 WRITE TOP ADDRESS D0000 4 CONTROL PROCEDURE FORM1 FORM4 5 BLOCK ...

Page 290: ...programmable controller or a personal computer 1 In the case of a communication interface general purpose serial IF output blocks can be specified only when the measurement is started by a CCD trigger or a parallel IF signal and the results are set by a general purpose serial IF signal See page 13 2 Enter item 5 COMPUTER LINK OUT SERIAL OUTPUT on the OBJECT TYPE I O menu to specify selection see t...

Page 291: ...ress the SET key On the OBJECT TYPE COND menu move the cursor to item t SYSTEM IN OUT and press the SET key 2 Setting operating procedure 1 Move the cursor to item 5 COMPUTER LINK OUT SERIAL OUTPUT with the up and down keys and press the SET key 2 Enter the program No camera No and block No of the measurement data to be output using the left right up and down keys Specify a block number to be retu...

Page 292: ... of the image signals from the CCD camera is changed As the gain value is reduced the screen will become lighter and as the gain value is increased the screen will become darker The offset for camera 2 is adjusted with the up and down keys The adjustment procedure is the same as that in Item The gain for camera 2 is adjusted with the up and down keys The adjustment procedure is the same as that in...

Page 293: ...nge to another menu it will be displayed in the selected language Display example SYSTEM SETUP menu shown above in the English mode 1 2 設定メイン画面 1運転画面条件 下位メニュー 2品種別条件 下位メニュー 3入出力条件 下位メニュー 4カメラ取付調整 下位メニュー 5表示モード JAPANESE ENGLISH 6全パラメータ受信 実行 7全初期化 実行 8自己診断 実行 9フラッシュメモリ保存 実行 0運転 On the MAIN OPS MENU move the cursor to SET SCRN and press the SET key SYSTEM SETUP 1OPS MENU SETTING TO NEXT SUB MENU 2OB...

Page 294: ...layed on the target IV S20 IV S20 Opposite side MAIN OPS MENU IV S20 SYSTEM SETUP menu All parameters system I O data and data about all object types are downloaded 9 6 19 2 38 4 57 6 115 2 Conduct a communication test before using the moduleto transfer data Communication speed k bps Cable length 15 m max 2 to 3 m 1 6 FL1 FL2 RS 232C Memory protection 1 Memory protection 2 1 6 FL1 FL2 Memory prote...

Page 295: ...s the ESC key to abort initialization Initialization will start and the progress of the initialization will be displayed on the bottom of the screen When initialization is complete the message INITIALIZING initializing will change to INIT COMPLETE complete initialization 1 SYSTEM SETUP 1OPS MENU SETTING TO NEXT SUB MENU 2OBJECT TYPE COND TO NEXT SUB MENU 3I O CONDITIONS TO NEXT SUB MENU 4ADJ CAM P...

Page 296: ...ed in the IV S20 flash memmory the display will change from SAVING saving to SAVING COMPLETE complete saving Note If the ESC key is pressed the set data entered will not be saved in the IV S20 flash memory In this case if the power to the IV S20 main housing is turned OFF or if the object type No is changed the data will be deleted The set data you have entered can be saved in the IV S20 flash mem...

Page 297: ...is replaced or a camera is dislocated will be displayed as a white image When the adjustment is complete the image is displayed as black Display examples To make a fine adjustment the camera position can be adjusted by comparing the fillet diameters centers of gravity and average light levels before and after a camera is replaced or a camera is dislocated 2 Adjustment items and methods Image befor...

Page 298: ...in item 9 6 If the number of labels exceeds the maximum number of labels which can be stored 32 use an area filter 7 You can check the centers of gravity fillet diameters and average light levels of each label from No 1 up to the maximum number using the up and down keys Go to the next page 6 7 5 2 4 1 1SELECT A CAMERA CAM1 1 2 NO YES 2WINDOW POSITION MOVE UP L 224 208 LO R 287 271 3THRESHOLD VALU...

Page 299: ...tment Detailed adjustment 8 Press the SET key on item 6 DISP DEG OF MATCH 9 Compare the values before and after the camera is replaced which are shown in item 9 DISPLAY LABELS None Adjusting the camera position direction Mismatch Mismatch Mismatch Adjustment of size comparison of fillet diameters Match Match Match Adjusting the camera position direction Adjustment of position comparison of the cen...

Page 300: ...pe number will be displayed and the next FROM PROG CHECK program check will be started without checking the conditions of the remaining object types 2 Press any key on the remote key pad and the screen will return to the SYSTEM SETUP menu 1 SYSTEM SETUP 1OPS MENU SETTING TO NEXT SUB MENU 2OBJECT TYPE COND TO NEXT SUB MENU 3I O CONDITIONS TO NEXT SUB MENU 4ADJ CAM POSITION TO NEXT SUB MENU 5DISPLAY...

Page 301: ...E d n a t l u s e r n o i t a u l a v e e h t s t u p t u o d n a e p y t 0 k c o l b n i a t a d t n e m e r u s a e m n o i t u c e x e t n e m e r u s a e M t l u s e r n o i t a u l a v e 7 n o i t c n u f a t a d l a c i r e m u n t n e m e r u s a e m A 1 t c e j b o d e i f i c e p s a r o f t n e m e r u s a e m a s e t u c e x E d n a t l u s e r n o i t a u l a v e e h t s t u p t u o d ...

Page 302: ...6 g n i d u l c n i s e u l a v l a i t i n i o t n o i t i d n o c t e s l l a t e S a e r a g n i t t e s m e t s y s d n a s g n i t t e s O I 3 1 3 1 s n o i t i d n o c t n e m e r u s a e m e z i l a i t i n I 1 6 d e n g i s s a e h t f o s n o i t i d n o c t n e m e r u s a e m t e S s e u l a v l a i t i n i o t e p y t c e j b o e g a m i e c n e r e f e r e z i l a i t i n I 2 6 a t a ...

Page 303: ...3 Processing other than measurement execution processing Any processing can be executed irrespective of the input output settings measurement start input and result output IV S20 Measuring for each object type 1 Receiving a command 2 Transmitting a response Personal computer measurement data and judgment CCD camera or programmable controller Personal computer or programmable controller IV S20 Meas...

Page 304: ...ed to complete a checksum for error detection use an at sign ASCII code 40 H in each of the checksum codes SCH and SCL included in the command Error detection using a checksum The ASCII code for each data byte from the processing code to the end of text prior to the checksum code is added The final value is compared to the checksum code which is treated the same way If the two values are identical...

Page 305: ...hecksum code The ASCII code for each byte of data from the processing code to the end of text prior to the checksum code is added together The lower 1 byte of this sum is divided into the upper 4 bits and the low order 4 bits The hex character 0 to F is converted to the ASCII code for that character and sent as one byte Thus the checksum code consists of two bytes This manual uses the following no...

Page 306: ...o 3 Measurement 0 0 none 1 positional deviation absolute position measurement camera 1 and camera 2 Measurement 1 to 3 0 none 2 shape and size comparison 3 distance angle measurement gray edge 4 distance angle measurement center of gravity 5 lead inspection 6 area measurement after binary conversion 7 object counting after binary conversion 8 label measurement after binary conversion 9 existence d...

Page 307: ...0 0 1 0 0 0 0 Object type Processing code X coordinate of 1st point X coordinate of 2nd point Output evaluation result Termination code 0 6 4 0 0 6 E 0 0 D 9 8 0 6 9 0 0 0 0 0 8 E C R Y coordinate of 1st point Y coordinate of 2nd point Angular deviation Measurement number 0 camera 2 no setting for measurement numbers 1 to 3 Setting for measurement number 0 camera 1 positional deviation absolute po...

Page 308: ...ch measurement function are output The contents of the command and response are the same as those for the measurement execution function 2 code 11 H 3 Measurement execution function 7 evaluation result measurement numerical data code 1A H The measurement for a specified object type is executed and the evaluation result OK NG of each measurement function and the data from a specified measurement bl...

Page 309: ...ons 0 to 3 Measurement function 0 0 none 1 positional deviation absolute position measurement Measurement functions 1 to 3 0 none 2 shape and size comparison 3 distance angle measurement gray edge 4 distance angle measurement center of gravity 5 lead inspection 6 area measurement after binary conversion 7 object counting after binary conversion 8 label measurement after binary conversion 9 existen...

Page 310: ...easurement was executed 00 to 15 Output evaluation result Y0 to Y15 _ 0 NG or unspecified 1 OK 2 _ Logical result calculation evaluation calculation result These data are output in the order of the measurement function numbers 0 to 3 4 Illuminance level reading code 28 H The illuminance level measured by the illuminance monitor function and the evaluation result are read Camera No _ 1 camera 1 2 c...

Page 311: ... _ Object type for which the measurement was executed 00 to 15 Result _ 0 NG 1 OK Corrected light level _ Corrected light level 0 to 255 0 Reference light level _ Light level used as the criterion 0 to 255 0 Ë Response 2 9 RC H RC L Corrected light level Reference light level 102 101 100 102 101 100 10 1 10 1 SC H SC L CR Result 2 9 SC H SC L Ë Command CR Object type Camera No Camera No _ 1 camera...

Page 312: ...rocess code Process function Communication format 1 Set operation screen lock status 51 5 4 SC H SC L Ë Response CR Object type 5 4 Ë Command SC H SC L CR RC H RC L Read object type number 54 5 5 SC H SC L Ë Response CR 5 5 Ë Command SC H SC L CR RC H RC L Assign object type number 55 Object type 5 8 Ë Command SC H SC L CR Ë Response 5 8 SC H SC L CR RC H RC L 1 1_Camera 1 2_Camera 2 0 No 1 All 2 ...

Page 313: ...ement conditions 61 6 2 SC H SC L Ë Response CR Object type Object type 6 2 Ë Command SC H SC L CR RC H RC L Initialize reference image 62 6 3 SC H SC L Ë Response CR 6 3 Ë Command SC H SC L CR RC H RC L Initialize I O conditions 63 Object type Object type 6 4 Ë Command SC H SC L CR Ë Response 6 4 SC H SC L CR RC H RC L 6 8 Ë Command SC H SC L CR Ë Response 6 8 SC H SC L CR RC H RC L Initialize sy...

Page 314: ...g Assignment Process code Communication format Command Response X coordinate 000 to 511 for detect point 0 Y coordinate 000 to 479 for detect point 0 X coordinate 000 to 511 for detect point 1 Y coordinate 000 to 479 for detect point 1 Command Response X coordinate 000 to 511 for detect point 0 Y coordinate 000 to 479 for detect point 0 X coordinate 000 to 511 for detect point 1 Y coordinate 000 t...

Page 315: ...conversion Counting quantities by binary conversion Object identification labeling by binary conversion Final numerical calculation result Existance detection by point measuremet Binary conversion 0 Average light level 0 1 0 1 10 to 13 20 to 23 30 to 33 40 to 43 60 to 77 0 1 0 1 2 0 1 0 1 0 0 0 Registration No 0 Registration No 1 to 7 X Y X Y None None None None Provided 4 4 4 4 4 1 1 1 1 1 Block ...

Page 316: ...ta as the registration No 0 1st point 2nd point 1st point 2nd point 1st point 2nd point 1st point 2nd point Deviation X Y X Y X Y X Y 2 2 2 2 None None None None None None None None 01 01 01 01 OK OK OK OK Evaluation Deviation 1st point The values shown in the data example column have been converted the same way as wad done in example of the data in block 0 Decimal point digit Measure ment result ...

Page 317: ... match Evaluation Position coordinates Evaluation Light level Light level X Y X Y X Y X Y 0 Provided 4 None Block Item Sign Degree of match positioning Registration No 1 to 15 contain the same data as the registration No 0 Registration No 1 to 15 contain the same data as the registration No 0 Positioning Position ing No of digits Decimal point digit Block Item Sign No of digits Decimal point digit...

Page 318: ...ed 8 4 1 1 Block Item Size measurement Distance Size measurement Angle 1 None None X Y 4 4 1 1 Measurement start point Registration No 1 to 15 contain the same data as the registration No 0 Registration No 1 to 15 contain the same data as the registration No 0 Registration No 1 to 15 contain the same data as the registration No 0 Registration No 1 to 15 contain the same data as the registration No...

Page 319: ...erence detection coordinates Evaluation Degree of match Degree of match Reserved area for the 2nd point Evaluation Reference 2 2 4 4 2 2 2 4 4 2 2 None None None None None None None None None None None None None 1 1 None None 2 2 4 4 2 4 20 None None None None None Provided X coordinate Y coordinate X coordinate Y coordinate Evaluation Quantity Evaluation Distance Distance Shortest Distance Longes...

Page 320: ... 7 Object identification by binary conversion 0 Registration No 0 Registration No 0 Registration No 1 to 3 Registration No 1 to 3 None 2 2 2 2 8 Dummy data No of labels Evaluation No of labels Evaluation Total area Total area Block Item 1 None Evaluation Label area to 2 2 2 No of digits Decimal point digit Registration No 1 to 3 contain the same data as the registration No 0 Registration No 1 to 3...

Page 321: ...same data as label 0 in block 10 Labels 0 to 127 contain the same data as label 0 in block 10 Labels 0 to 127 contain the same data as label 0 in block 10 No of digits Decimal point digit Label 0 Label unit area in registration No 0 Label unit area in registration No 1 Label unit area in registration No 2 Label unit area in registration No 3 Center of gravity in registration No 0 Center of gravity...

Page 322: ...127 Label 0 to Label 127 Label 0 to Label 127 Label 0 to Label 127 Label 0 to Label 127 4 4 to 4 4 to 4 4 to 4 to 4 4 4 4 to 8 8 to 1 1 to 1 to 1 1 to 1 1 to 1 1 to X Y X Y 68 69 70 71 72 73 74 75 76 77 None 1 4 Item comparison table of block 0 in each software version Shown below is an item comparison table of the block 0 for each software version which is the general purpose serial I F used for ...

Page 323: ... White black information Evaluation Point White black information 2 2 Evaluation Point White black information E D Judg ment White black information Judgment OK NG E D H F A H White black information P8 P7 P6 P5 P4 P3 P2 P1 OK White OK OK NG OK OK NG OK P8 P7 P6 P5 P4 P3 P2 P1 0 NG 1 OK F A Data Contents Point No Judgment Point No White black 0 black 1 white 1 White 1 White 1 White 1 White 1 Black...

Page 324: ... u n f o s t l u s e R 0 t n e m e r u s a e m s n o i t a l u c l a c 2 a r e m a c 0 0 N o t 5 1 N e h t n i e s o h t s a a t a d e m a s e h t n i a t n o c 5 1 N o t 0 0 N 1 a r e m a c 0 t n e m e r u s a e m m e t i l a c i r e m u n f o s t l u s e R 1 t n e m e r u s a e m s n o i t a l u c l a c 0 0 N o t 5 1 N e h t n i e s o h t s a a t a d e m a s e h t n i a t n o c 5 1 N o t 0 0 N 1...

Page 325: ...merical calculations measurement 2 Results of numerical calculations measurement 3 N00 to N15 contain the same data as those in the item measurement 0 camera 1 N00 to N15 contain the same data as those in the item measurement 0 camera 1 N00 to N15 contain the same data as those in the item measurement 0 camera 1 N00 to N15 contain the same data as those in the item measurement 0 camera 1 AN00 to A...

Page 326: ... JW 21CM link module Sharp JW50H 70H 100H AnA AnN AJ71C24 Sx A1S A1SJ71C24 A0J2 A0J72C24 S1 Mitsubishi C1000H C500 LK203 C200H RS 232C C200H LK201 C200H RS 422 C200H LK202 CV1000 CVM1 OMRON CV CPU link port CV500 LK201 CV CPU link port CV500 LK201 J board Host communication port in models Z 311J 312J JW10 Communication port and MMI port in models JW 1324K 1342K 1424K 1442K 1624K 1642K JW30H Commun...

Page 327: ...on response 2 Write measurement data PC 2 3 Computer link CCD camera or PC The block of measurement data to be written from the IV S20 to the PC in step 2 can be specified on the OBJECT TYPE I O menu See page 11 21 When a Sharp PC is connected The IV S20 sends write enable command EWR to the PC in the following cases When the power is applied to the IV S20 When a Sharp PC is selected When a write ...

Page 328: ...ion 0 using camera 2 Measurement function 1 Measurement function 2 Measurement function 3 Output data from measurement 0 block 0 Output data from measurement 1 block 0 Output data from measurement 2 block 0 Output data from measurement 3 block 0 Sharp Mitsubishi OMRON Contents 1 3 2 4 5 19000 19001 D0256 L H L H DM0256 6 Assigned block data 1 to 6 See the next page The register map shown above is ...

Page 329: ... Max 500 bytes See pages 14 5 7 to 11 13 for details about the measurement data of block 0 The data block 0 from any unselected measurement number will not be output Its space will be filled by the next item 6 Assigned block data When a measurement number camera No or block number is specified the IV S20 will output its measurement data For details about how to specify measurement see pages 11 19 ...

Page 330: ...version Counting quantities by binary conversion Object identification labeling by binary conversion Final numerical calculation result Existance detection by point measuremet Binary conversion 0 Average light level 0 1 0 1 10 to 13 20 to 23 30 to 33 40 to 43 60 to 77 0 1 0 1 2 0 1 0 1 0 0 0 Registration No 0 Registration No 0 to 7 X Y X Y None None None None Provided 4 4 4 4 4 1 1 1 1 1 Block Ite...

Page 331: ... as the registration No 0 1st point 2nd point 1st point 2nd point 1st point 2nd point 1st point 2nd point Deviation X Y X Y X Y X Y 2 2 2 2 None None None None None None None None 01 01 01 01 OK OK OK OK Evaluation Deviation 1st point The values shown in the data example column have been converted the same way as wad done in example of the data in block 0 Decimal point digit Measure ment result Ev...

Page 332: ... match Evaluation Position coordinates Evaluation Light level Light level X Y X Y X Y X Y 0 Provided 4 None Block Item Sign Degree of match positioning Registration No 1 to 15 contain the same data as the registration No 0 Registration No 1 to 15 contain the same data as the registration No 0 Positioning Position ing No of digits Decimal point digit Block Item Sign No of digits Decimal point digit...

Page 333: ...rt point Registration No 1 to 15 contain the same data as the registration No 0 Registration No 1 to 15 contain the same data as the registration No 0 Registration No 1 to 15 contain the same data as the registration No 0 Registration No 1 to 15 contain the same data as the registration No 0 Registration No 1 to 15 contain the same data as the registration No 0 Registration No 1 to 15 contain the ...

Page 334: ... data 1 Reference detection coordinates Evaluation Degree of match Dummy data Degree of match Reserved area for the 2nd point Evaluation Reference 2 2 4 4 2 2 2 2 4 4 2 2 None None None None None None None None None None None None None 1 1 None None 2 2 4 4 2 2 4 20 None None None None None Provided X coordinate Y coordinate X coordinate Y coordinate Evaluation Quantity Evaluation Distance Distanc...

Page 335: ...2 Block Item No of digits Registration Nos 1 to 15 contain the same data as the registration No 0 Window area Evaluation Area Dummy data 0 4 2 2 8 No of labels Evaluation Number of labels Evaluation Total area Total area Registration No 0 Registration No 1 to 3 Block Item No of digits Registration No 1 to 3 contain the same data as the registration No 0 ...

Page 336: ... angle Window label fillet diameter Window label circumference Label 1 to 31 32 to 63 64 to 95 96 to 127 0 to 31 32 to 63 64 to 95 96 to 127 Label 0 to 31 32 to 63 64 to 95 96 to 127 Label 0 to 31 32 to 63 64 to 95 96 to 127 Labels 1 to 127 contain the same data as label 0 Labels 0 to 127 contain the same data as label 0 in block 10 Labels 0 to 127 contain the same data as label 0 in block 10 Labe...

Page 337: ...to 127 Label 0 to 127 Label 0 to Label 127 Label 0 to Label 127 Label 0 to Label 127 Label 0 to Label 127 Label 0 to Label 127 Label 0 to Label 127 4 4 to 4 4 to 4 4 to 4 to 4 4 4 4 to 8 8 to 1 1 to 1 to 1 1 to 1 1 to 1 1 to X Y X Y 68 69 70 71 72 73 74 75 76 77 None 1 4 Label 0 Label unit area in registration No 0 Label unit area in registration No 1 Label unit area in registration No 2 Label uni...

Page 338: ...valuation Point White black information 2 2 Evaluation Point White black information E D Judg ment White black information Judgment OK NG E D H F A H White black information P8 P7 P6 P5 P4 P3 P2 P1 OK White OK OK NG OK OK NG OK P8 P7 P6 P5 P4 P3 P2 P1 0 NG 1 OK F A Data Contents Point No Judgment Point No White black 0 black 1 white 1 White 1 White 1 White 1 White 1 Black 0 White 1 Black 0 1 1 F A...

Page 339: ... of numerical calculations measurement 1 Results of numerical calculations measurement 2 Results of numerical calculations measurement 3 N00 to N15 contain the same data as those in the item measurement 0 camera 1 N00 to N15 contain the same data as those in the item measurement 0 camera 1 N00 to N15 contain the same data as those in the item measurement 0 camera 1 N00 to N15 contain the same data...

Page 340: ...l calculations measurement 2 Results of numerical calculations measurement 3 N00 to N15 contain the same data as those in the item measurement 0 camera 1 N00 to N15 contain the same data as those in the item measurement 0 camera 1 N00 to N15 contain the same data as those in the item measurement 0 camera 1 N00 to N15 contain the same data as those in the item measurement 0 camera 1 AN00 to AN15 co...

Page 341: ...ubishi 3 OMRON 4 Settings for the IV S20 See item 1 below Programmable controller Item Setting details 115 2 57 6 38 4 19 2 9 6 7 8 None odd even 1 2 Checksum Communication speed k bit sec Data length bit Parity Stop bit Error check Station No Write address up to 512 bytes Sharp 00 to 37 8 Mitsubishi 00 to 31 OMRON 00 to 31 Sharp 09000 to 99776 Mitsubishi D000 to D9999 OMRON DM0000 to DM9999 ...

Page 342: ...nk module JW 21CM JW 10CM 5 Communication board Z 331J 332J 1 Module setting 1 1 1 1 1 When a JW 22CU or a JW 70CUH 100CUH and Z 311J 312J are used Store the communication port conditions in system memory addresses 236 and 237 Bits D0 to D5 are stored in memory address 236 In the initial state addresses 236 and 237 are set to 000 2 2 2 2 2 When a JW 32CUH H1 M1 or a JW 33CUH H1 H2 H3 is used 1 Whe...

Page 343: ...rity None Odd Even Applicable only to the JW 32CUH1 M1 and JW 33CUH1 H2 H3 Station No 001 to 037 8 Enter the station No for the current station 3 3 3 3 3 When a JW 1324K 1342K 1424K 1442K 1624K 1642K is used 1 When the communication port is used Store the communication conditions in system memory addresses 234 236 and 237 In the initial state addresses 234 236 and 237 are set to 000 Set bits D0 to...

Page 344: ... Set to 001 8 Memory Register Range address 09000 to 99776 h c t i w S g n i t t e S e u l a v t e S 0 W S e d o m d n a m m o C 4 1 W S t i b r e p p u o N n o i t a t S 7 3 o t 1 0 8 2 W S t i b r e w o l o N n o i t a t S 1 3 W S d i l a v n I F F O 2 3 W S m e t s y s e r i w 4 N O 3 3 W S d i l a v n I F F O 4 3 W S r o F F O N O y t i r a p n e v e F F O y t i r a p d d O N O N O r o F F O 4...

Page 345: ...RS 422 Shielded twisted pair cable Pin No Signal name Pin No Signal name Pin No Signal name Communication connector on the IV S20 RS232C RS422 Connector shield 1 4 2 7 FG RD SD SG JW 32CUH H1 M1 JW 33CUH H1 H2 H3 PG COMM2 port JW 32CUH H1 M1 JW 33CUH H1 H2 H3 PG COMM1 port PG COMM2 port 9 10 3 11 1 RD RD SD SD FG 1 km or less RS 422 Communication connector on the IV S20 RS232C RS422 Connector shie...

Page 346: ... JW 1324K 1342K 1424K 1442K 1624K 1642K is used The IV S20 can only be connected to the RS 422 port When the communication port is used provide a 2 wire RS 422 system When the MMI port is used provide a 4 wire RS 422 system 1 When the communication port is used JW 1324K 1342K 1424K 1442K 1624K 1642K Communication port L1 L2 SHLD Terminal name TA RA TB RB FG 4 8 7 9 Communication connector on the I...

Page 347: ...22 Pin No Signal name Connector shield Signal name 1 km or less RS 422 4 wire system Shielded twisted pair cable 6 When a Z 331J 332J is used Communication through the RS 422 port 2 wire system Z 331J 332J Host communication port T1 L1 L2 S FG TA RA TB RB FG 4 8 7 9 Communication connector on the IV S20 RS232C RS422 1 km or less RS 422 2 wire system Shielded twisted pair cable Pin No Signal name C...

Page 348: ...fixed at 00 because it does not have a station number switch 3 A0J72C24S1 A0J2 1 Module setting 1 Example using an AJ71C24 Sx module 8 0 C 4 1 2 3 5 6 7 F 9 E A D B STATION No 10 8 0 C 4 1 2 3 5 6 7 F 9 E A D B STATION No 1 8 0 C 4 1 2 3 5 6 7 F 9 E A D B MODE SW11 to 13 OFF SW14 to 24 ON m e t I n o i t p i r c s e D e d o m e r u d e c o r p l o r t n o c n o i s s i m s n a r T C 2 3 2 S R 1 t ...

Page 349: ...To write data from the IV S20 to a Mitsubishi PC use the WW QW write command The range that can be written using the write command WW QW is D0000 to D1023 D000000 to D008191 due to the limitation of Mitsubishi PCs The write all address can be set within the range of limitation for Mitsubishi PCs See page 11 19 Memory D data register Range address 0 to 999900 SW 01 02 03 04 05 06 07 08 09 10 11 12 ...

Page 350: ... RS CS DTR DSR SG 1 2 3 4 5 20 6 7 3 2 7 8 4 6 5 Shielded cable Calculator link module Note Jumper the RS CS DR and CD lines Do not jumper the SG Communication connector on the IV S20 RS232C RS422 Pin No Signal name Pin No Pin No Signal name Connector shield FG In case of 25 pins connector In case of 9 pins connector TOP n1 H10B K1 K1 Xn7 FG RDA RDB SDA SDB SG Calculator link module FG TA TB RA RB...

Page 351: ... mode Operation mode Monitor mode Operation mode Operation mode 0 1 1 Installed support tool Memory module initial setting switch Programming console setting mode 2 OFF ON The bit used to set the monitor mode in the system setting FUN49 instruction Support tools other than the programming console FUN49 A302 000 000 00000 AR1001 2 When the programming console is used set the PC to the monitor mode ...

Page 352: ...ector on the IV S20 RS232C RS422 Pin No Signal name Pin No Pin No Signal name Connector shield FG RDB RD RDB RD SDB SD SDA SD RS CS Calculator link module FG TA TB RA SG Case 4 7 8 9 IV S20 communication connector RS232C RS422 1 km max RS 422 4 line system Shielded twisted pair cable Pin No Signal name Signal name Pin numbers vary with the module to be used Memory D data register Range address 0 t...

Page 353: ... p t u o t l u s e R K O s i 0 Y y l n O 5 0 0 9 0 0 0 6 0 0 9 0 1 0 1 a r e m a c g n i s u 0 t n e m e r u s a e M t n e m e r u s a e m n o i t a i v e d l a n o i t i s o P 7 0 0 9 0 0 0 f o n o i t c n u f t n e m e r u s a e M e n o n 2 a r e m a c g n i s u 0 t n e m e r u s a e m 0 1 0 9 0 0 0 f o n o i t c n u f t n e m e r u s a e M e n o n 1 t n e m e r u s a e m 1 1 0 9 0 0 0 f o n o i...

Page 354: ...rts operation 00040 ON Time out Normal termination Error occurs Turning ON relay 00013 Starting the time out detection timer Error recovery 00041 ON Outputting Y0 Outputting Y1 Turning ON relay 00010 Transferring the result output Y0 to Y15 from registers 09004 and 09005 to addresses 0412 and 0413 ...

Page 355: ...12 13 14 15 16 T000 00000 F 044 04100 00006 00007 TMR 001 0030 04100 04101 T001 04107 00007 Fc012 CMP 09000 000 07357 04100 07354 Fc012 CMP 09000 377 07356 04101 04100 F 000w XFER 09004 0412 07357 04100 00010 00040 00010 04120 00011 00040 00011 04121 00012 00040 00012 04101 00013 00041 04107 00013 04101 00006 00041 04107 ...

Page 356: ...mination 8 Normal termination 09000 000 8 9 A check is made for errors 10 Occurrence of an error 09000 001 to 376 8 11 The data in the result output relays Y0 to Y15 16 points on the IV S20 is transferred from registers 09004 to 09005 to addresses 0412 and 0413 12 A normal termination signal is output 13 The judgment OK NG of the result output relay Y0 is output 14 The judgment OK NG of the result...

Page 357: ... h t e g n a h C e d o m n o i t c e s u n e m 2 d e s o l c t o n s i s i r i s n e l e h t t a h t e r u s e k a M 3 d e s a e r c n i n e e b t o n s a h d e e p s r e t t u h s e h t t a h t e r u s e k a M 4 n o i t a n i m a t n o c r o f s n e l e h t k c e h C 5 n o i t a n i m a t n o c r o f e c a f r u s g n i v i e c e r t h g i l D C C e h t k c e h C 6 y l r e p o r p d e t s u j d a...

Page 358: ... t a d n e s o t e c i v e d e h t t a h t e r u s e k a M n i a m 0 2 S V I e h t n o s l a n i m r e t t u p n i e h t o t d e t c e n n o c y l r e p o r p g n i s u o h 4 d e n r u t u o y r e t f a s d n o c e s 5 t u o b a d e t i a w u o y t a h t e r u s e k a M r e w o p e h t N O 5 e h t n o d e y a l p s i d s i U N E M S P O N I A M e h t t a h t e r u s e k a M n e e r c s t o n e r a...

Page 359: ... t d n a a e r a t l u s e r n o i t a u l a v e e h t e k a T r o t i n o m e h t n o d e y a l p s i d s i r o r r e e h t o t g n i d r o c c a s e r u s a e m r e p o r p t n e r e f f i d e s u s l e d o m t n e r e f f i d e d o c s e d o c 9 0 g n i r u d d e r r u c c o s a h t u o e m i t A k n i l r e t u p m o c e h t h g u o r h t n o i t a c i n u m m o c e h t f o y l p p u s r e w o...

Page 360: ...S e h T 7 3 t e s n e e b t o n s a h t n i o p t r a t s A t n e m e r u s a e m e l g n a e c n a t s i D 8 3 t o n e r a s n o i t i d n o c t n i o p y r a i l i x u a e h T e l g n a e c n a t s i D d e i f i c e p s y l h g u o r o h t t n e m e r u s a e m 9 3 t o n e r a s n o i t i d n o c e n i l y r a i l i x u a e h T e l g n a e c n a t s i D d e i f i c e p s y l h g u o r o h t t n ...

Page 361: ...Mount the lens mirror tube on this camera 2 Close the lens iris all the way 3 Point the lens toward the light source and check the monitor screen to make sure that there are no spots on the screen If the iris is open even a little then even if spots exist they will not be visible on the monitor screen Fine adjustments to the iris are required 3 When measurement errors and or evaluation errors occu...

Page 362: ...c n u f t n e m e r u s a e M n o i t a i v e d l a n o i t i s o P f o o n x 8 2 s a r e m a c e g d e n o t n i o p e n o h c r a e s s t n i o p o w t h c r a e s t n i o p e n O e g d e n o t n i o p e n o h c a r e s t n i o p e n o s e g d e n o s t n i o p o w t n o i t c e p s n i h c t a m f o e e r g e D 6 1 o n s e y h c r a e s o n s e y h c r a e s s t n i o p o w T h c r a e s y a r ...

Page 363: ... i r e w o p e h t n e h W D E L i m r e T l a n k c o l b l a n i m r e t t u p n I s t n i o p 7 d e x i f s t n i o p 4 e g n a h c e p y t d e x i f t n i o p 1 r e g g i r t l a n r e t x E s l a n i m r e t e l b a t c e l e s s r e s U d n a e g a m i e c n e r e f e r a g n i r o t s r o f t u p n i l a n r e t x e e n O 1 m a r g o r p t n e m e r u s a e m g n i n n u r d n a e g a m i e...

Page 364: ... o h t e M r e t t u h s m o d n a R t n e i b m a e g a r o t S e r u t a r e p m e t C 0 7 o t 0 2 t n e i b m a n o i t a r e p O e r u t a r e p m e t C 5 4 o t 0 t n e i b m a n o i t a r e p O y t i d i m u h g n i s n e d n o c n o n H R 5 8 o t 5 3 e c n a t s i s e r n o i t a r b i V t n e l a v i u q e r o 1 1 9 0 C S I J s m 7 4 1 z H 5 5 o t 0 1 m m 2 e d u t i l p m A 2 H 0 5 1 o t 5...

Page 365: ... s m o d n a R r o t c e n n o C r o t c e n n o c e l a m e f n i p 2 1 d n u o R g n i s u o h n i a m 0 2 S V I o t n o i t c e n n o C 3 C H 0 2 S V I e l b a c n o i s r e v n o c a r e m a c g n i s U e r u t a r e p m e t t n e i b m a n o i t a r e p O 5 4 o t 0 o C y t i d i m u h t n e i b m a n o i t a r e p O g n i s n e d n o c n o n H R 5 8 o t 5 3 e r e h p s o m t a n o i t a r e p...

Page 366: ...ble IV S20EC2 EC4 m e t I s n o i t a c i f i c e p S h t g n e l e l b a C 4 C E 0 2 S V I m 4 2 C E 0 2 S V I m 2 h t a e h s e l b a C e d i r o l h c l y n i v y l o P r o t c e n n o C r o t c e n n o c e l a m e f n i p 3 1 d n u o R e d i s g n i s u o h n i a M r o t c e n n o c e l a m n i p 3 1 d n u o R e d i s a r e m a C s u i d a r d n e b m u m i n i M m m 5 7 m e t I s n o i t a c ...

Page 367: ...EIA 525 lines 2 1 interlace Horizontal 15 75 kHz vertical 48 to 62 Hz 8 under scan Horizontal 10 or less vertical max 10 BNC 75 ohms High Z BNC Brightness adjustment contrast adjustment vertical position adjustment horizontal position adjustment Focal adjustment vertical width adjustment horizontal linearity adjustment sub bright adjustment used only by our service staff 20 to 60 C 0 to 45 C 35 to...

Page 368: ... i b m a n o i t a r e p O e r u t a r e p m e t 5 4 o t 0 C t n e i b m a e g a r o t S e r u t a r e p m e t 0 6 o t 0 1 C t n e i b m a n o i t a r e p O y t i d i m u h g n i s n e d n o c n o n H R 0 9 o t 5 3 e r e h p s o m t a n o i t a r e p O t s u d r o s e s a g e v i s o r r o c o N e c n a t s i s e r n o i t a r b i V t n e l a v i u q e r o 1 1 9 0 C S I J s m 7 4 1 z H 1 6 o t 0 1...

Page 369: ...lue level and 0 when it is darker than the specified threshold value level Ë Ë Ë Ë Ë Artifact processing Artifact processing is a method of processing that eliminates the false detection of the edge of the target object when an artifact is in the line being scanned This process can be used during edge detection The real edge of the target object is detected by computing the average duration of the...

Page 370: ...to trigger the shutter operation The window can be set for each item on the production line so that adjustments to the position of an external sensor are no longer needed This feature reduces the down time needed to change items on production lines Ë Contraction See Expansion and contraction to eliminate binary noise in the image Variation in lighting Fixed Fails to convert the image due to a vari...

Page 371: ...ion Detection direction Edge detection point Detection area Internal diameter between B and C External diameter between A and D Detection area Detection area Detection area Horizontal transition point from light to dark moving from left to right Vertical transition point from light to dark moving from top to bottom Horizontal transition point from light to dark moving from right to left Center dar...

Page 372: ...oint to white 2Contraction If a black area contains a single isolated white point the system will converts the white point to black 1Expansion _ contraction Delete isolated black points by expansion and then restore the original image size by contraction Binary conversion Contraction Expansion 2Contraction _ expansion Delete isolated white points by contraction and then restore the original image ...

Page 373: ...f light contain large volumes of information compared with binary images images with 256 levels of gray have 256 times the volume of information than in binary images Therefore gray scale images offer more precision and more reliable results However the larger the information volume the larger the number of calculations that must be made for correlation values This means that high speed processing...

Page 374: ... scale image Advantage Theoretically better precision and reliability can be offered because the image contains more information about the brightness of each pixel in the image Disadvantage More processing time is required because this approach must handle a large amount of data Positional deviation measurement Output Application Maximum matching level value Shape inspection The center coordinates...

Page 375: ...an area a mask window is used Measurement window Object to be measured Mask window N Ë Normalization correlation To determine whether the levels between the reference image and the input image match the IV S20 uses an information processing method called normalization correlation This is a method used to cal culate relationship between two groups of data Factors determining the correlation value I...

Page 376: ...n a binary image By this process multiple objects in the same binary image can be handled separately or as a group Whole image reading Partial image reading 512 512 480 120 P Ë Partial CCD reading The partial CCD reading technique reads only that part of the CCD which contains the object needed for image processing This can shorten the data transfer time from the CCD camera to the image memory To ...

Page 377: ...ndard patterns In the IV S20 you can select from smoothing edge emphasis and edge extraction whole horizon tal vertical pre processing techniques Ë Resolution The CCD in the IV S20 contains 512 pixels horizontally and 480 pixels vertically If it takes a full picture the resolution will be X 512 and Y 480 R Ë Random shutter function This function allows the CCD camera shutter operation to be trigge...

Page 378: ...etection precision high for 1 10 pixel in case of the IV S20 Ë Setting window boundaries enable disable This function enables and disables the labeling object identification of binary images located that cross over the window frame boundary Binary conversion Labeling Disable window boundary Window 1 2 3 4 1 2 Images 1 and 3 cross over the window frame edges and are measured together with the areas...

Page 379: ...easurement In these cases a window is used to pick out just the desired target for measurement The area inside the window will contain the object to be measured and the areas outside the window will be ignored Object to be measured Objects outside the designated measurement area Window Example for adjustment An example of adjustment is shown below using a white object on a black background When th...

Page 380: ...a Ku Tokyo Suplier Seiwa Optical Corp Asahi Precision Co Ltd Chugai Optronics Co Ltd Tamron Co Ltd Canon Sales Company Inc Optical Lens Sales Department Supplier Moritex Corporation Nippon PI Co Ltd Rawtronocs Corporation Hayashi Watch Works Co Ltd Appendix 1 Support tools available on the market Manufacturers of the support tools which can be used with the IV S20 are listed below Products availab...

Page 381: ...m m 5 1 f 3 0 1 1 A 1 V I 1 3 4 2 7 1 L M s n e l V T C C φ t n u o m m m 7 1 m m 4 2 f 1 0 3 1 A 1 V I 1 M C D 5 6 1 L M M s n e l c i r t n e c e l e T φ t n u o m m m 7 1 x 1 2 0 3 1 A 1 V I 1 M C D 5 6 2 L M M s n e l c i r t n e c e l e T φ t n u o m m m 7 1 x 2 1 0 1 0 A 2 V I R L 0 5 H F H M e c r u o s t h g i l n e g o l a H W 0 5 2 0 1 0 A 2 V I R L 0 0 1 D F H M e c r u o s t h g i l n ...

Page 382: ...PUT X6 The DIST BETW X and DIST BETW Y have been added to the 2 DISTANCE TYPE on the DISTANCE SETTINGS menu The MANL MESR have been added to the 8DISPLAY CURSOR This is used to get the overall distance X coordinate distance and Y coordinate distance between two points which are manually designated The 0 IMAGE DISPLAY has been added These measurements can also be made on the through images RUN MENU...

Page 383: ...nglish display modes 12 1 The menu display details in the English display mode have totally changed Auxiliary relay C112 Auxiliary relay C114 10 7 Binary image displays are set to Yes and the MAIN OPS MENU the measuring time is reduced Example of the measuring time Blocks 60 to 77 have been added to the Label measurement after binary conversion operation Changed data order for the block 0 of Label...

Page 384: ...113 Square root absolute value TAN and ATAN calculation functions are added Added final numerical calculation function Load and save displayed image Communication function between another IV module for creating a clone Assignable output block as well as block 0 Measurement of positional deviation Binary conversion measurement Point measurement Lead inspection PC functions Numerical calculations Ge...

Page 385: ...surement number selectable from X5 and X6 Select between BUSY and READY outputs Added evaluation using average density from CCD trigger Shutter speed can be set for each object type Shutter speed can be set continuously Possible to test using the through image Store monitor brightness level setting in flash memory No calculation functions for comparison No calculation functions for comparison In u...

Page 386: ...n general purpose serial I F 13 20 Computer link 14 10 Outline 1 5 9 82 Operation example 3 2 Setting sequence 9 83 Setting details 9 84 Area setting procedure 9 26 Artifact processing 9 12 Distance and angle measurement edge detection 9 61 Lead inspection 9 76 Positional deviation measurement 9 39 Arrangement of square pixel 1 1 G 1 Assignment of output block 11 20 Auxiliary change AUX CHNG 10 16...

Page 387: ...20 to 21 Point measurement 13 23 Positional deviation absolute position measurement 13 15 to 16 Computer link Area measurement by binary conversion 14 10 Counting quantities by binary conversion 14 10 Degree of match inspection for shape and size 14 7 Distance and angle measurement 14 8 Final numeric calculation result 14 14 Lead inspection 14 9 Object identification by binary conversion 14 11 to ...

Page 388: ...al output 11 20 Conditions for each measurement program measurement conditions Area measurement by binary conversion 9 84 Counting quantities by binary conversion 9 92 to 93 Degree of match inspection for shape and size Center of gravity 9 62 Gray and edge 9 59 Distance and angle measurement 9 57 Existence inspection by point measurement 9 109 Lead inspection 9 74 Object identification by binary c...

Page 389: ...ejection criteria 3 14 Degree of match inspection for shape and size 9 53 Distance and angle measurement 9 67 Lead inspection 9 78 Positional deviation measurement 9 41 Degree of match inspection for shape and size Measurement data block Communication general purpose serial I F 13 17 Computer link 14 7 Operation example 3 15 Outline 1 4 9 45 Setting sequence 9 46 Setting details 9 47 Detection are...

Page 390: ...t 9 65 Download all parameters 12 2 E Edge detection 9 11 G 3 Edge detection conditions Positional deviation measurement 9 36 Editing Copying 9 28 Initialization 9 32 Edge extraction 9 9 G 3 Eliminating binary noise the number of times Area measurement by binary conversion 9 85 Counting quantities by binary conversion 9 93 Degree of match inspection for shape and size 9 51 Distance and angle measu...

Page 391: ...erminals X0 to X6 10 10 External output instructions Y0 to Y15 10 12 External trigger 4 3 F Fillet width object identification by binary conversion 9 102 G 4 Final calculation result terminals 10 10 Final evaluation result 3 14 Final numerical calculations 9 18 Final numeric calculation result measurement data block Communication general purpose serial I F 13 24 Computer link 14 14 Final output co...

Page 392: ...nditions settings 11 1 Installation condition 6 1 Installation method Installing the camera body 6 12 Installing the IV S20 main housing 6 10 Installation space 6 9 Interface computer link 14 5 Interline transfer system G 7 Iris 5 1 Island G 7 IV S20 main housing 4 1 5 1 16 1 IV S20EC2 4 4 2 6 8 IV S20SP 4 2 7 14 IV 09MT 4 2 16 6 IV 60LD 4 2 6 2 16 7 L Label area objects identification by binary c...

Page 393: ...e 7 3 10 16 Mask window G 7 Area measurement by binary conversion 9 85 Counting quantities by binary conversion 9 93 Distance and angle measurement 9 62 Object identification by binary conversion 9 101 Measurement change 7 3 Measurement data blocks 13 14 14 5 Measurement number switching X5 X6 11 1 to 2 Measurement object lead inspection 9 78 Measurement output conditions 8 5 Measurement processin...

Page 394: ...ry conversion 9 103 Numerical calculations 9 14 Final numerical calculations 9 18 Operation example 3 45 Type and number of styles of entered for each measurement program 9 17 Numerical calculation conditions Area measurement by binary conversion 9 87 Counting quantities by binary conversion 9 95 Degree of match inspection for shape and size 9 54 Distance and angle measurement 9 68 Lead inspection...

Page 395: ...binary conversion 9 106 Positional deviation measurement 9 44 Optical filter A 1 Operation flow 7 10 Output change 10 16 Output conditions 10 1 to 7 Area measurement by binary conversion 9 88 Counting quantities by binary conversion 9 96 Degree of match inspection for shape and size 9 55 Distance and angle measurement 9 69 Existence inspection by point measurement 9 113 Kinds of input signals in e...

Page 396: ...ck Communication general purpose serial I F 13 14 to 15 Computer link 14 5 to 6 Operation example 3 8 Outline 1 3 9 34 Setting procedure 9 35 Setting sequence 9 36 Power lamp 5 2 Power terminal block 5 2 Pre processing 9 9 G 9 Pre processing 9 9 Area measurement by binary conversion 9 85 Counting quantities by binary conversion 9 93 Degree of match inspection for shape and size 9 51 Distance and a...

Page 397: ...surement conditions 9 84 Counting quantities by binary conversion Evaluation conditions 9 94 Measurement conditions 9 92 Degree of match inspection for shape and size Evaluation conditions 9 53 Measurement conditions 9 47 Distance and angle measurement Evaluation conditions 9 67 Lead inspection Evaluation conditions 9 78 Measurement conditions 9 74 Object identification by binary conversion Evalua...

Page 398: ...tter speed 6 3 9 117 Smoothing 9 9 G 10 Specifications 16 1 Spectral sensitivity characteristics CCD element 6 4 Start CCD sampling input 4 5 11 8 to 16 Starting point conditions distance and angle measurement Center of gravity 9 62 Edge detection 9 61 Gray scale search 9 59 to 60 Starting point mode distance and angle measurement 9 59 Starting point number distance and angle measurement 9 59 Star...

Page 399: ...n by point measurement 9 109 Lead inspection 9 76 Object identification by binary conversion 9 76 Positional deviation measurement 9 41 Through image display mode 7 8 Timer instruction 10 12 Timer terminal 10 10 Title registration 9 33 Total area Counting quantities by binary conversion 9 94 Object identification by binary conversion 9 103 Total initialization 12 3 Trigger window 1 1 Troubleshooti...

Reviews: