


XLS Library Technical Service Manual
6-1
6
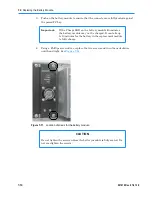
Shutting Down the XLS
This chapter provides instructions for shutting down the XLS to perform a service
operation.
6.1
What Happens When the XLS is Shut Down
When the XLS is shut down, it performs the following actions:
•
It completes all current and pending moves.
•
It moves the handler and carousel to their home positions.
•
It logs an event in the event log and sends a message to designated users.
•
It goes into physical mode.
•
It closes X-Link and displays a system-halted message on the touch screen.
When the shut-down process is complete, the Fault LED (red) flashes, indicating that it is
safe to move the power switch to the off position.
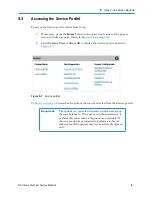
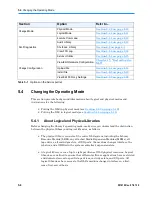
6.2
Shutting Down the XLS
To shut down the XLS, follow these steps:
1. Make sure that no backup operations are in process, then shut down the
applications. Refer to the documentation for the software applications.
2. From X-Link, press the
Home
button in the upper right corner of any page to
return to the Home page.
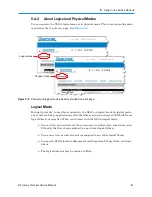
3. Access the Physical Library portlet or the Service portlet (see
Section 5.3 on
page 5-7
).
4. Select
Physical Mode
to put the XLS in physical mode. See
Section 5.4.3 on
page 5-10
.
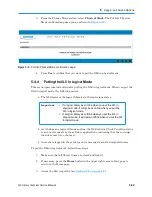
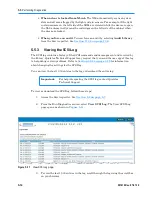
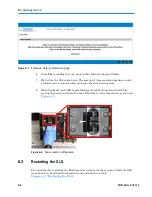
5. Select
Shutdown Library
. The Shutdown Library confirmation page opens, as
shown in
Figure 6-1 on page 6-2
.
Summary of Contents for XLS Series
Page 1: ...Technical Service Manual Document No 501610 Rev 07 01 19 XLS Series of Tape Libraries...
Page 14: ...501610 Rev 07 01 19 Part I Before You Begin Notes...
Page 58: ...3 7 Cabling for the Carousel Controller 3 12 501610 Rev 07 01 19 Notes...
Page 70: ...4 5 Inspecting and Cleaning the Gripper and Barcode Reader 4 12 501610 Rev 07 01 19 Notes...
Page 72: ...Part II Using X Link 501610 Rev 07 01 19 Notes...
Page 96: ...Part III Replacing FRUs 501610 Rev 07 01 19 Notes...
Page 136: ...8 8 Bringing a Tape Drive Online 8 14 501610 Rev 07 01 19 Notes...
Page 158: ...9 5 Replacing a Drive Bay with a Cartridge Bay 9 22 501610 Rev 07 01 19 Notes...
Page 172: ...10 3 Replacing a Side Panel 10 14 501610 Rev 07 01 19 Notes...
Page 186: ...11 3 Upgrading a Fixed Port Assembly to an I O Port 11 14 501610 Rev 07 01 19 Notes...
Page 226: ...12 6 Replacing the Y Motor Assembly 12 40 501610 Rev 07 01 19 Notes...
Page 324: ...Part IV Reference 501610 Rev 07 01 19 Notes...
Page 352: ...B 2 Packing the XLS B 14 501610 Rev 07 01 19 Notes...
Page 354: ...C 2 501610 Rev 07 01 19 Notes...


