


XLS Library Technical Service Manual
14-1
14
Replacing Library Sensors
and Solenoids
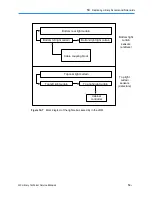
This chapter provides instructions for replacing the following library sensors:
•
Door interlock sensors (see
Section 14.1
)
•
Door lock solenoids (see
Section 14.2 on page 14-4
)
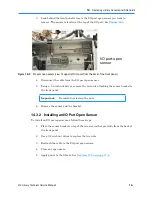
•
I/O port open sensors (see
Section 14.3 on page 14-5
)
•
I/O port solenoids (see
Section 14.4 on page 14-8
)
•
Light curtain sensors (see
Section 14.5 on page 14-10
)
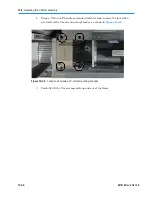
Important:
For clarity, all of these procedures have been
photographed with the front panel removed However,
with the exception of replacing the I/O port solenoids,
you can perform any of these procedures with the front
panel in place.
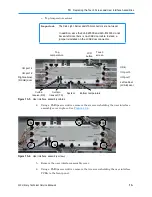
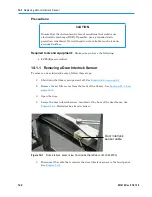
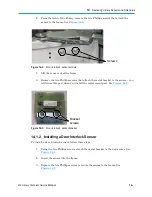
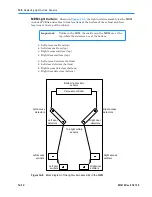
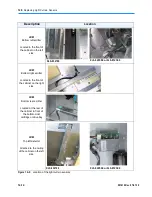
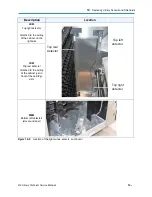
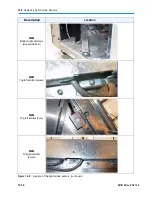
14.1
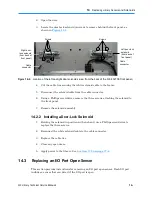
Replacing a Door Interlock Sensor
This section provides instructions for replacing a door interlock sensor in the XLS-832700,
XLS-820500, XLS-812300, or a MEM. Each door uses a door interlock sensor to detect if a
door is opened while the library power is off.
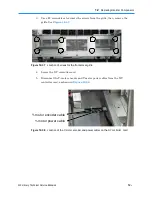
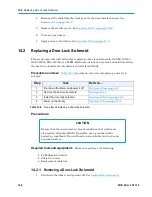
Procedure overview:
Table 14-1
provides an overview of replacing a door interlock
sensor.
Step
Task
Refer to...
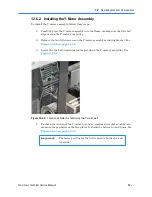
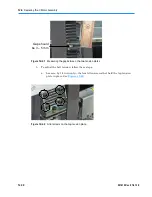
1
Shut down the library and power it off
Section 6.2 on page 6-1
2
Remove the air filter cover
Section 10.1.2 on page 10-3
3
Remove the door interlock sensor
Section 14.1.1 on page 14-2
4
Install the door interlock sensor
Section 14.1.2 on page 14-3
5
Replace the air filter cover
Section 10.2.3 on page 10-10
6
Power on the library
Section 17.3 on page 17-4
Table 14-1
Overview of replacing a door interlock sensor
Summary of Contents for XLS Series
Page 1: ...Technical Service Manual Document No 501610 Rev 07 01 19 XLS Series of Tape Libraries...
Page 14: ...501610 Rev 07 01 19 Part I Before You Begin Notes...
Page 58: ...3 7 Cabling for the Carousel Controller 3 12 501610 Rev 07 01 19 Notes...
Page 70: ...4 5 Inspecting and Cleaning the Gripper and Barcode Reader 4 12 501610 Rev 07 01 19 Notes...
Page 72: ...Part II Using X Link 501610 Rev 07 01 19 Notes...
Page 96: ...Part III Replacing FRUs 501610 Rev 07 01 19 Notes...
Page 136: ...8 8 Bringing a Tape Drive Online 8 14 501610 Rev 07 01 19 Notes...
Page 158: ...9 5 Replacing a Drive Bay with a Cartridge Bay 9 22 501610 Rev 07 01 19 Notes...
Page 172: ...10 3 Replacing a Side Panel 10 14 501610 Rev 07 01 19 Notes...
Page 186: ...11 3 Upgrading a Fixed Port Assembly to an I O Port 11 14 501610 Rev 07 01 19 Notes...
Page 226: ...12 6 Replacing the Y Motor Assembly 12 40 501610 Rev 07 01 19 Notes...
Page 324: ...Part IV Reference 501610 Rev 07 01 19 Notes...
Page 352: ...B 2 Packing the XLS B 14 501610 Rev 07 01 19 Notes...
Page 354: ...C 2 501610 Rev 07 01 19 Notes...


