


2-32
Intel® Integrated RAID Controller GSU31 User’s Manual
Rev 1.0
Advanced Installation Steps
2.5.2.6
Upgrading Windows NT 4.0, that is Currently Installed on an Intel
Integrated RAID Volume or Pass-Through Disk, to Windows 2000
For computers with NT 4.0 currently installed on a RAID volume or pass-through disk connected
to an Intel Integrated RAID controller.
1. Log into Windows NT 4.0 with administrative privileges.
2. Insert RAID Software Suite CD-ROM into CD-ROM drive (exit the RAID Software Suite
Setup Wizard if it auto-launches).
a. Go to Windows Menu Bar. Select Start > Run and type in the following path:
<CD drive letter>:\OS_Setup\Win2K\Migration\Setup.exe
b. Complete the RAID Upgrade Utility Setup Wizard.
3. Remove the RAID Software Suite CD-ROM and insert the Windows 2000 CD-ROM. The
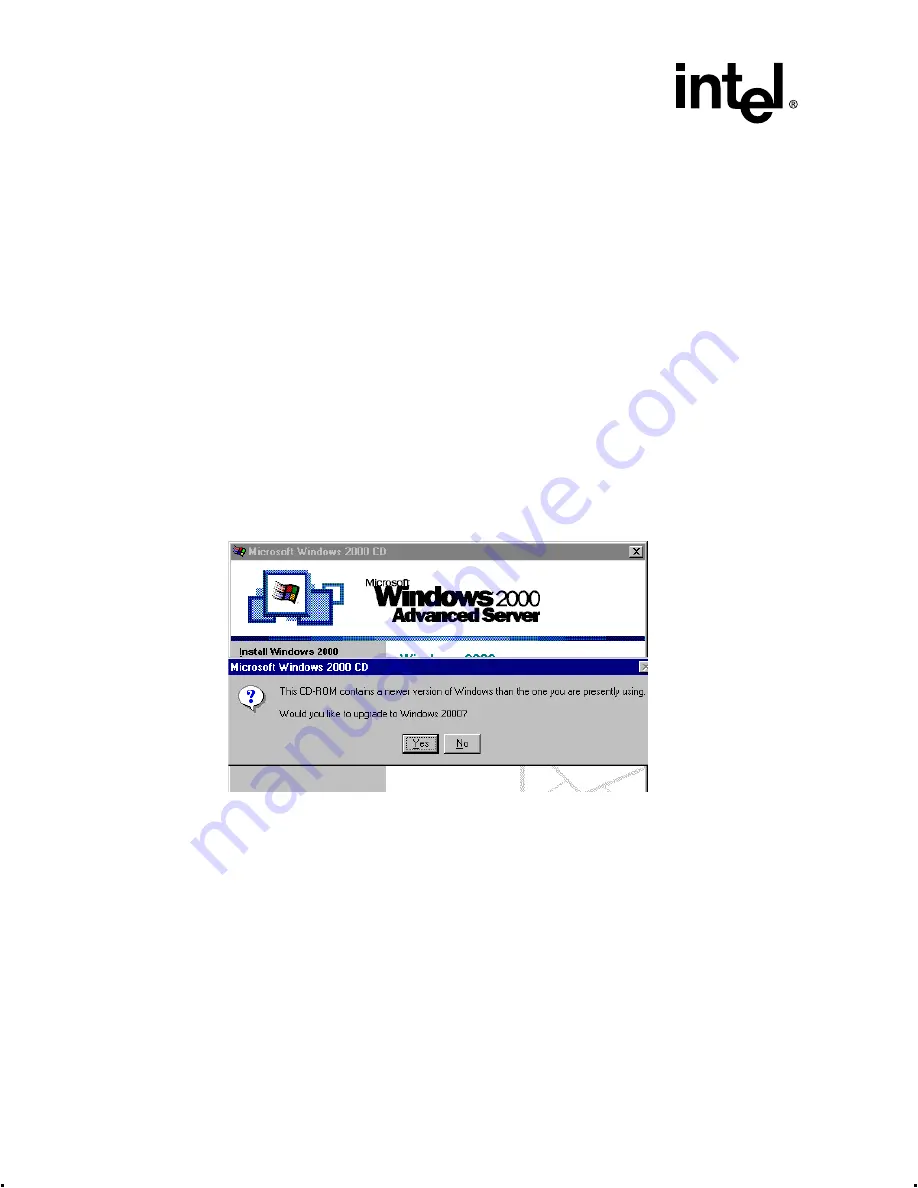
Windows 2000 upgrade utility will auto start. See
Click Yes to start the upgrade.
4. When “Welcome to the Windows 2000 Setup Wizard” launches, select Upgrade to Windows
2000 (Recommended) and complete this portion of the upgrade. Windows will reboot. (If it
doesn’t auto-reboot after a couple of minutes, manually restart your computer.)
Figure 2-27. Upgrade to Windows 2000
5. Leave the Windows 2000 CD-ROM in the CD-ROM drive and let the computer boot up. (DO
NOT touch any key when prompted to boot from the CD-ROM. Let the computer boot to the
hard drive to continue the upgrade.)
6. Let the computer continue to reboot until it gets to the first blue setup screen. Immediately hit
the <F6> key to load the Windows 2000 I
2
O miniport drivers.
7. When prompted select <S> and insert the OS Installation Driver diskette and continue the
Windows 2000 upgrade
.
for instructions on creating the OS Installation
Driver diskette.
8. Setup will complete the text-based portion of the installation and auto-reboot to continue the
GUI portion of the Windows 2000 Upgrade.
9. When the GUI portion of setup completes, the computer will auto-reboot. If the computer does
not auto-reboot after sometime, manually reboot the computer to continue the upgrade.


