Scanning Procedure
169
Sca
n
4
3
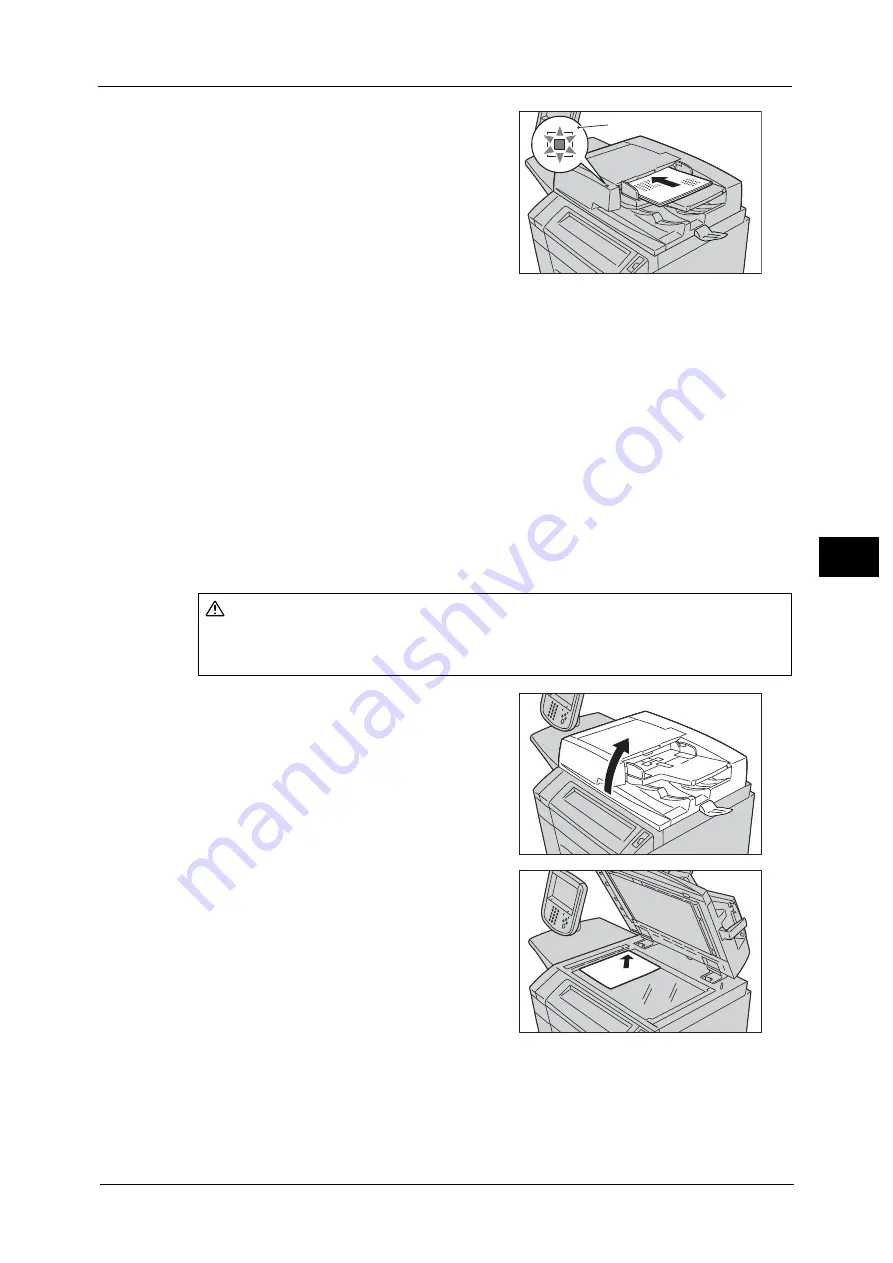
Load the document face up (when the
document is 2-sided, place the front side up) in
the center of the document feeder.
Note
•
The Confirmation indicator lights up when
the document is loaded correctly.
•
The number of documents that can be
loaded in the document feeder is up to 250
sheets (P paper).
•
When the document is loaded in the
document feeder, the document feeder tray
lifts up. You can set the timing of the lift. For
more information, refer to "5 Tools" > "Common Service Settings" > "Other Settings" > "Document
Feeder Tray Elevation" in the Administrator Guide.
Document Glass
The document glass supports a single sheet, a book, or other similar documents with sizes
up to 297 x 432 mm (Standard size: A3, 11 x 17").
Important •
Always close the document cover after using the document glass.
The document glass automatically detects standard size documents. For non-standard size
documents, enter the size on the [Original Size] screen.
For information on document sizes that can be detected automatically and how to enter a non-standard document size,
refer to "Original Size (Specifying a Scan Size)" (P.243).
The standard document sizes that can be detected automatically depend on [Paper Size Settings] in the System
Administration mode. For information on the paper size settings, refer to "5 Tools" > "Common Service Settings" > "Other
Settings" > "Paper Size Settings" in the Administrator Guide.
1
Open the document cover.
Important •
Ensure that the touch screen is active, and
then load a document. Otherwise, the
machine may not properly detect the
document size.
2
Load the document face down, and align it
against the top left corner of the document
glass.
3
Close the document cover.
Confirmation indicator
CAUTION
Do not apply excessive force to hold thick document on the document glass. It may
break the glass and cause injuries.
Summary of Contents for Color C60
Page 1: ...User Guide Color C70 Printer Color C60 Printer...
Page 10: ...10...
Page 13: ...Preface 13 Before Using the Machine 1...
Page 74: ...2 Product Overview 74 Product Overview 2...
Page 101: ...Copy 101 Copy 3 1 Use and to select from seven density levels...
Page 166: ...3 Copy 166 Copy 3...
Page 182: ...4 Scan 182 Scan 4 Original Size Specifying a Scan Size P 243 4 Press the Start button...
Page 256: ...4 Scan 256 Scan 4...
Page 290: ...7 Stored Programming 290 Stored Programming 7...
Page 314: ...10 Job Status 314 Job Status 10 Print this Job Report Prints the Job Report...
Page 352: ...11 Computer Operations 352 Computer Operations 11...
Page 353: ...12 Appendix This chapter contains a glossary of terms used in this guide z Glossary 354...
Page 358: ...12 Appendix 358 Appendix 12...


