


Changing the Paper Size
69
P
a
p
e
r an
d Oth
e
r M
e
dia
2
4
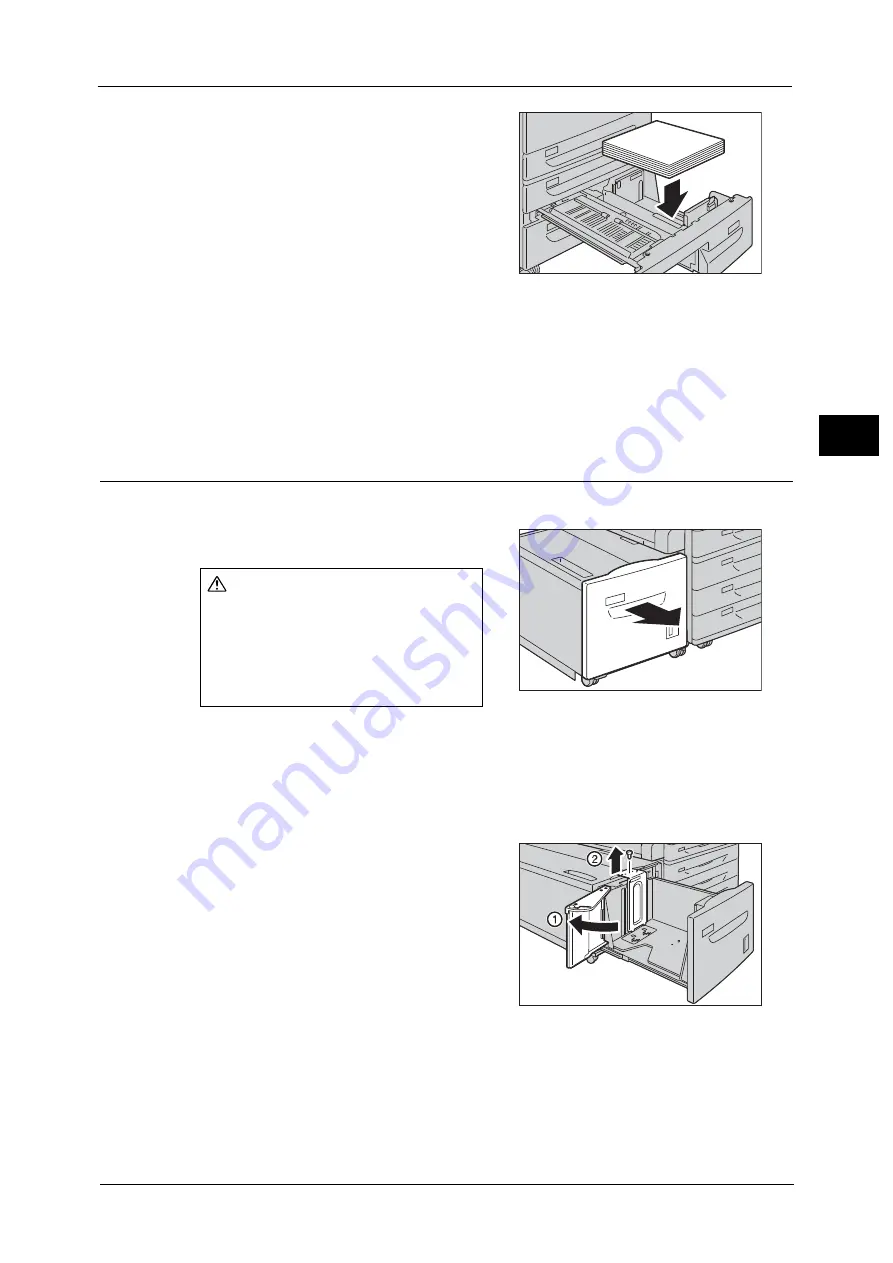
Load and align the edge of the paper against
the left edge of the tray, with the side to be
copied or printed on facing down.
Important •
Do not load paper above the maximum fill
line. It may cause paper jams or machine
malfunction.
5
While pinching the paper guide, lightly align the edge to the edge of the paper.
6
Push the tray in gently until it stops.
Note
•
Affix the paper size label to the front of the paper tray.
7
Specify the type of loaded paper when you have changed the paper type.
For information on how to set the paper types, refer to "Changing the Paper Settings" (P.72).
Changing the Paper Size for Tray 6 (HCF B1) (Optional)
The following describes how to change paper size in Tray 6 (HCF B1) (optional).
1
Pull out the Tray 6 until it stops.
Important •
While the machine is processing a job, do not
pull out the tray that is being used for the job.
•
To prevent paper jams or erroneous
detection of loaded paper in a tray by the
machine, do not add paper on top of any
remaining paper in the tray.
2
Remove any paper loaded in the tray.
3
Open the end guide (1) and unscrew the screw
(2). And then remove the guide from the tray.
4
Insert the small protrusions at the bottom of the guide into the holes corresponding to the
paper size (1). Insert the protrusion on the tray into a hole corresponding to the paper size
on the top of the guide, and tighten up the screw (2).
CAUTION
Make sure to pull out the tray slowly.
If the tray is pulled out with too much
force, the tray might possibly hit your
knees or other parts of your body and
cause injuries.
Summary of Contents for ApeosPort-V C2276
Page 14: ...14 ...
Page 42: ...1 Before Using the Machine 42 Before Using the Machine 1 ...
Page 334: ...5 Tools 334 Tools 5 ...
Page 356: ...7 Printer Environment Settings 356 Printer Environment Settings 7 ...
Page 388: ...9 Scanner Environment Settings 388 Scanner Environment Settings 9 ...
Page 396: ...10 Using IP Fax SIP 396 Using IP Fax SIP 10 ...
Page 408: ...12 Using the Server Fax Service 408 Using the Server Fax Service 12 ...


