129
Continued on next page
Security
Settings
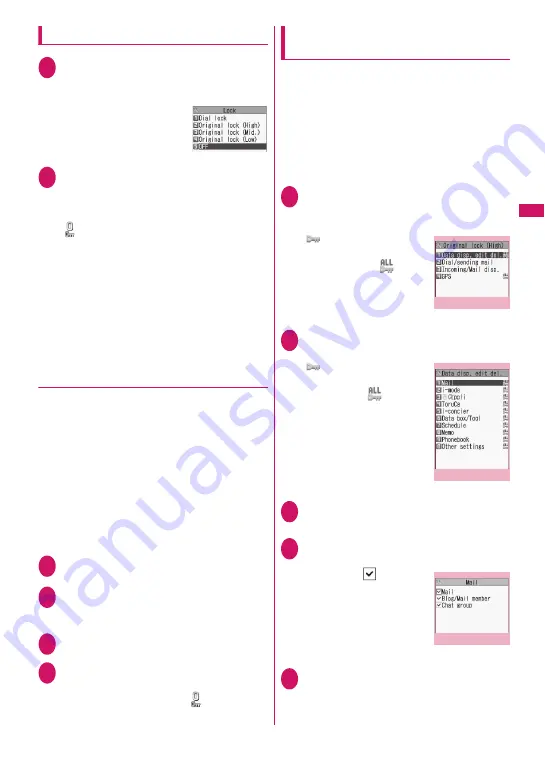
Activating Original lock
1
i
X
“Settings/Service”
X
“Lock/
Security”
X
“Lock”
X
Enter your
security code
2
Select Original lock from (High) to
(Low)
The lock is activated and the function or data is
locked.
“
” appears on the screen.
Icons displayed when another lock is set at the
same time
→
p.25
■
To customize functions or data to be
locked
→
p.129
■
To edit the title
X
Highlight Original lock from (High) to (Low)
X
u
(FUNC)
X
“Edit title”
X
Enter a title
■
To release Original lock
X
“OFF”
●
Operations when Original lock is set
If you try to use the locked function or data when
Original lock is set, you are asked to enter the
security code.
z
After you enter the correct security code, the lock is
deactivated temporarily and you can use the locked
function or data (functions of “Dial/sending mail”
and “Incoming/Mail disp.” are not available when
the lock is released temporarily). After exiting the
active function and returning to the standby screen,
the lock is activated again.
<Example: To view an i-mode mail when Original lock
is set>
1
On the standby screen
X
o
2
Enter your security code
Original lock is released temporarily and the mail
menu appears.
3
Read i-mode mail
4
Exit the mail menu and return to
the standby screen
Original lock is activated and “
” appears on
the screen.
Customizing functions or data to be
locked
z
You can store particular settings such as locking
only the phonebook or restricting only the outgoing
calls/mail to Original lock (High), (Mid.), or (Low)
depending on the usage or purpose.
z
You can set (customize) items to be locked by
category, group or function as shown in
Table 1
(p.130).
z
The items to be locked you set (customize) are retained
even when Original lock is activated or deactivated.
1
Lock selection screen (p.129)
X
Highlight Original lock (High) to
(Low)
X
o
(Detail)
“
” appears when any of
the items in the category is
to be locked and “
”
appears when all items are
to be locked.
2
Select a category where you want
to change the setting
“
” appears when any of
the items in the group is to
be locked and “
” appears
when all items are to be
locked.
3
Select a group where you want to
change the setting
4
Use
c
to select a checkbox (
□
)
X
o
(Finish)
The checked (
) items will
be locked.
Deselect items you do not
want to lock.
5
o
(Finish)
X
o
(Finish)
X
d
(Set)
The number of times you press
o
(Finish)
varies depending on the category.
Lock selection
Category list
Function menu
¨
p.132
Function menu
¨
p.132
Group list
Function list screen
Function menu
¨
p.132
Summary of Contents for STYLE N-02A
Page 22: ......
Page 84: ......
Page 96: ......
Page 212: ......
Page 244: ......
Page 272: ......
Page 396: ......
Page 426: ......
Page 440: ......
Page 462: ...460 Appendix Troubleshooting Reading Reading Reading...
Page 503: ...501 Appendix Troubleshooting Memo...
Page 504: ...502 Appendix Troubleshooting Memo...
Page 505: ...503 Appendix Troubleshooting Memo...
Page 506: ...504 Appendix Troubleshooting Memo...
Page 507: ...505 Index Quick Manual Index 506 Quick Manual 520...
Page 598: ...Kuten Code List...


