Section 3: Operation
3-12
User’s Manual
Once selected, change the setting as desired (see below) and press
to save and
return to the current function menu.
Slidebars in menus –
The current value for a given parameter,
such as size or vertical stretch, appears to the left of its slidebar
icon (adjustment window). This number often expresses a percentage, or it may have
units associated with it (such as pixels, degrees Kelvin, etc.), depending on the
specific option. Press
to gradually adjust the setting up or down—both the
number and the length of the bar change accordingly. Hold for continuous adjustment.
Or press
to activate a slidebar text box for specific number entry via the keypad,
then press
to save (or press
Exit
to cancel).
“Direct” slidebars -
For quick access, you can access Gamma, Brightness, and
Contrast slidebars without traveling the menu system. For example, simply press
Cont
to immediately display the same contrast slidebar accessed with the Contrast option in
the Image Settings menu.
Use the arrow keys to adjust a direct slidebar, or press
and enter a specific
number from the keypad , then
or
or
to save (or
Exit
to cancel). When
you are done, press
Exit
to save and return to your presentation.
NOTES: 1) You can still adjust a direct slidebar as usual if the display is turned off
(see
OSD
or Menu Preferences menu) — the slidebar just won’t be visible. 2) A direct
slidebar disappears if it is not used within 5 seconds.
Checkboxes -
Conditions are present if its adjacent
checkbox contains a checkmark. To toggle the checkbox,
simply highlight and press
, or highlight and use
to check and
to uncheck. If a checkbox is numbered, simply enter its number to
immediately toggle the checkbox.
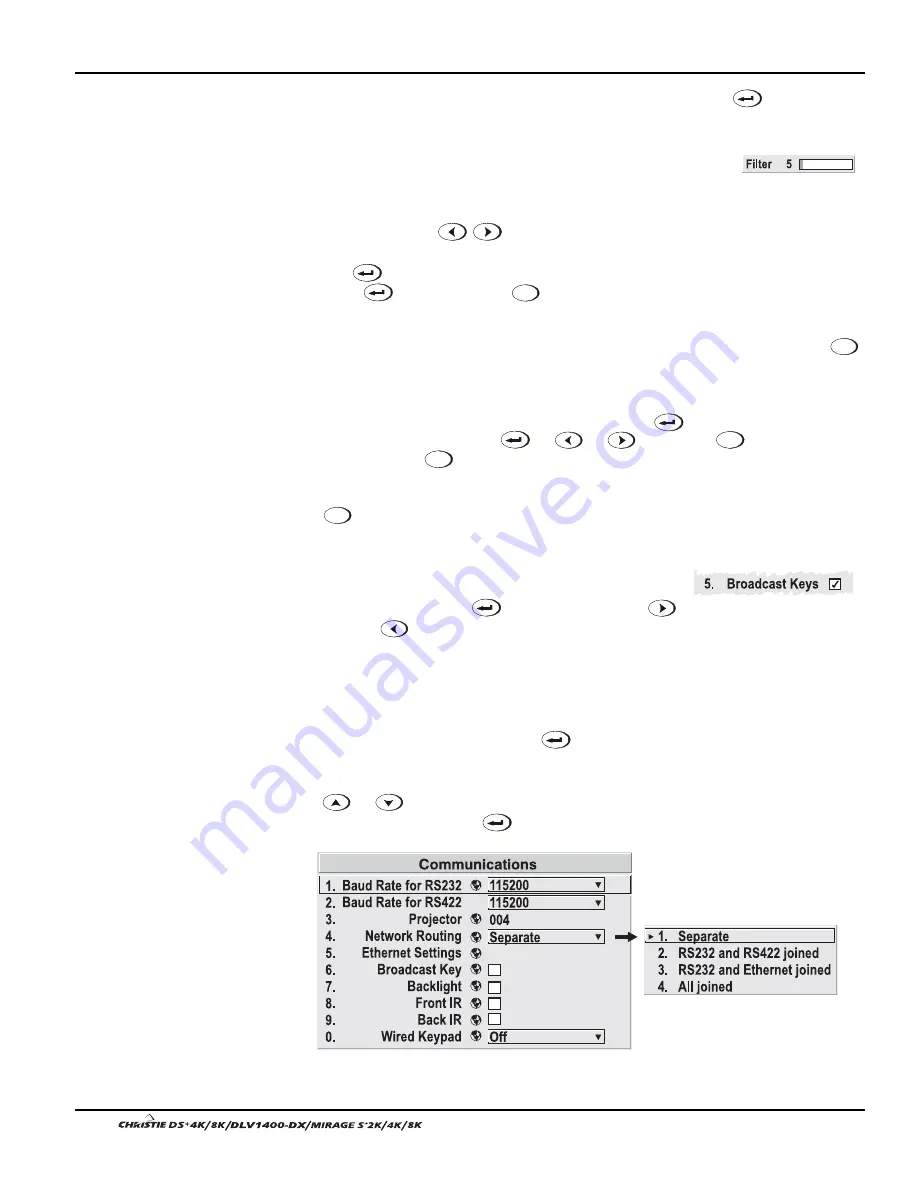
Pull-down lists –
To see a pull-down list of options available for a given parameter
labeled with a
▼
, you can:
•
Highlight it and press
(Enter)
•
Or enter the menu option number.
Use
or
keys to navigate up and down within the list (the current choice is
noted with a small
'
). Press
to choose an option from the list, if desired.
Figure 3.7. Example of Pull-Down List
Summary of Contents for DS+4K
Page 2: ......
Page 11: ...Section 2 Installation and Setup User s Manual 2 7 Figure 2 2 Vertical Offset Examples...
Page 12: ...Section 2 Installation and Setup 2 8 User s Manual Figure 2 3 Lens Vertical Offsets...
Page 14: ...Section 2 Installation and Setup 2 10 User s Manual Figure 2 5 Lens Horizontal Offsets...
Page 22: ......
Page 75: ...Section 3 Operation User s Manual 3 53 Figure 3 29 Customizing the Input Signal...
Page 92: ......
Page 102: ...Section 4 Maintenance 4 10 User s Manual Figure 4 8...
Page 106: ......
Page 120: ......
Page 122: ......
Page 124: ...Appendix C Serial Communication Cables C 2 User s Manual...
Page 126: ...Appendix D Throw Distance D 2 User s Manual...
Page 127: ...Appendix D Throw Distance User s Manual D 3...
Page 128: ...Appendix D Throw Distance D 4 User s Manual...
Page 129: ...Appendix D Throw Distance User s Manual D 5...
Page 130: ...Appendix D Throw Distance D 6 User s Manual...
Page 131: ...Appendix D Throw Distance User s Manual D 7...
Page 132: ...Appendix D Throw Distance D 8 User s Manual...
Page 133: ...Appendix D Throw Distance User s Manual D 9...
Page 134: ...Appendix D Throw Distance D 10 User s Manual...


