


In whole image view:
When no cropping frame is displayed, the entire Preview area will be scanned. When a cropping
frame is displayed, the portion within the cropping frame will be scanned.
Note
• To enlarge/reduce the scanned image, enter values into
(Width) and
(Height) in
Output Settings
or specify a value (by 1 %) for
%
. Although the maximum value available for
%
depends on the
Output Resolution
, it can be specified for up to 19200 dpi (the maximum
available output resolution).
Paper Size (L, A4, etc.) & Monitor Size (1024 x 768 pixels, etc.)
(Width),
(Height), and scale cannot be specified. The preview image will be cropped
according to the selected output size and resolution. The portion within the cropping frame will be
scanned at the size of the selected paper/monitor size. You can drag the cropping frame to
enlarge, reduce, or move it while maintaining the aspect ratio.
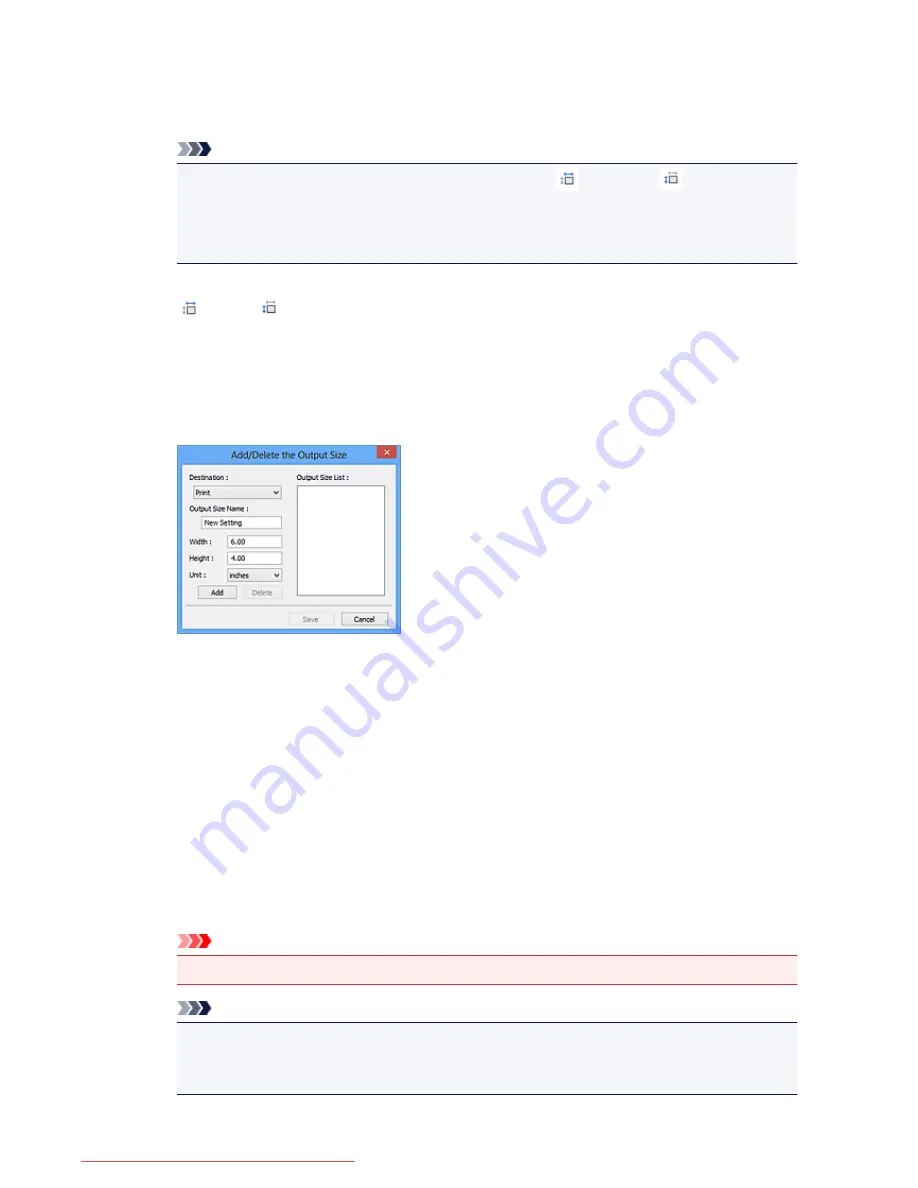
Add/Delete...
Opens the
Add/Delete the Output Size
dialog box, in which you can specify custom output sizes.
In the
Add/Delete the Output Size
dialog box, you can specify multiple output sizes and save
them at one time. Saved items will be registered to the
Output Size
list and can be selected, along
with the predefined items.
Adding:
Select
or
Image display
for
Destination
, then enter
Output Size Name
,
Width
, and
Height
,
then click
Add
. For
Unit
, you can select
inches
or
mm
when
Destination
is
but you can only
select
pixels
when
Destination
is
Image display
. The name of the added size appears in
Output
Size List
. Click
Save
to save the items listed in
Output Size List
.
Deleting:
Select the output size you want to delete in
Output Size List
, then click
Delete
. Click
Save
to save
the items listed in
Output Size List
.
Important
• You cannot delete predefined output sizes such as
A4
and
1024 x 768 pixels
.
Note
• Save up to 10 items for each destination.
• An error message appears when you enter a value outside the setting range. Enter a value
within the range displayed in the message.
712
Downloaded from ManualsPrinter.com Manuals
Summary of Contents for MB5300 series
Page 90: ...90 Downloaded from ManualsPrinter com Manuals ...
Page 139: ...139 Downloaded from ManualsPrinter com Manuals ...
Page 446: ...Adjusting Intensity Adjusting Contrast 446 Downloaded from ManualsPrinter com Manuals ...
Page 533: ...Device user settings 533 Downloaded from ManualsPrinter com Manuals ...
Page 566: ...See Two Sided Copying for two sided copying 566 Downloaded from ManualsPrinter com Manuals ...
Page 678: ...678 Downloaded from ManualsPrinter com Manuals ...
Page 701: ...Related Topic Scanning in Basic Mode 701 Downloaded from ManualsPrinter com Manuals ...


