Chapter 2
2-38
7) Start service mode, and register the front deck paper size.
8) Exit the service mode.
9) When done, go through the shut-down sequence to turn off and then on
the main power.
2.2.28 Fixing Host Machine in Place
0017-8636
iR7105 / iR7095 / iR7086 / iR7095P
<After installing the host machine>
1) Clean up the area around the host machine.
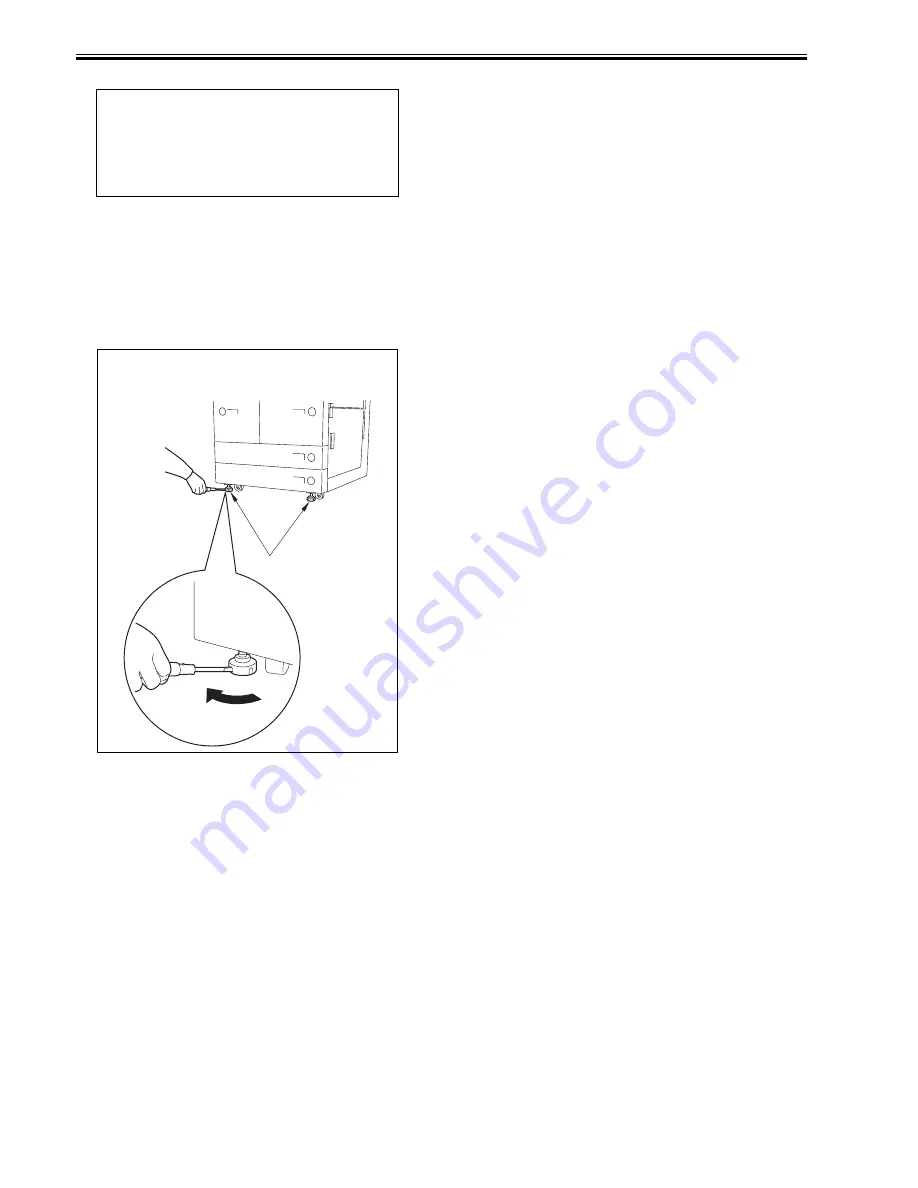
2) Move the host machine in a desired place and fix it in place with 2 adjus-
tors.
3) Complete the necessary information in a service book and store it in a
service book storage.
2.2.29 Checking the Operation in a System Configuration
0011-4297
iR7105 / iR7095 / iR7086 / iR7095P
1) Install the accessories according to their respective Installation Proce-
dures.
2) Check to make sure that all accessories have been connected correctly.
- Make a check in service mode:
Start service mode, and make the following selections: COPIER >
OPTION > ACCPST-D > ACC1 through 8.
Check to see that the order and the model names are indicated
correctly.
End service mode.
- Click 'system status/stop' to check the device information.
Check to make sure that all connected accessories are indicated.
3) Check the operation using the accessories.
- Make sure paper does not jam, move askew, or fail to deposit properly.
MEMO:
right deck: COPIER > OPTION > CST > P-SZ-C1
left deck: COPIER > OPTION > CST > P-SZ-C2
A4=6, B5=15, LTR=18
MEMO:
If the adjustor cannot be rotated by hand, use a screwdriver to rotate it.
[1]
Summary of Contents for iR7086
Page 1: ...Sep 7 2007 Service Manual iR7105 7095 7086 Series...
Page 2: ......
Page 6: ......
Page 26: ...Contents...
Page 27: ...Chapter 1 Introduction...
Page 28: ......
Page 30: ......
Page 32: ...Chapter 1 1 2 Not all products are necessarily available in all sales areas...
Page 55: ...Chapter 2 Installation...
Page 56: ......
Page 150: ......
Page 151: ...Chapter 3 Basic Operation...
Page 152: ......
Page 154: ......
Page 159: ...Chapter 4 Main Controller...
Page 160: ......
Page 162: ......
Page 183: ...Chapter 5 Original Exposure System...
Page 184: ......
Page 228: ......
Page 229: ...Chapter 6 Laser Exposure...
Page 230: ......
Page 232: ......
Page 238: ...Chapter 6 6 6 F 6 7 1 Laser light 2 Laser shutter 1 2 1 2 2 1...
Page 240: ......
Page 241: ...Chapter 7 Image Formation...
Page 242: ......
Page 246: ......
Page 294: ......
Page 295: ...Chapter 8 Pickup Feeding System...
Page 296: ......
Page 300: ......
Page 353: ...Chapter 9 Fixing System...
Page 354: ......
Page 378: ......
Page 379: ...Chapter 10 External and Controls...
Page 380: ......
Page 384: ......
Page 394: ...Chapter 10 10 10 F 10 7...
Page 417: ...Chapter 11 MEAP...
Page 418: ......
Page 420: ......
Page 466: ......
Page 467: ...Chapter 12 RDS...
Page 468: ......
Page 470: ......
Page 479: ...Chapter 13 Maintenance and Inspection...
Page 480: ......
Page 482: ......
Page 496: ......
Page 497: ...Chapter 14 Standards and Adjustments...
Page 498: ......
Page 526: ......
Page 527: ...Chapter 15 Correcting Faulty Images...
Page 528: ......
Page 530: ......
Page 560: ......
Page 561: ...Chapter 16 Self Diagnosis...
Page 562: ......
Page 564: ......
Page 584: ......
Page 585: ...Chapter 17 Service Mode...
Page 586: ......
Page 588: ...Contents 17 8 1 1 COPIER Items 17 94...
Page 688: ......
Page 689: ...Chapter 18 Upgrading...
Page 690: ......
Page 692: ......
Page 696: ...Chapter 18 18 4...
Page 713: ...Chapter 18 18 22 formatting and download the system software once again...
Page 726: ...Chapter 19 Service Tools...
Page 727: ......
Page 729: ......
Page 733: ......
Page 734: ...Sep 7 2007...
Page 735: ......


