Serialization
86
LabelMark 5.0 User’s Manual
8.
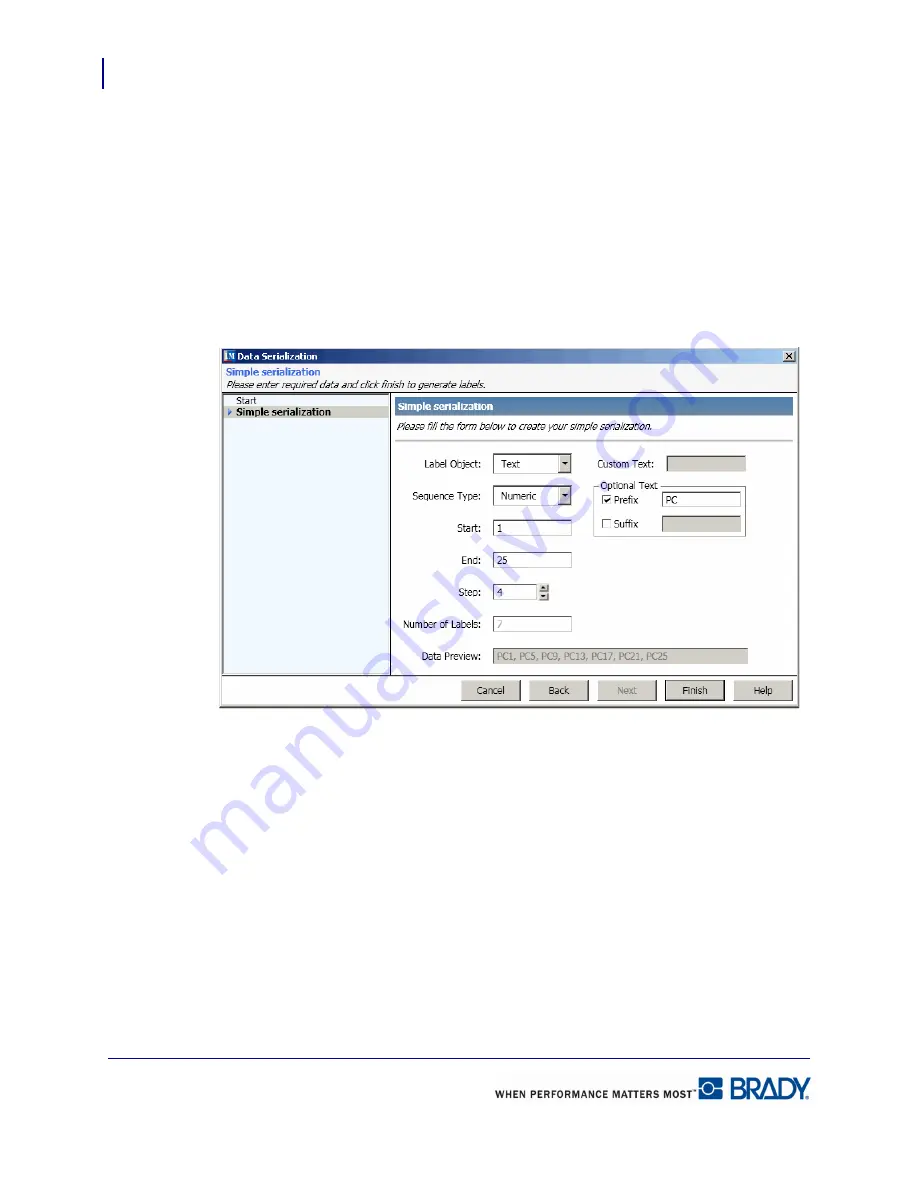
In the
Step
field, enter the number by which the serialization should increment.
9.
In the
Number of Labels:
field, enter the number of labels to which the serialization should
be added.
10.
If you want to add consistent text before or after the serialized character, in the Optional
Text section, click
Prefix
(for text displaying before the serialized characters) or
Suffix
(for
text displaying after the serialized characters). Enter the prefix or suffix text string in the
text entry box to the right of the Prefix or Suffix checkbox.
The Data Preview: field displays a sample of how the serialization is applied.
Figure 1 • Simple serialization using a prefix
11.
When finished, click Finish.
The serialization displays in the top left corner of the indicated labels. If you want to place the
serialized characters at some other location on the label:
1.
Click the serialized characters on one of the labels (it makes no difference on which label
you select the item).
2.
With handles displaying around the serialized characters, position the mouse on the
characters (not the handles), then drag the serialized characters to another location on the
label.
All labels with the serialized characters display the characters at the new location on their
respective label.
Summary of Contents for LabelMark 5.0
Page 1: ......
Page 2: ......
Page 38: ...Print a Label File Print Dialog Box 28 LabelMark 5 0 User s Manual...
Page 122: ...Job Files Favorite Job Files 112 LabelMark 5 0 User s Manual...
Page 132: ......
Page 154: ...Microsoft Visio 144 LabelMark 5 0 User s Manual...
Page 160: ...Microsoft Excel 150 LabelMark 5 0 User s Manual...


