Microsoft Visio
140
LabelMark 5.0 User’s Manual
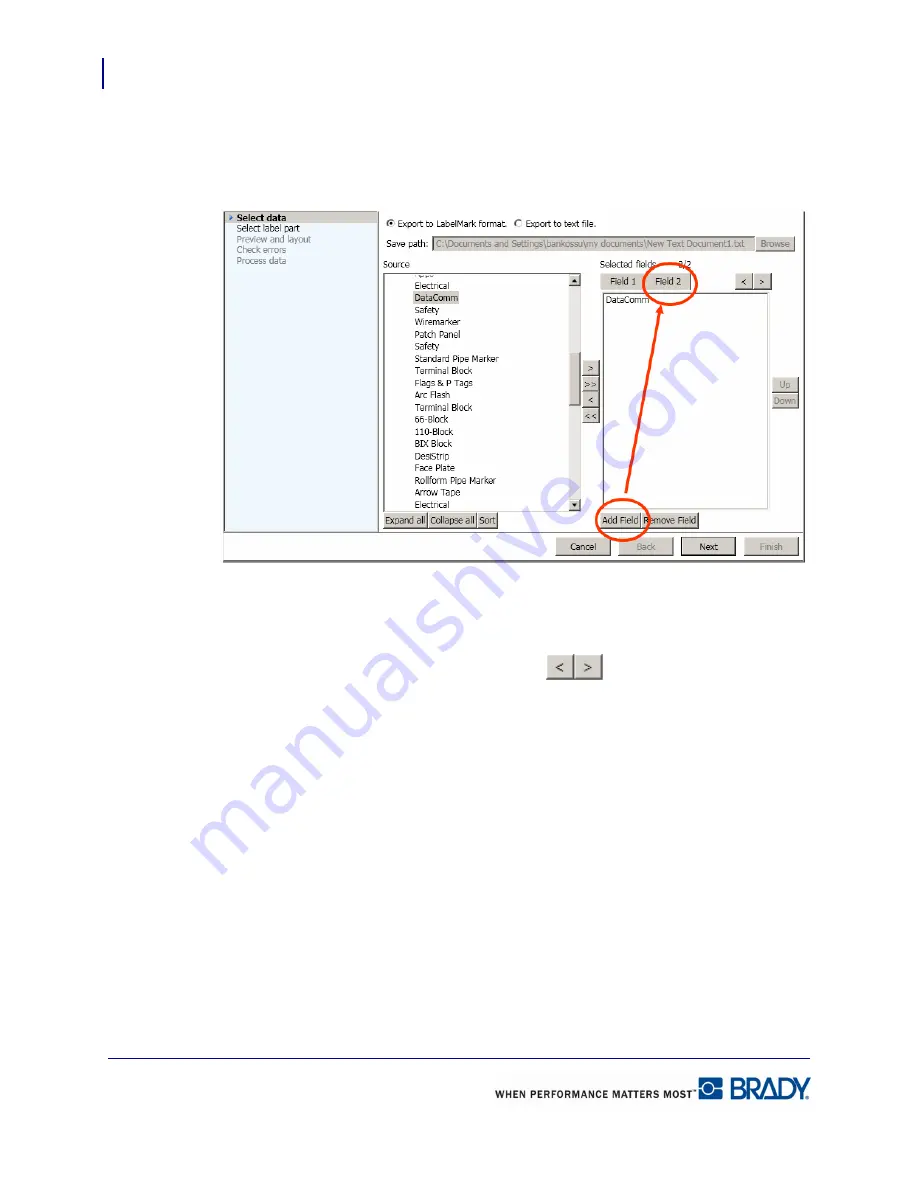
All the individual text added to a specific field on the Selected fields side of the dialog box will
display as one object on the label. To have specific text display as different objects on the
label, separate them from each other by adding fields to the Selected Fields section.
To add a different field:
7.
Click Add Field, then click the text in the page lists to be added to that field and click >.
8.
To move to the different fields, click the arrows
above the field list. To view the
contents of each added field, click the Field # tab in the Selected Fields section.
9.
To remove an added field, click the Field # tab to display the data that you want to remove.
10.
Click Remove Field.
The data placed in that field will be returned to its original field in the Source section.
Adding a field after deleting one will continue the numbering sequence. The deleted field is
removed from the sequence, leaving a gap in field numbers. For instance, if you have three
fields (Field #1, Field #2, Field #3), you remove Field #2, then add another field, the fields will
be numbered: Field #1, Field #3, Field #4. If you want to keep the added field numbers
sequential, just remove the data on a field, not the entire field.
Summary of Contents for LabelMark 5.0
Page 1: ......
Page 2: ......
Page 38: ...Print a Label File Print Dialog Box 28 LabelMark 5 0 User s Manual...
Page 122: ...Job Files Favorite Job Files 112 LabelMark 5 0 User s Manual...
Page 132: ......
Page 154: ...Microsoft Visio 144 LabelMark 5 0 User s Manual...
Page 160: ...Microsoft Excel 150 LabelMark 5 0 User s Manual...


