113
Managing Custom Parts
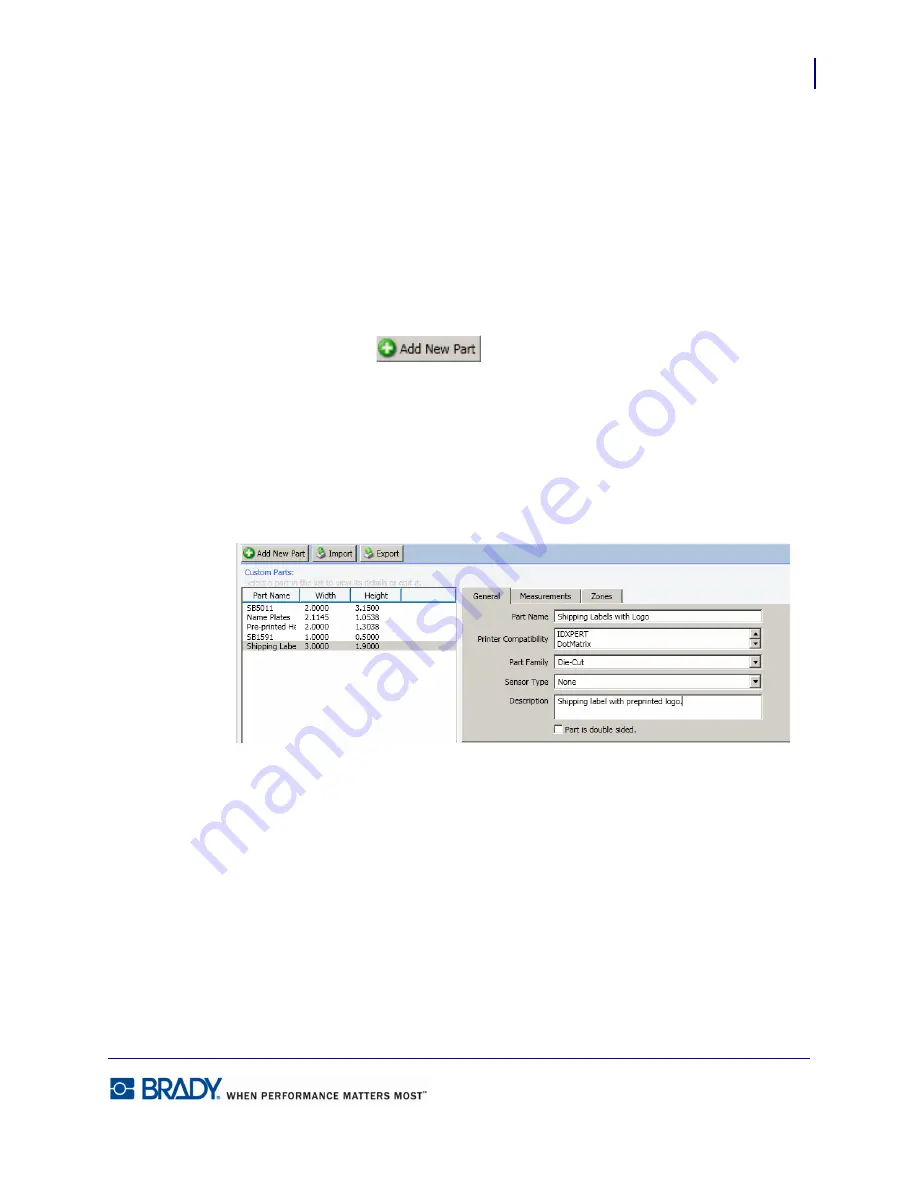
Creating a Custom Part
LabelMark5.0 User’s Manual
Managing Custom Parts
Custom parts are user-defined label parts. These parts can be based on factory created stock
parts or completely original, defined by the user.
Creating a Custom Part
To create a custom part:
1.
Choose Tools>Manage Custom Parts.
2.
Click Add New Part
.
3.
From the list of part numbers displayed, click the part number with parameters closest to
what you need. (See Create New/Open dialog and Search features.)
4.
Click OK.
5.
On the General tab, in the
Part Name
field, highlight the temporary generic name, then
enter a unique name for your custom part.
6.
The
Printer Compatibility
field lists the printer most often associated with the particular
label. Click the up/down toggle button to access a different printer, if desired.
7.
In the
Part Family
field, click the down arrow and select the label type that identifies your
custom label.
8.
In the
Sensor Type
field, click the down arrow and indicate label feed mechanism most
closely identified with this custom label.
9.
In the
Description
field, enter a brief description of the custom label (optional).
10.
Indicate if the custom label is double sided by clicking the
Part is double sided
checkbox.
11.
Click the Measurements tab and adjust the height, width, and margins of the label to the
new requirements of the custom label.
Summary of Contents for LabelMark 5.0
Page 1: ......
Page 2: ......
Page 38: ...Print a Label File Print Dialog Box 28 LabelMark 5 0 User s Manual...
Page 122: ...Job Files Favorite Job Files 112 LabelMark 5 0 User s Manual...
Page 132: ......
Page 154: ...Microsoft Visio 144 LabelMark 5 0 User s Manual...
Page 160: ...Microsoft Excel 150 LabelMark 5 0 User s Manual...


