3 - Installation
35
3.9.3 Installing
Display
The remote display is installed as follows:
• Install the gasket onto the display.
• Insert the display through the door cutout.
• Insert the mounting clips into the holes in each side of the display.
• Tighten the mounting clips until they hold the display securely in place. (Torque requirements are 0.7
NM or 6.195 in lbs.)
• Plug the cable into the display connector on the MX
2
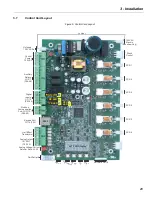
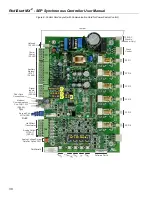
card. See Figures 5 and 6 on Pages 29 and 30
for the connector location.
• Route the cable through the enclosure to the display. Observe the wiring considerations as listed in
Section 3.4 on Page 22.
• Plug the other end of the cable into the LCD display.
Figure 14: Mounting Remote Keypads
MX³ DISPLAY
GASKET
ENCLOSURE DOOR
MX³ DISPLAY CABLE
CLIP
CLIP
Summary of Contents for RediStart MX2 SEP
Page 2: ......
Page 8: ...RediStart MX 2 SEP Synchronous Controller User Manual 8 ...
Page 14: ...RediStart MX 2 SEP Synchronous Controller User Manual 14 ...
Page 36: ...RediStart MX 2 SEP Synchronous Controller User Manual 36 ...
Page 52: ...RediStart MX 2 SEP Synchronous Controller User Manual 52 ...
Page 98: ...RediStart MX 2 SEP Synchronous Controller User Manual 98 ...
Page 114: ...RediStart MX 2 SEP Synchronous Controller User Manual 114 ...
Page 116: ...RediStart MX 2 SEP Synchronous Controller User Manual 116 ...
Page 118: ...RediStart MX 2 SEP Synchronous Controller User Manual 118 ...
Page 128: ...RediStart MX 2 SEP Synchronous Controller User Manual 128 ...
Page 129: ...Publication History Revision Date ECO 00 12 15 06 Initial Release 01 12 04 15 E4926 ...

