116
X100 Series Main User Manual
IN
ST
A
LL
&
C
O
N
N
EC
T
SE
TU
P
CO
N
FI
G
U
RE
RE
CO
RD
IN
G
S
O
FT
W
A
RE
RE
CO
RD
IN
G
S
O
FT
W
A
RE
Click the SCHEDULE SETUP button to launch the Schedule Config panel. Click on the SYSTEM Tab and
the pop up window will appear.
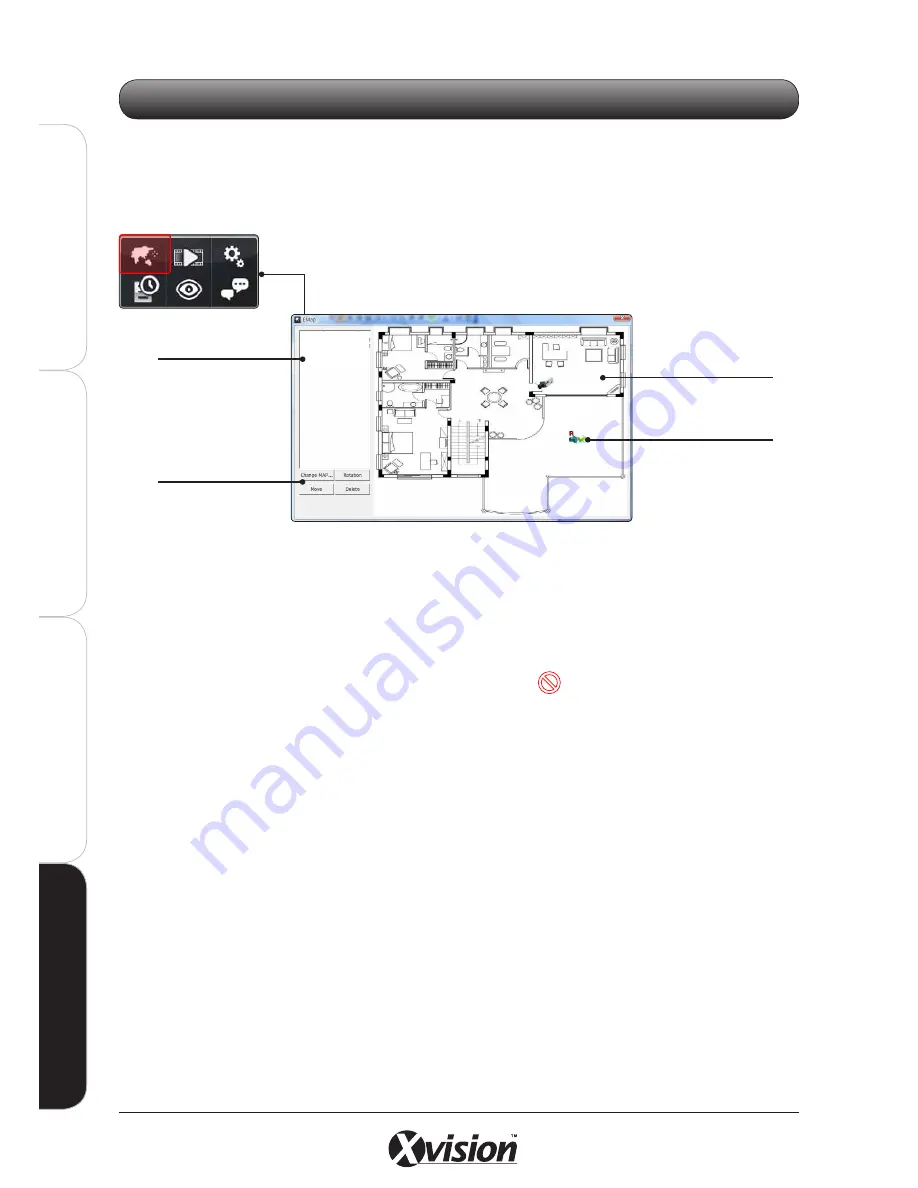
Add/Change the E-Map
Click the CHANGE MAP button, and then select a new picture to replace the old one.
Add a camera to E-Map
Simply drag a camera name from the Camera List onto the Map.
- If the camera already exists in the E-Map, the cursor will change to indicating the camera cannot be added
- Position the cameras on the E-Map as they appear in real life.
Preview a camera
Double click on the camera icon located on the E-Map. A pop up window will appear with live images of
the camera selected.
Move a camera
Either drag the camera icon to its new position OR preview the camera by double clicking the icon, click
the MOVE button then use the mouse to click on the new position on the map.
Rotate a camera
Either press and hold the mouse button on the camera icon then rotate it to its new position OR preview
the camera by double clicking the icon, click the ROTATE button then use the mouse to rotate the
camera icon to its new position on the map.
Delete a camera from the E-Map
Preview the camera by double clicking the icon, click the DELETE button to remove the icon from the map.
X100 CAM1 (192.168.0.56)
X100 CAM2 (192.168.0.187)
X100 CAM3 (192.168.0.55)
4.8 E-MAP
Displays custom map to
locate your cameras on
Cameras can be
overlaid on the map
Camera List
Lists all the system
cameras by name
E-Map buttons
See below for details
Содержание X100 Series
Страница 1: ...User Manual X100 SERIES ...
Страница 176: ...V1 2 2010 10 ...


