


October 2012
4-98
ColorQube 8570/8870 Service Manual
REP 6.2
Revised, 3rd Revision - Xerox Internal Use Only
Repairs and Adjustments
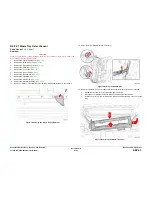
REP 6.2 No Paper Sensor
Parts List on
PL 6.1 Item 2
Removal
1.
Remove the Front Door (
REP 1.1
).
2.
Remove Tray 2.
3.
Remove the Pick Assembly and Retard Rollers (
REP 3.10
).
4.
Remove the Lower Inner Duplex Guide (
REP 3.2
).
5.
Remove the Inner Simplex Guide (
REP 3.1
).
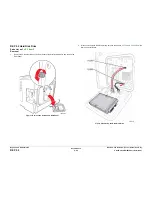
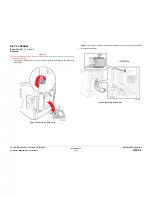
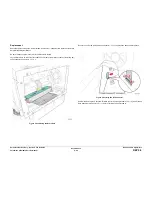
6.
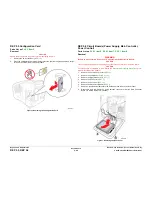
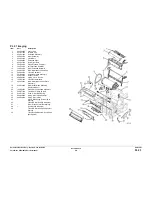
Release the 4 hooks that secure the No Paper Sensor to the left side of the Pick Assem-
bly recess.
7.
Disconnect the wiring harness connector
P/J127
from the wiring harness and remove the
Sensor.
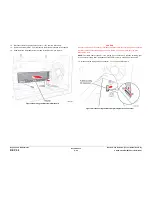
Figure 1 Remove the No Paper Sensor
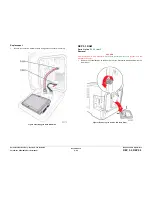
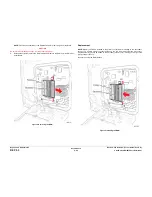
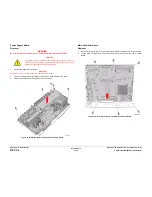
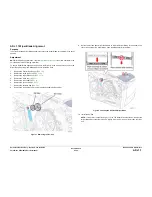
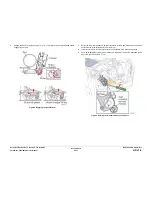
Replacement
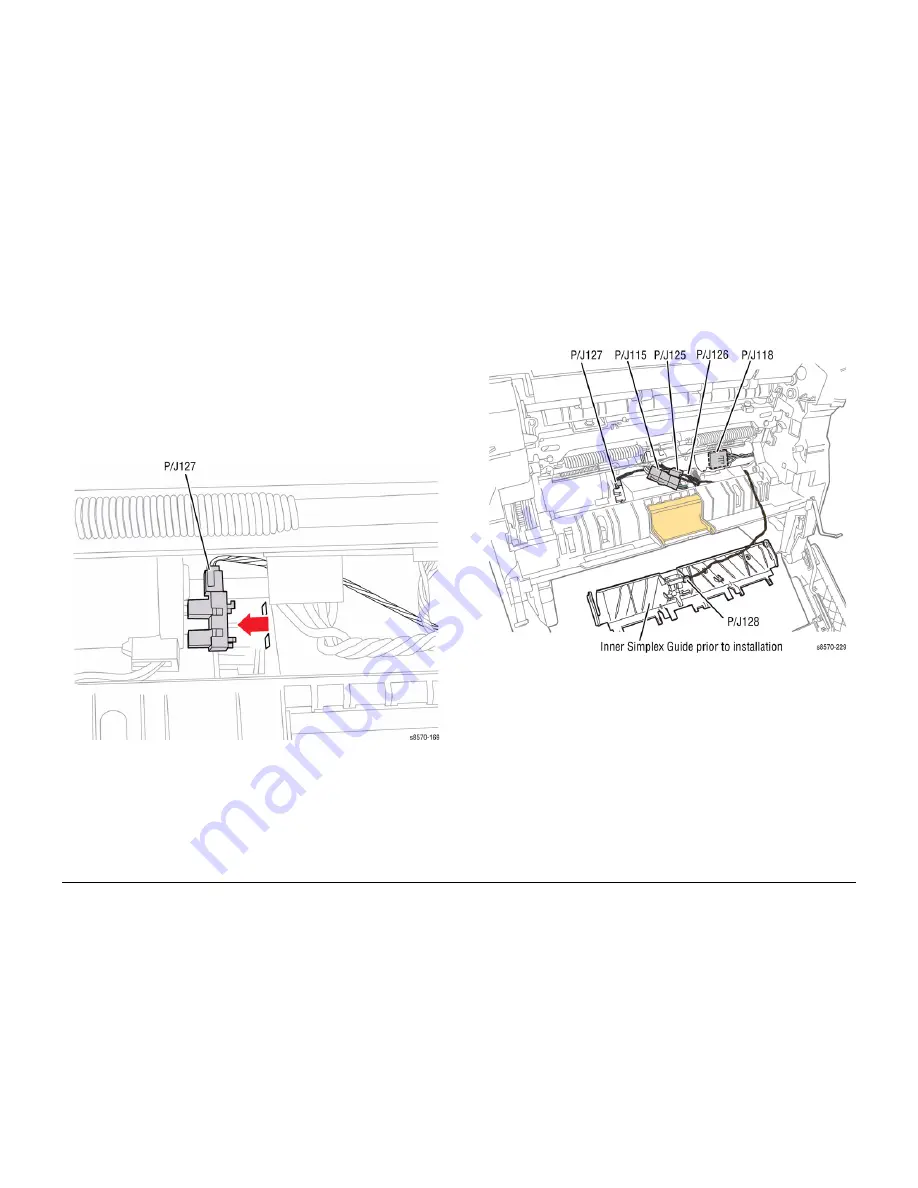
Disconnect the Preheater Assembly wiring harness connectors
P/J125
and
P/J115
to make
additional room to replace the Sensor. Release the lock on the wiring harness connector
P/
J115
to remove it from the Preheater Assembly.
Figure 2 Wiring Connector Locations
Содержание COLORQUBE 8570
Страница 1: ...ColorQube 8570 8870 Printer ColorQube 8570 8870 Service Manual Xerox Internal Use Only...
Страница 2: ......
Страница 152: ...October 2012 3 2 ColorQube 8570 8870 Service Manual Revised 3rd Revision Xerox Internal Use Only Image Quality...
Страница 196: ...October 2012 4 2 ColorQube 8570 8870 Service Manual Revised 3rd Revision Xerox Internal Use Only Repairs and Adjustments...
Страница 304: ...October 2012 5 2 ColorQube 8570 8870 Service Manual Revised 3rd Revision Xerox Internal Use Only Parts List...
Страница 316: ...October 2012 6 2 ColorQube 8570 8870 Service Manual Revised 3rd Revision Xerox Internal Use Only General Troubleshooting...
Страница 372: ...October 2012 7 2 ColorQube 8570 8870 Service Manual Revised 3rd Revision Xerox Internal Use Only Wiring Data...
Страница 392: ...October 2012 8 2 ColorQube 8570 8870 Service Manual Revised 3rd Revision Xerox Internal Use Only Theory of Operation...
Страница 423: ......