


October 2012
4-51
ColorQube 8570/8870 Service Manual
REP 2.21
Repairs and Adjustments
Xerox Internal Use Only - Revised, 3rd Revision
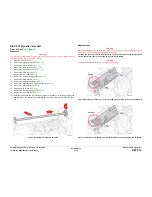
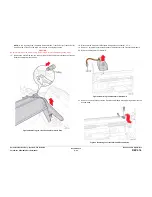
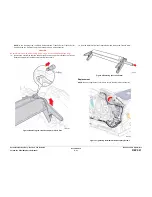
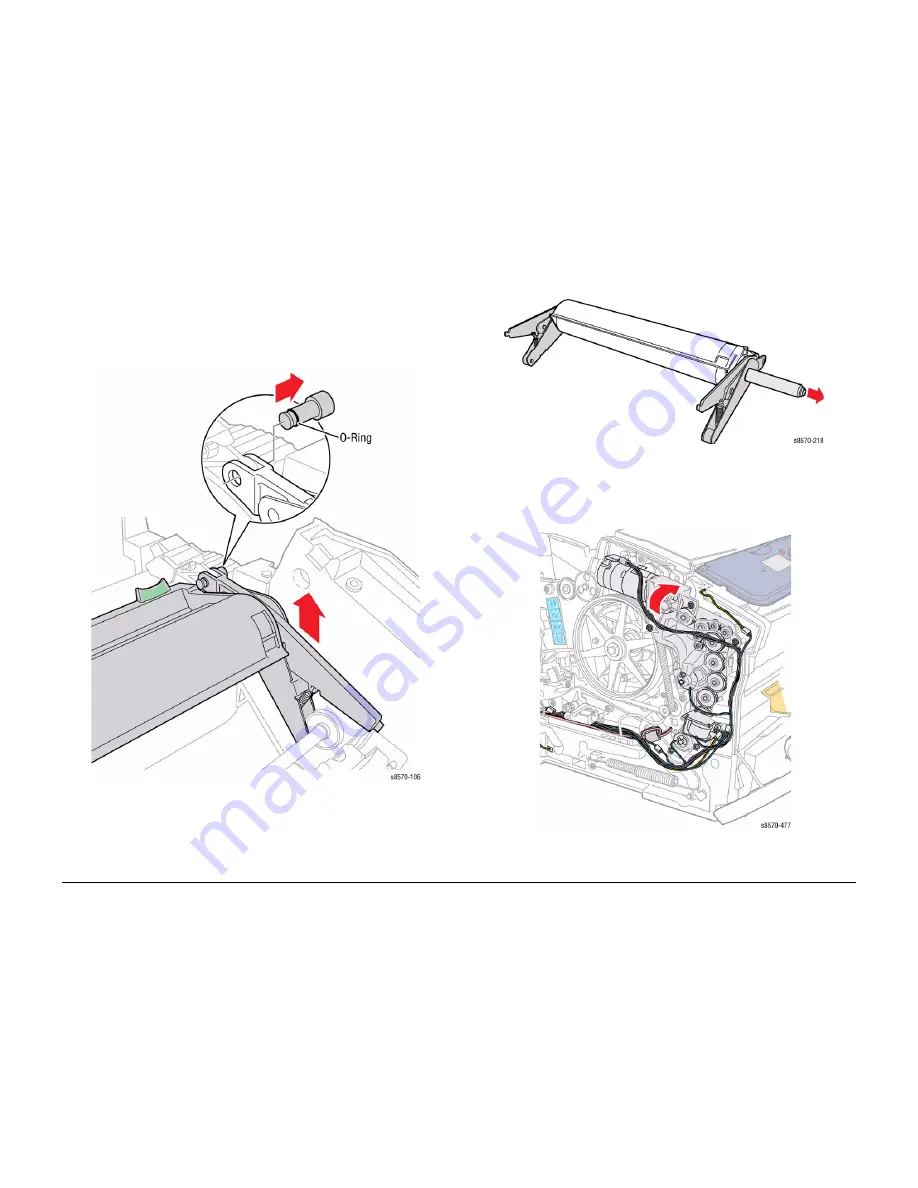
NOTE: In the following step, the Media Release Blade, Transfix Roller, Transfix Roller
Shaft, and the two Transfix Load Arms are removed as a single assembly.
CAUTION
Be careful not to lose the rubber O-ring. (The O-ring is for noise dampening during strip.)
13. Remove the Clevis Pins from the left and right Transfix Load Arms to release the Transfix
Roller Assembly with Transfix Load Arms from the chassis.
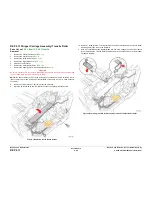
Figure 3 Removing the Transfix Load Arm Clevis Pins
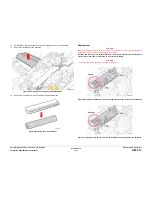
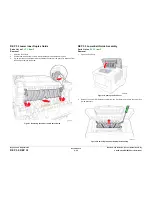
14. Pull the Shaft out from the Transfix Roller and remove the Transfix Arms.
Figure 4 Removing the Transfix Arm
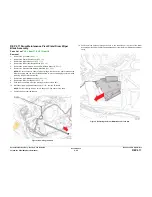
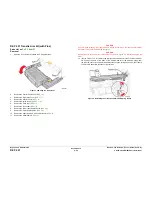
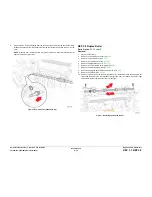
Replacement
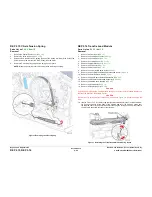
NOTE: Be sue to tighten the six screws to secure the Media Drive Assembly.
Figure 5 Tightening the Media Drive Assembly Screws
Содержание COLORQUBE 8570
Страница 1: ...ColorQube 8570 8870 Printer ColorQube 8570 8870 Service Manual Xerox Internal Use Only...
Страница 2: ......
Страница 152: ...October 2012 3 2 ColorQube 8570 8870 Service Manual Revised 3rd Revision Xerox Internal Use Only Image Quality...
Страница 196: ...October 2012 4 2 ColorQube 8570 8870 Service Manual Revised 3rd Revision Xerox Internal Use Only Repairs and Adjustments...
Страница 304: ...October 2012 5 2 ColorQube 8570 8870 Service Manual Revised 3rd Revision Xerox Internal Use Only Parts List...
Страница 316: ...October 2012 6 2 ColorQube 8570 8870 Service Manual Revised 3rd Revision Xerox Internal Use Only General Troubleshooting...
Страница 372: ...October 2012 7 2 ColorQube 8570 8870 Service Manual Revised 3rd Revision Xerox Internal Use Only Wiring Data...
Страница 392: ...October 2012 8 2 ColorQube 8570 8870 Service Manual Revised 3rd Revision Xerox Internal Use Only Theory of Operation...
Страница 423: ......


