


October 2012
4-43
ColorQube 8570/8870 Service Manual
REP 2.16
Repairs and Adjustments
Xerox Internal Use Only - Revised, 3rd Revision
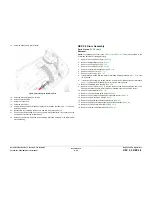
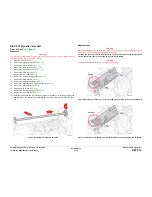
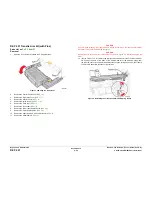
NOTE: In the following step, the Media Release Blade, Transfix Roller, Transfix Roller
Shaft, and the 2 Transfix Load Arms are removed as a single assembly.
CAUTION
Be careful not to lose the rubber O-ring. (The O-ring is for noise dampening during strip.)
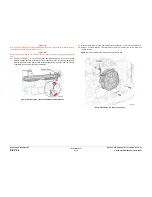
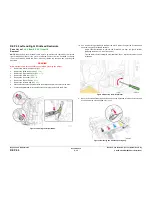
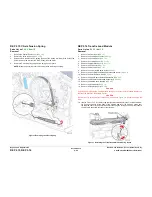
17. Remove the Clevis Pins from the left and right Transfix Load Arms to release the Transfix
Roller Assembly from the chassis.
Figure 2 Removing the Transfix Load Arm Clevis Pins
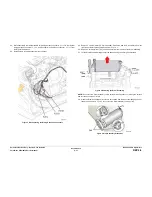
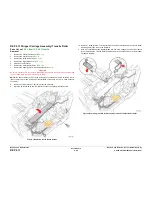
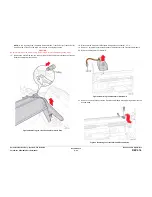
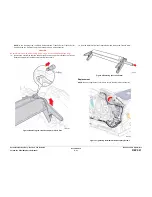
18. Disconnect the Preheater Lift Solenoid wiring harness connector
P/J112
.
19. Remove 1 screw that secures the Preheater Lift Solenoid to the Transfix Load Module.
20. Remove the Preheater Lift Solenoid.
Figure 3 Removing the Preheater Lift Solenoid
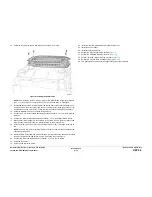
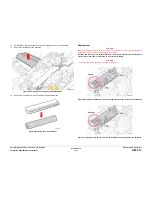
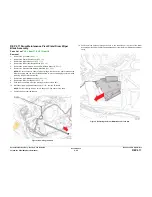
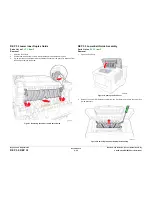
21. Remove the screw that secures the Transfix Load Module Ground Spring and remove the
Ground Strap.
Figure 4 Removing the Transfix Module Ground Strap
Содержание COLORQUBE 8570
Страница 1: ...ColorQube 8570 8870 Printer ColorQube 8570 8870 Service Manual Xerox Internal Use Only...
Страница 2: ......
Страница 152: ...October 2012 3 2 ColorQube 8570 8870 Service Manual Revised 3rd Revision Xerox Internal Use Only Image Quality...
Страница 196: ...October 2012 4 2 ColorQube 8570 8870 Service Manual Revised 3rd Revision Xerox Internal Use Only Repairs and Adjustments...
Страница 304: ...October 2012 5 2 ColorQube 8570 8870 Service Manual Revised 3rd Revision Xerox Internal Use Only Parts List...
Страница 316: ...October 2012 6 2 ColorQube 8570 8870 Service Manual Revised 3rd Revision Xerox Internal Use Only General Troubleshooting...
Страница 372: ...October 2012 7 2 ColorQube 8570 8870 Service Manual Revised 3rd Revision Xerox Internal Use Only Wiring Data...
Страница 392: ...October 2012 8 2 ColorQube 8570 8870 Service Manual Revised 3rd Revision Xerox Internal Use Only Theory of Operation...
Страница 423: ......