Highlight the box beside
Baud Rate
and press the button. A list of baud rates ranging from 300 to
115,200 appears.
Highlight the box beside
Data Bit
and press the
button. Choose between 7 bit and 8 bit formats.
Highlight the box beside
Stop Bit
and press the
button. Choose between 1 and 2 Stop Bits.
Highlight the box beside
Parity
and press the
button. A drop-down list appears. You can select from
None
,
Odd
or
Even
parity.
DVRNS Setup
Highlight the
DVRNS
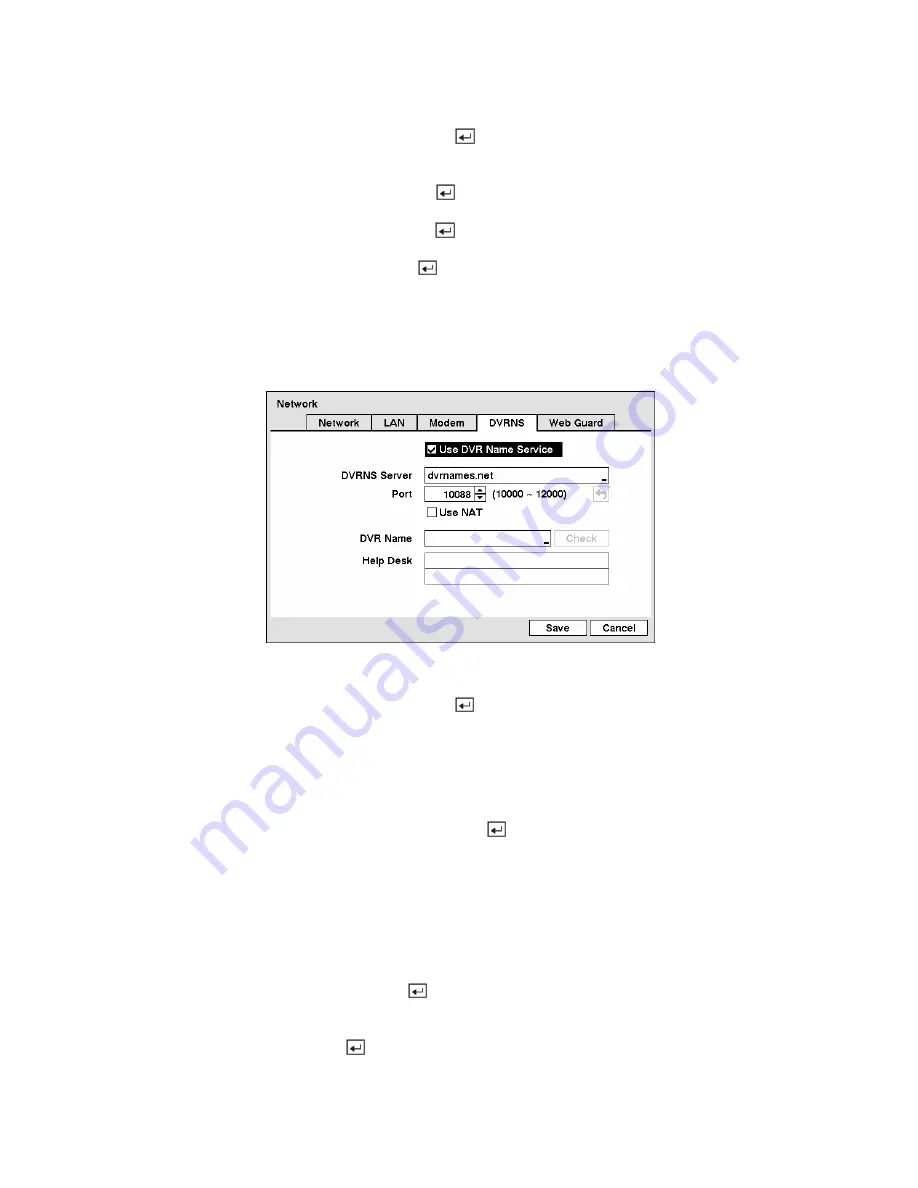
tab, and the DVRNS screen displays.
Figure 49 — DVRNS setup screen.
Highlight
Use DVR Name Service
and press the button to toggle between On and Off.
NOTE: The DVRNS (DVR Name Service) allows the DVR to use Dynamic IP addresses for remote
connection. When this feature is On, you can access your DVR remotely using the DVR name
instead of its IP address. For the DVRNS feature, the DVR should be registered on the DVRNS
server.
Highlight the box beside
DVRNS Server
and press the
button. A virtual keyboard appears allowing
you to enter the IP address or domain name of the DVRNS server.
NOTE: You will need to get the IP Address or domain name of the DVRNS Server from your
network administrator.
NOTE: You can use the domain name instead of IP address if you already set up the DNS Server
when setting up the LAN.
Highlight the box beside
Port
and press the
button. Set the port number of the DVRNS server using
the
Up
and
Down
arrow buttons to increase or decrease the numbers.
Highlight
Use NAT
and press the button to toggle between On and Off.


