Using Pagis Pro
4–49
Index
Contents
7. To continue scanning go to Step 8. To end scanning and
save your document, go to Step 10.
A
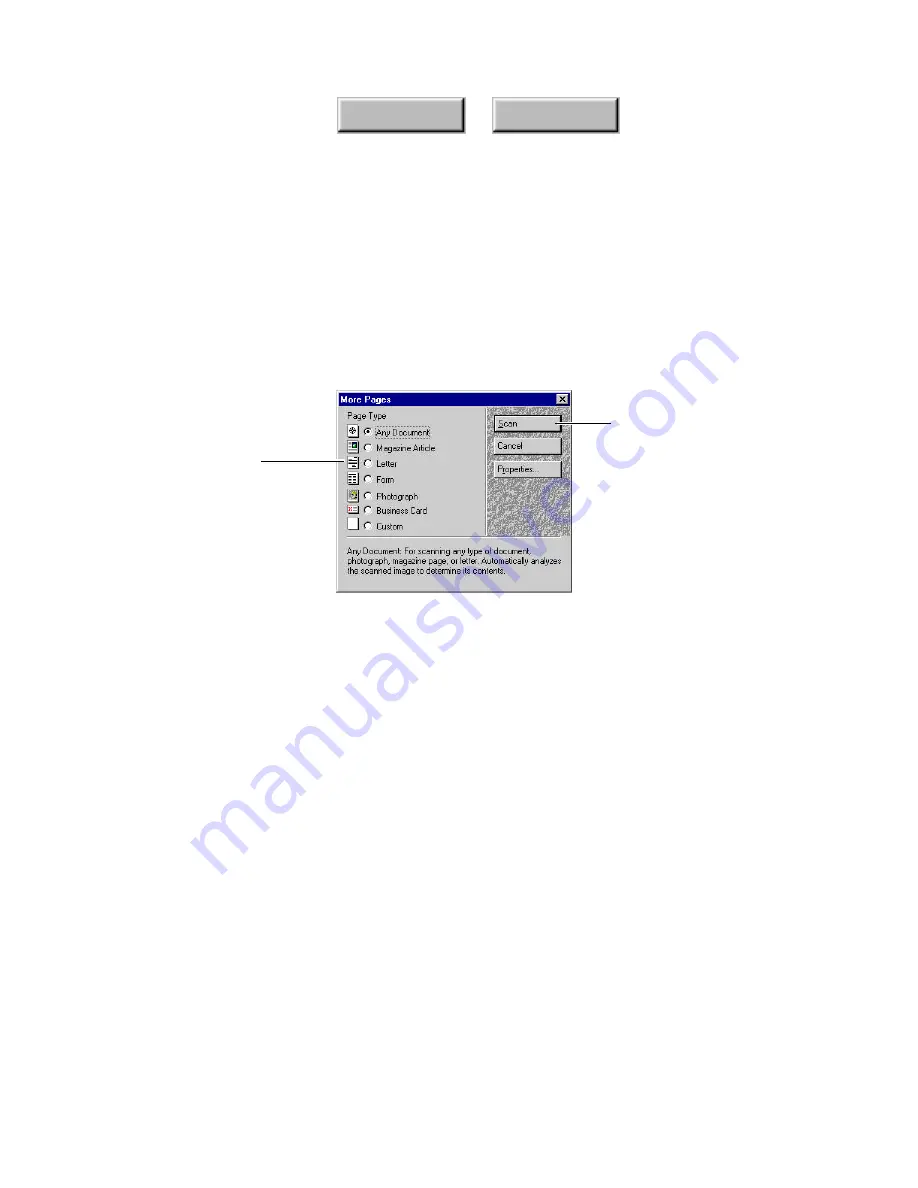
More Pages
dialog box appears allowing you to select a
different page type for the next page (Figure 4–24).
8. Insert the next page into the scanner, and click the More
Pages button.
Select a different page
type if necessary
Click to scan the next
page of the document
Figure 4–24.
More Pages dialog box
9. Specify the page type for the next page, and click the Scan
button.
10. Continue from Step 8 to scan additional pages. When you
finish scanning, go to Step 11.
11. On the Scanner Progress dialog box (refer to Figure 4–23),
click the Save button.
Depending on the Auto Save properties:
•
the scanned document is automatically saved to the specified
file name and location, or a Save As dialog appears for you to
name and locate the file.
•
the scanned document is automatically located and selected
for you in Windows, the scanned document is automatically
opened in the Pagis Editor ready for editing, the Scan Tool
closes, or the Scan Tool is ready to scan a new document.
Содержание PAGIS PRO 3.0
Страница 1: ......


