52
Clip Management: Thumbnail and Clip Management
4
Press the SET button.
◆
NOTE:
• Selecting [THUMBNAIL INIT] opens a confirmation dialog.
Select [YES].
5
Press the MENU button to end processing.
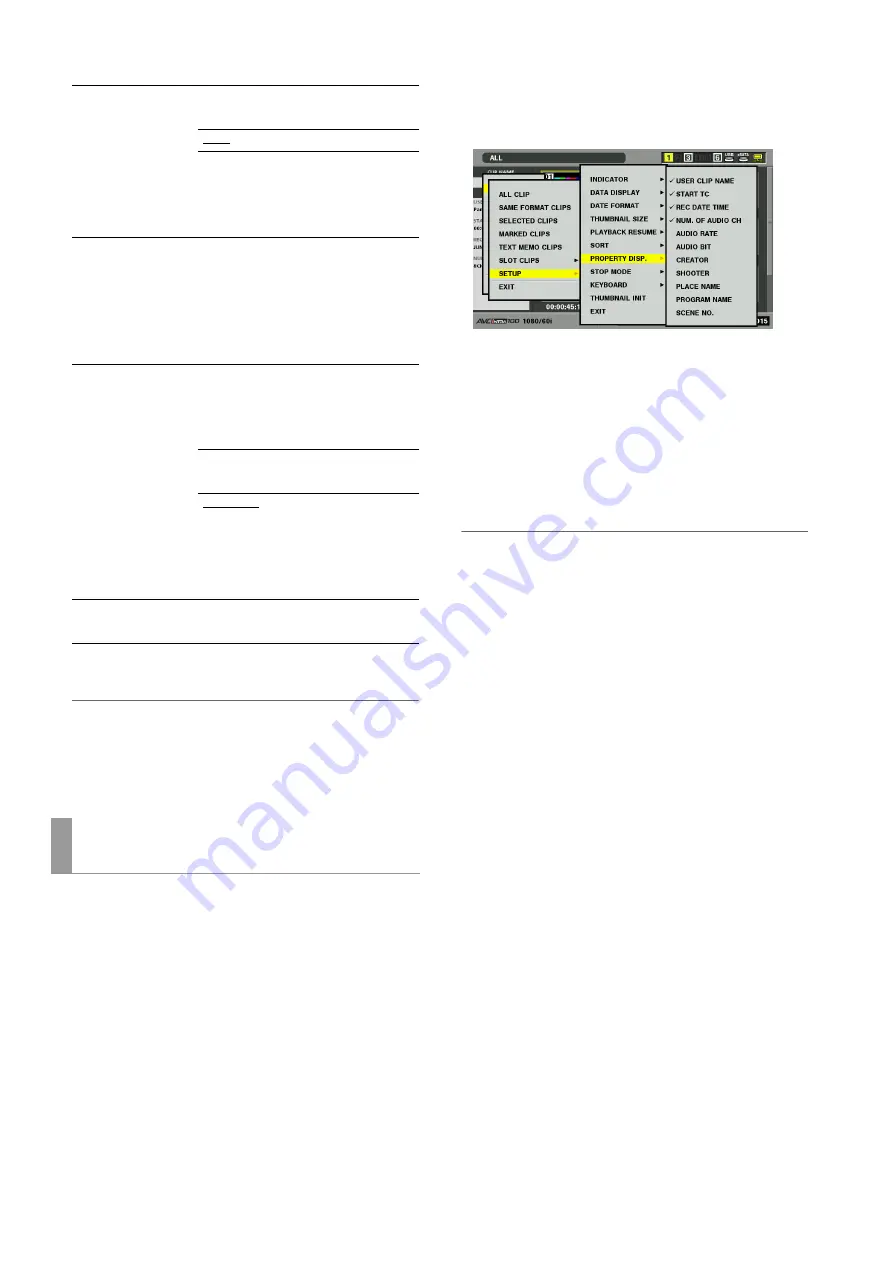
Select items that will appear in a simplified property display on
the left side of the thumbnail.
1
Open the thumbnail screen.
2
Press the MENU button.
3
Use the cursor buttons to choose [THUMBNAIL] -
[SET UP] - [PROPERTY DISP.].
4
Press the SET button to open the setup menu.
All selected items are indicated by check marks.
5
Press the SET button and add check marks for items
to be displayed.
Pressing the SET button causes unchecked items to be
checked and checked items to be unchecked.
◆
NOTE:
• Up to six items can appear simultaneously.
• When the sixth item has been selected, no other unchecked
item can be selected. Removing the check mark for a checked
item makes it possible to select other items.
SORT:
Specify the order thumbnails
appear.
OFF
In recorded order
ON
Slot order (clips in the
same slot appear
according to date and
time of recording).
PROPERTY DISP.:
Specifies the items that will appear
in a simplified property display on
the left side of the thumbnail.
➝
Refer to “Selecting items to be
displayed as properties” (this
STOP MODE:
Specifies whether or not to return to
the thumbnail screen after stopping
playback started from the
thumbnail screen.
STAY
Stays in playback
mode
RETURN
Return to thumbnail
mode
➝
Refer to “Playing
THUMBNAIL INIT:
Return above settings to their
factory defaults (initial values).
Selecting items to be displayed as
properties


