Connections: Using This Unit With a Hard Disk
121
C
onn
ect
ion
s
10
Select [YES] and press the SET button.
The data will now be imported.
When the import operation ends, the message “COPY
COMPLETED” appears.
◆
NOTE:
• When data is imported to a P2 card that differs from the original
P2 card, some clips may become incomplete (showing the
indicator). Then use the reconnection function to rebuild the clip.
➝
Refer to “Reconnecting Incomplete Clips” (page 60).
• The [HDD (USB or eSATA)] – [SETUP] – [VERIFY] menu setting
allows you to turn verification during copying on or off.
• It is not possible to import data by partition between P2 cards
with different model numbers. Copy data by clip.
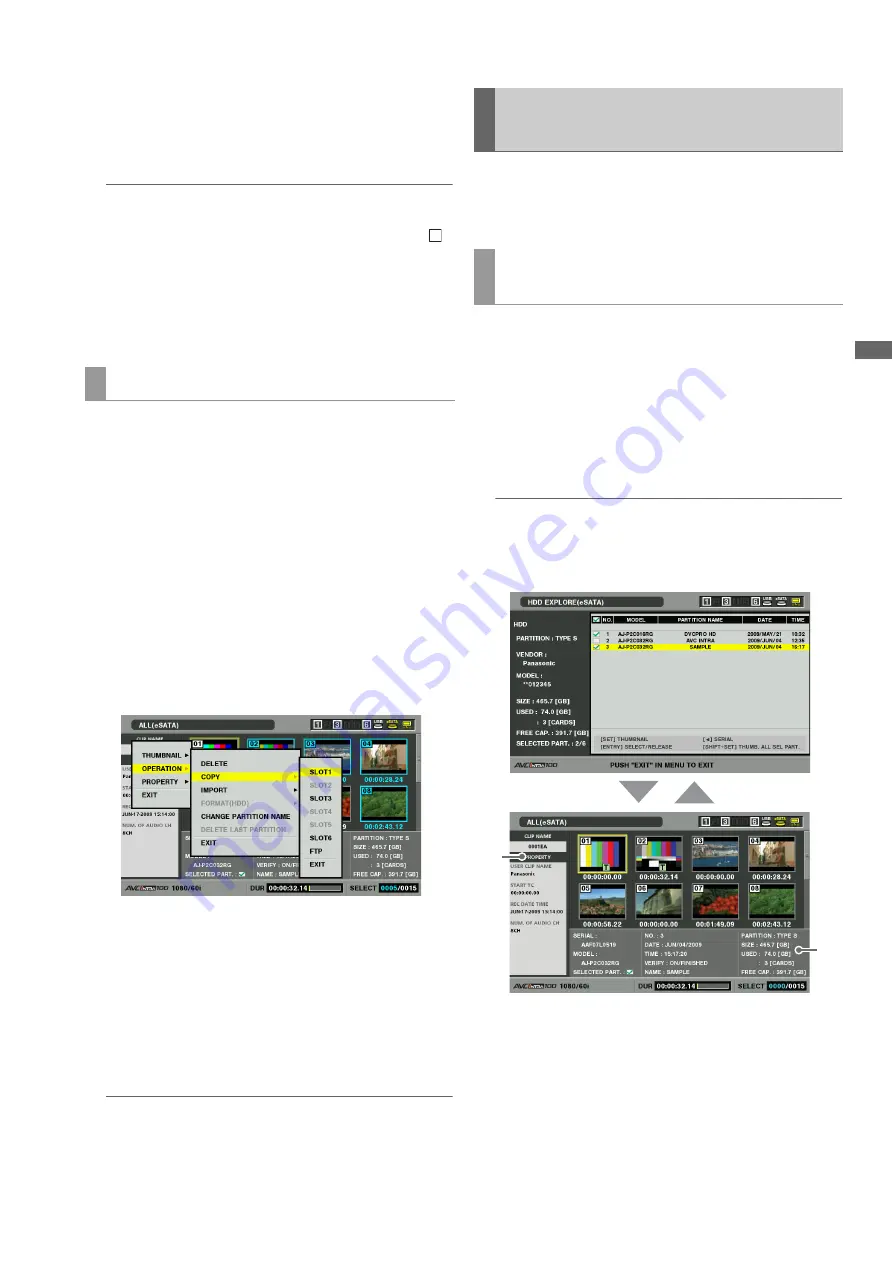
Use the steps below to select a hard disk clip and copy it to a
P2 card.
1
Insert the P2 card to which the clip will be copied.
2
Open the hard disk thumbnail screen.
3
Select a clip to copy.
4
Press the MENU button.
5
Use the cursor buttons to choose [OPERATION] –
[COPY] and press the SET button.
6
Select the number of the P2 card slot to which the
data will be copied and press the SET button.
7
Select [YES] and press the SET button.
The clip will now be copied.
When the copy operation ends, the message “COPY
COMPLETED” appears.
◆
NOTE:
• Copying of clips to a P2 card is not verified.
You can display thumbnails and manage clips stored on the
hard disk in the same way as clips on P2 cards. You can also
view video from the thumbnail display.
1
Open the hard disk explorer screen.
A list of partitions appears.
2
Use the cursor buttons to select the partition whose
thumbnails you want to view and press the SET
button.
Thumbnails of the clips on the partition appears.
◆
NOTE:
• When multiple partitions are selected as target, pressing the
MULTI SEL (SHIFT + SET) button will display thumbnails for all
partitions on the target partitions.
1)
Clip information
Displays clip properties.
Copying data to a P2 card by clip
!
Displaying Clip Thumbnails on a
Hard Disk
Thumbnail display (only for TYPE S hard
disk and P2 store)
1)
2)
SET
EXIT


