


170
Camera
U
s
ing Vo
ic
e Mode
Restricted(Short)
(When the camera is launched)
……
You can record up to 290K bytes. Select this
option to attach the data to i-mode mail as a stan-
dard movie.
Restricted(Long)
……
You can record up to 490K
bytes. Select this option to attach the data to i-mode
mail as a large-sized movie.
<Voice mode>
Using Voice Mode
You can record your voice without movies.
1
Photo mode screen (P.162)
1
“
”
The “recording start screen” appears.
Function menu of the movie mode screen
→
P.168
2
d
(Record)
The recording starts.
You can check the approximate seconds left to record
on the screen.
3
d
(Stop)
The recording finished. The “recording check screen”
appears.
Function menu of the movie checking screen
→
P.168
4
d
(Save)
The movie is saved to the folder specified in “Select to
save” (P.168).
Changing the Shooting Settings
You can change the camera settings such as the
zoom or Auto timer.
Using the zoom
Using the zoom enables you to adjust the image
being shot to your desired size.
●
You can zoom in/out while shooting a movie.
●
You can select the zoom between 1× and approx. 5×
among 16 steps for shooting by the rear camera in
Photo mode, continuous shooting and Movie mode.
However, you cannot select the zoom when the
image size is SXGA (1,280 × 960).
*1
:
Can be selected only when the camera is launched
from i-
α
ppli.
●
You can select the zoom in 2 steps for shooting by the
front camera, which cannot be selected when the
image size is VGA (640 × 480) or JAVA (240 × 240).
1
Each shooting screen Use
v
to
adjust the zoom
j
: Zooms in by one step each time you press the key.
h
: Zooms out by one step to 1× (default) each time
you press the key.
Hold down
v
to zoom in/out continuously.
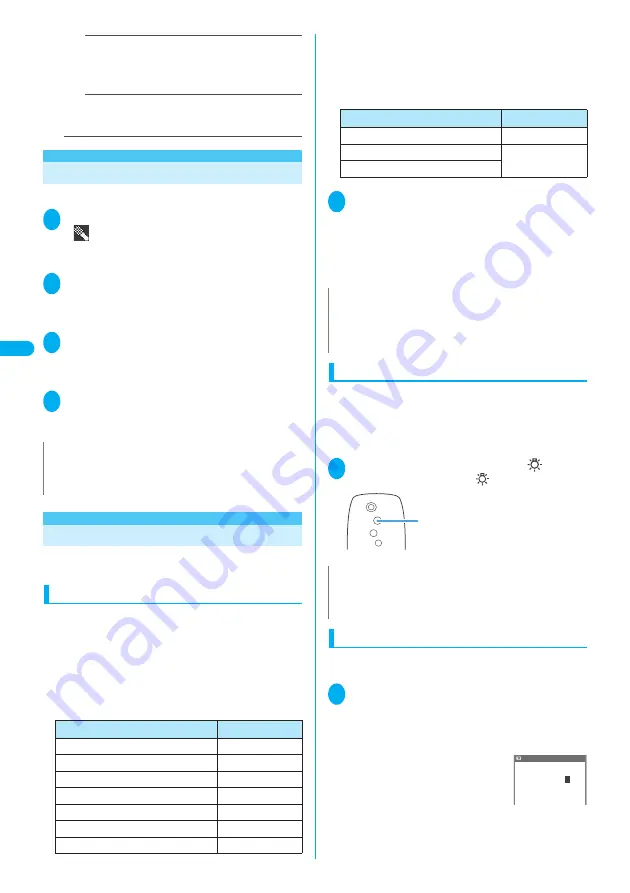
Turning on the light
When it is not so bright (e.g. in a room), you can
shoot images or movies with the light of the FOMA
terminal turned on.
●
If you do not shoot images for about 30 seconds after
turning on the light, it is automatically turned off.
1
Each shooting screen
a
(
)
To turn off the light, press
a
(
).
Using the auto timer
●
The Auto timer is reset to “OFF” each time you finish
shooting.
1
Each shooting screen
p
(FUNC)
“Auto timer” “ON” Enter the
time for the Auto timer (01 to 15 sec-
onds in 2 digits)
Entering the number sets the Auto
timer and each shooting screen
reappears. To set the displayed
time, press
d
(Set).
“10 seconds” is the default setting.
N
z
You can also record in Voice mode by selecting
p
(FUNC) in
the movie mode screen “Movie type set” “Voice”.
z
Voice recorded in Voice mode is MP4 (Mobile MP4) format.
Size
Maximum
VGA (640 × 480)
Approx. 2×
CIF (352 × 288)
Approx. 1.8×
Screen (240 × 345)
Approx. 1.5×
Stand-by (240 × 320)
Approx. 1.6×
JAVA (240 × 240)
*1
Approx. 2.1×
Mail (L)/Large (176 × 144)
Approx. 3.6×
Mail (S)/Small (128 × 96)
Approx. 5×
Size
Maximum
CIF (352 × 288)
Approx. 1.8×
Mail (L)/Large (176 × 144)
Approx. 2×
Mail (S)/Small (128 × 96)
N
z
“1×” is the default setting when you launch the camera.
Changing the image size or camera mode also changes the
zoom to “1×”.
z
Changing the zoom may slightly change the image quality.
N
z
You cannot turn on the light when recording a video with
sound only.
z
This function is only an assistance.
Light
Shutter delay time
Delay time(seconds)
01〜15?
1
0
Содержание FOMA N702iS
Страница 54: ......
Страница 252: ......
Страница 263: ...261 i channel i channel 262 Using Channel List to Display Sites 263 Setting i channel 264 i Channel settings...
Страница 300: ......
Страница 340: ......
Страница 370: ...Appendix Using the FOMA Terminal with External Devices Troubleshooting Pictographs List 368 Reading Reading Reading...
Страница 403: ...401 Index Quick Manual Index 402 Quick Manual 412...
Страница 413: ...Index Quick Manual Index 411...


