


Removing a printer hard disk
Note:
Use the screwdriver located inside the bottom front door of the printer.
CAUTION—SHOCK HAZARD:
If you are accessing the controller board or installing optional hardware
or memory devices sometime after setting up the printer, then turn the printer off, and unplug the power
cord from the electrical outlet before continuing. If you have any other devices attached to the printer,
then turn them off as well, and unplug any cables going into the printer.
Warning—Potential Damage:
Controller board electronic components are easily damaged by static
electricity. Touch a metal surface on the printer before touching any controller board electronic components
or connectors.
1
Access the controller board.
For more information, see
“Accessing the controller board” on page 21
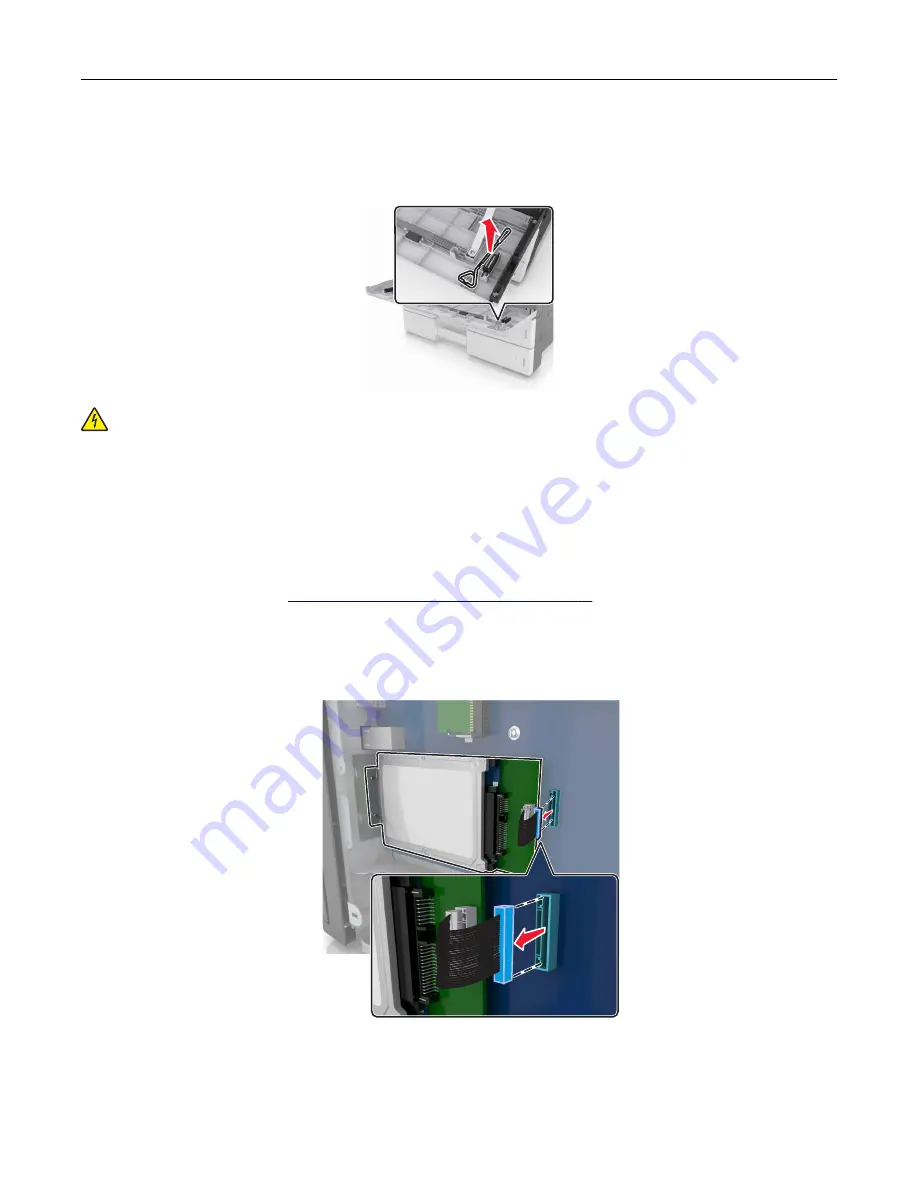
2
Unplug the hard disk interface cable from the controller board, leaving the cable attached to the hard disk.
To unplug the cable, squeeze the paddle at the plug of the interface cable to disengage the latch before
pulling out the cable.
Additional printer setup
32
Содержание MS910 Series
Страница 1: ...MS910 Series User s Guide July 2017 www lexmark com Machine type s 4021 Model s 230...
Страница 133: ...Emptying the hole punch box 1 Open door H 2 Remove and empty the hole punch box Maintaining the printer 133...
Страница 167: ...Fuser area Below the fuser area Duplex area Above the duplex area Clearing jams 167...
Страница 175: ...Door J Note If there is a jammed paper between the nisher bins then remove the paper Areas H1 and H2 Clearing jams 175...
Страница 183: ...Door J Note If there is a jammed paper between the nisher bins then remove the paper Areas H1 and H2 Clearing jams 183...
Страница 185: ...Area H8 Area H9 Clearing jams 185...


