


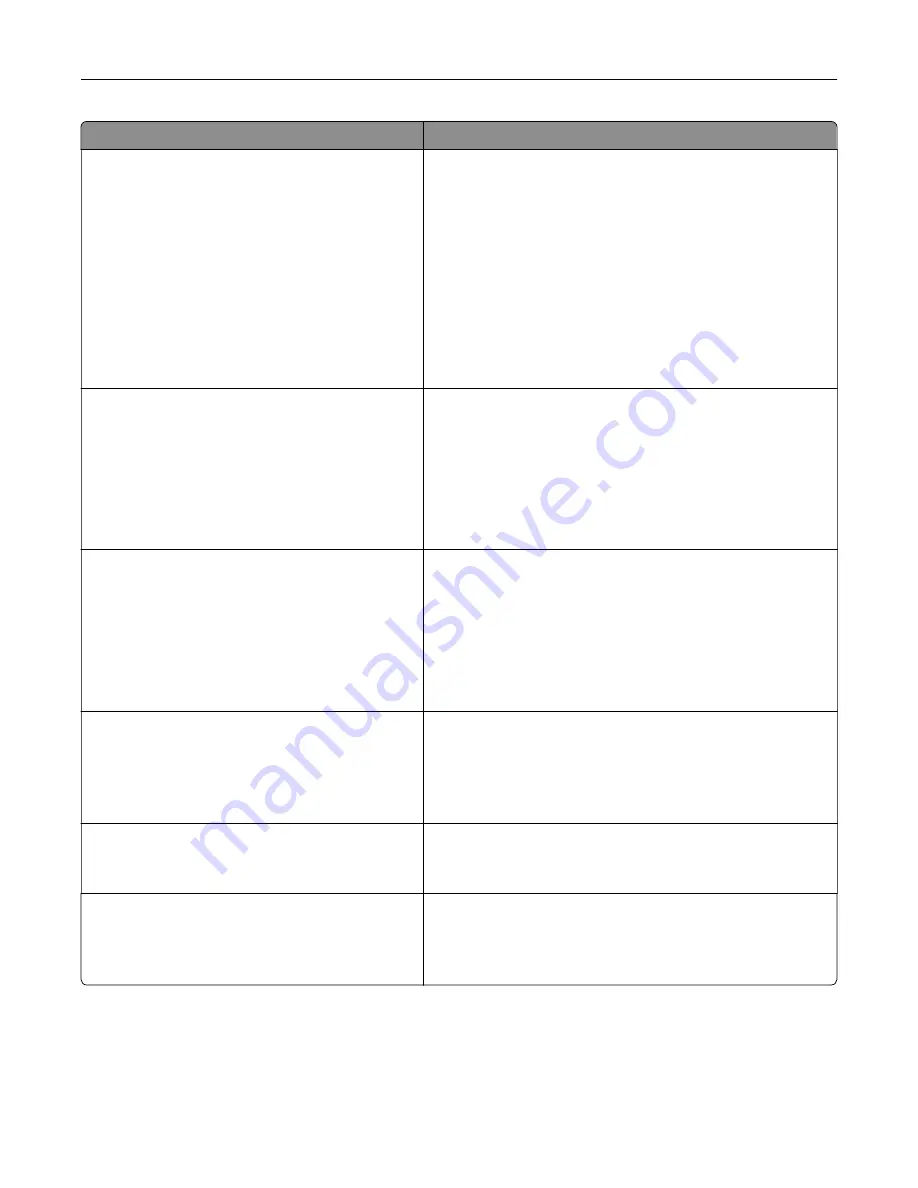
Use
To
Timeouts
Print Timeout
Disabled
1–255 sec
Set the amount of time in seconds the printer waits to receive
an end
‑
of
‑
job message before canceling the rest of the print
job.
Notes:
•
90 sec is the factory default setting.
•
When the timer expires, any partially printed page still in
the printer is printed, and then the printer checks to see
if any new print jobs are waiting.
•
Print Timeout is available only when using PCL
emulation. This setting has no effect on PostScript
emulation print jobs.
Timeouts
Wait Timeout
Disabled
15–65535 sec
Set the amount of time in seconds the printer waits for
additional data before canceling a print job.
Notes:
•
40 sec is the factory default setting.
•
Wait Timeout is available only when the printer is using
PostScript emulation. This setting has no effect on PCL
emulation print jobs.
Timeouts
Job Hold Timeout
5–255 sec
Set the amount of time the printer waits for user intervention
before it holds jobs that require unavailable resources and
continues to print other jobs in the print queue.
Notes:
•
30 sec is the factory default setting.
•
This menu appears only when a formatted printer hard
disk is installed.
Error Recovery
Auto Reboot
Reboot when idle
Reboot always
Reboot never
Set the printer to restart when an error is encountered.
Note:
Reboot always is the factory default setting.
Error Recovery
Max Auto Reboots
1–20
Determine the number of automatic reboots the printer can
perform.
Note:
2 is the factory default setting.
Print Recovery
Auto Continue
Disabled
5–255
Let the printer automatically continue printing from certain
offline situations when not resolved within the specified time
period.
Note:
Disabled is the factory default setting.
Understanding the printer menus
105
Содержание MS910 Series
Страница 1: ...MS910 Series User s Guide July 2017 www lexmark com Machine type s 4021 Model s 230...
Страница 133: ...Emptying the hole punch box 1 Open door H 2 Remove and empty the hole punch box Maintaining the printer 133...
Страница 167: ...Fuser area Below the fuser area Duplex area Above the duplex area Clearing jams 167...
Страница 175: ...Door J Note If there is a jammed paper between the nisher bins then remove the paper Areas H1 and H2 Clearing jams 175...
Страница 183: ...Door J Note If there is a jammed paper between the nisher bins then remove the paper Areas H1 and H2 Clearing jams 183...
Страница 185: ...Area H8 Area H9 Clearing jams 185...


