


•
Flex, fan, and straighten paper before loading it.
•
Do not use paper that has been cut or trimmed by hand.
•
Do not mix paper sizes, weights, or types in the same tray.
•
Make sure the paper size and type are set correctly on the computer or printer control panel.
•
Store paper according to manufacturer recommendations.
Understanding jam messages and locations
When a jam occurs, a message indicating the jam location and information to clear the jam appears on the
printer display. Open the doors, covers, and trays indicated on the display to remove the jam.
Notes:
•
When Jam Assist is set to On, the printer flushes blank pages or pages with partial prints after a jammed
page has been cleared. Check your printed output for blank pages.
•
When Jam Recovery is set to On or Auto, the printer reprints jammed pages. However, the Auto setting
reprints jammed pages only if adequate printer memory is available.
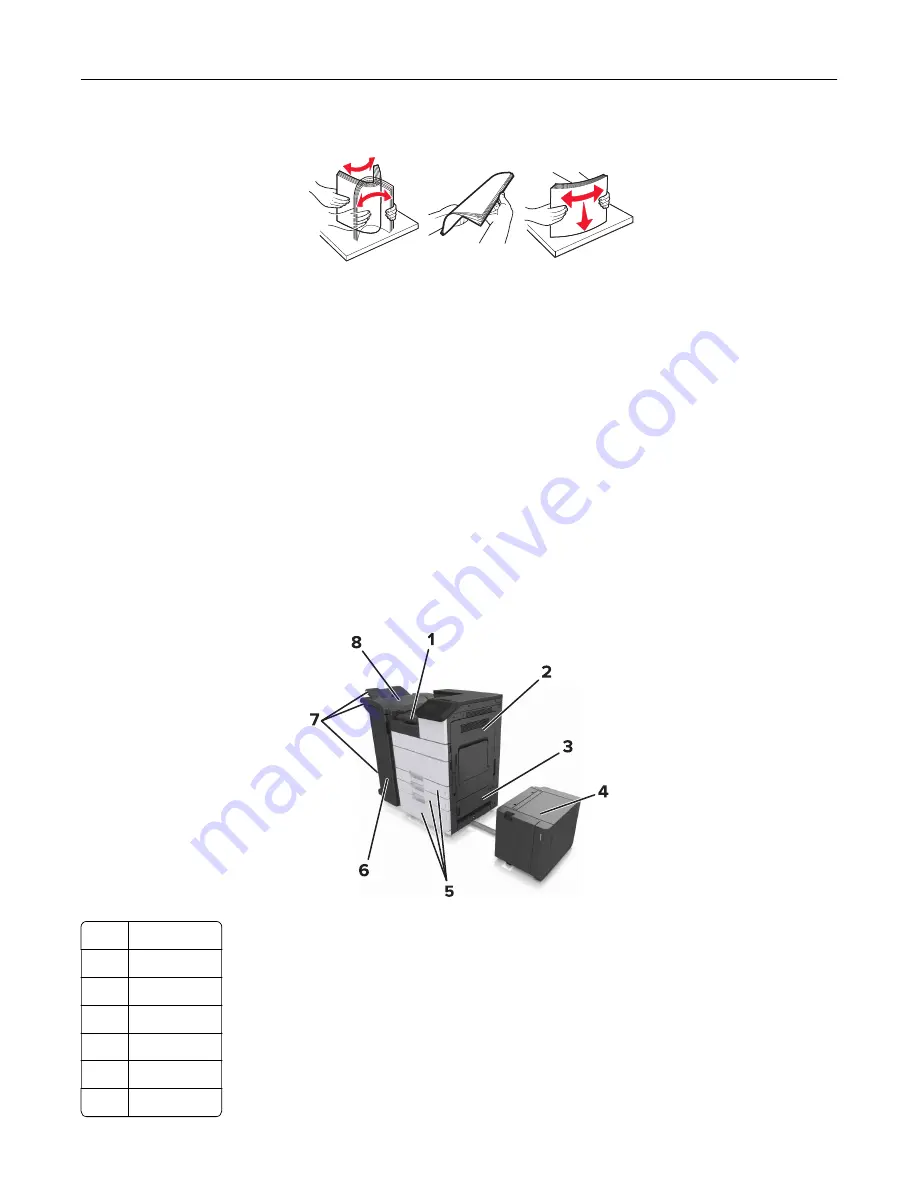
1
Area G
2
Door C
3
Door D
4
Door F
5
Trays
6
Door H
7
Finisher bins
Clearing jams
162
Содержание MS910 Series
Страница 1: ...MS910 Series User s Guide July 2017 www lexmark com Machine type s 4021 Model s 230...
Страница 133: ...Emptying the hole punch box 1 Open door H 2 Remove and empty the hole punch box Maintaining the printer 133...
Страница 167: ...Fuser area Below the fuser area Duplex area Above the duplex area Clearing jams 167...
Страница 175: ...Door J Note If there is a jammed paper between the nisher bins then remove the paper Areas H1 and H2 Clearing jams 175...
Страница 183: ...Door J Note If there is a jammed paper between the nisher bins then remove the paper Areas H1 and H2 Clearing jams 183...
Страница 185: ...Area H8 Area H9 Clearing jams 185...


