Attention:
Do not touch the connectors on the microprocessor and the microprocessor socket.
Step 7.
Install the microprocessor on the microprocessor socket:
a.
Touch the static-protective package that contains the new microprocessor to any
unpainted
on the chassis or any
unpainted
metal surface on any other grounded rack component; then,
carefully remove the microprocessor from the package.
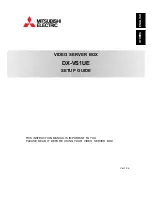
b.
Release the sides of the cover and remove the cover from the installation tool. The
microprocessor is preinstalled on the installation tool.
Installation tool
Microprocessor
Cover
Figure 246. Installation tool cover removal
Note:
Do not touch the microprocessor contacts. Contaminants on the microprocessor
contacts, such as oil from your skin, can cause connection failures between the contacts
and the socket.
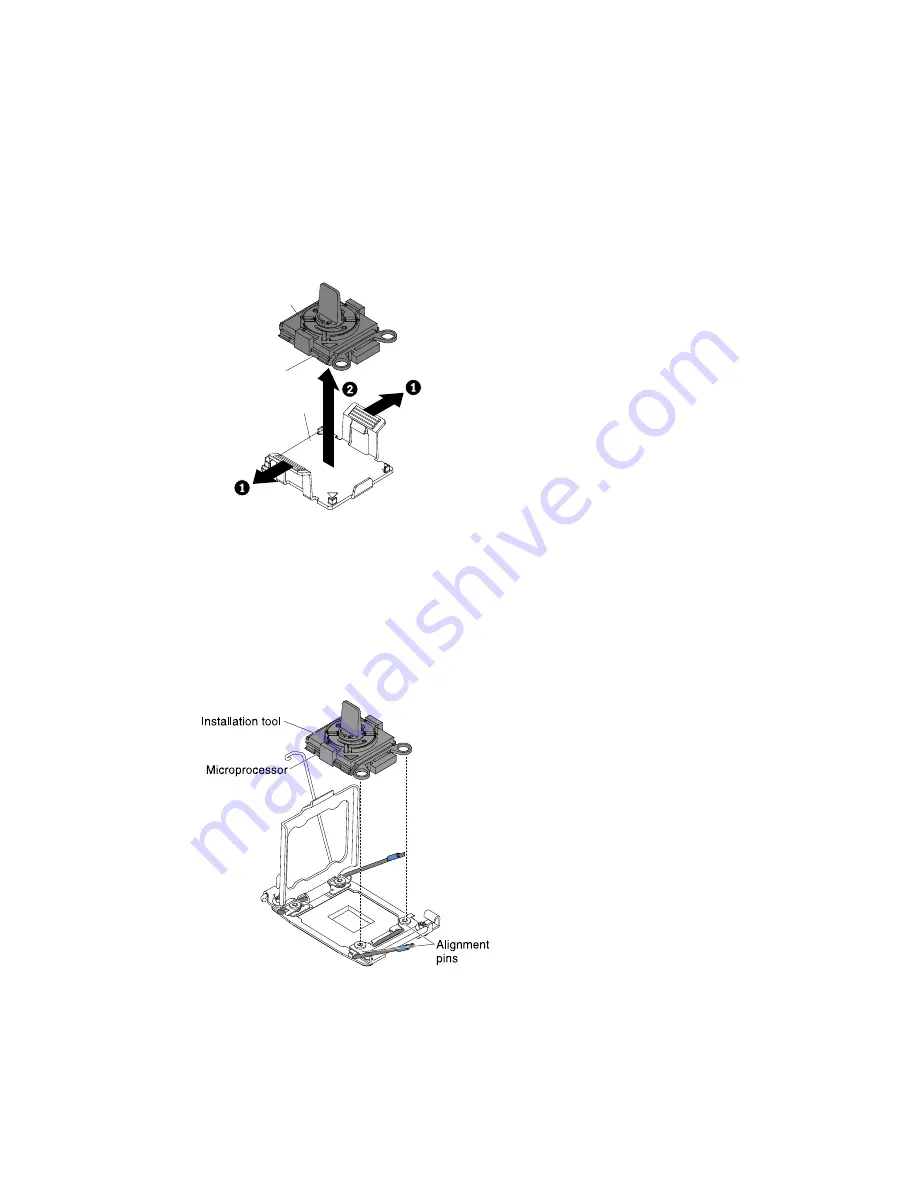
c.
Align the installation tool with the microprocessor socket. The installation tool rests flush on
the socket only if properly aligned.
Figure 247. Installation tool alignment
d.
Install the microprocessor using the following instructions for your installation tool.
Removing and replacing components
333
Содержание x3650 M4 BD 5466
Страница 1: ...Lenovo System x3650 M4 Installation and Service Guide Machine Type 7915 ...
Страница 6: ...iv Lenovo System x3650 M4 Installation and Service Guide ...
Страница 176: ...164 Lenovo System x3650 M4 Installation and Service Guide ...
Страница 226: ...214 Lenovo System x3650 M4 Installation and Service Guide ...
Страница 1042: ...1030 Lenovo System x3650 M4 Installation and Service Guide ...
Страница 1200: ...1188 Lenovo System x3650 M4 Installation and Service Guide ...
Страница 1204: ...1192 Lenovo System x3650 M4 Installation and Service Guide ...
Страница 1211: ...People s Republic of China Class A electronic emission statement Taiwan Class A compliance statement Appendix E Notices 1199 ...
Страница 1212: ...Taiwan BSMI RoHS declaration 1200 Lenovo System x3650 M4 Installation and Service Guide ...
Страница 1221: ......
Страница 1222: ......