POWER CORE User Manual
Version: V6.0.0/5
216/459
13. Control Surface Configuration
Ø
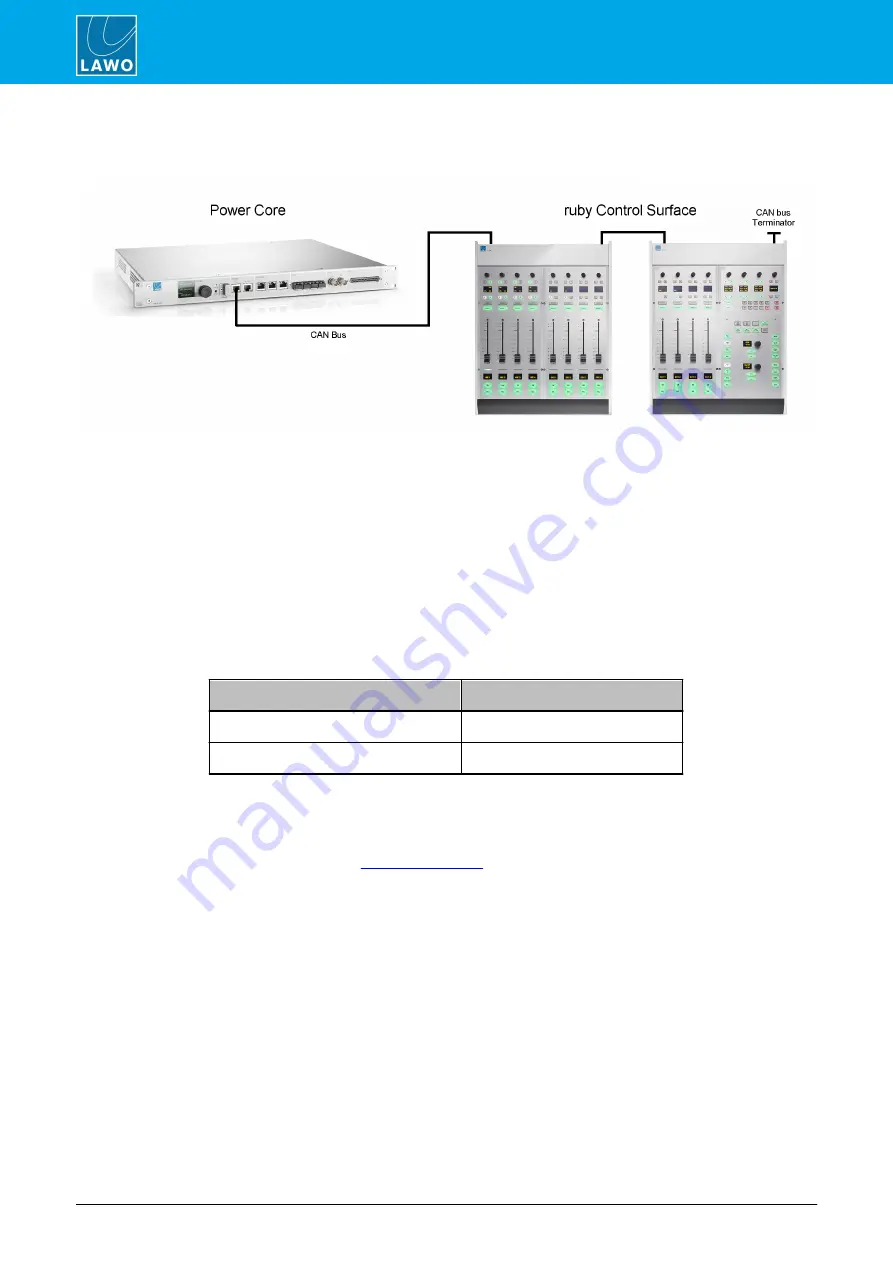
To connect multiple frames:
The CAN bus must be looped in a daisy chain fashion:
1
.
Start by cabling the POWER CORE
CAN
connector to the first frame's
CAN BUS IN
.
2
.
Then loop the first frame's
CAN BUS LINK OUT
to the
CAN BUS IN
connector on the next frame.
3
.
Continue to loop the CAN bus through the remaining frames (and any optional Key Panels). They may
be connected in any order.
4
.
On the last frame or Key Panel in the chain, fit the CAN bus terminator supplied with the system.
13.10.3 Working with the CAN Bus
Each control surface module, Key Panel and Visual Extension (sapphire only) has a CAN bus address which
defines its role within the system. In addition, the CAN bus speed defines the maximum distance which you can
run the cables:
Transfer Speed
Maximum Distance
500 kbit/sec (recommended)
60 m
100 kbit/sec
300 m
Both settings are read by the system configuration
AND
stored on each physical module. They
MUST
match
exactly to ensure correct operation.
The system configuration can be edited using the
ON-AIR Designer
software:
·
CAN bus address
is defined in the
·
CAN bus speed
is defined in the Project window.
On each physical module, the settings can be adjusted by entering the special functions mode.
Now is a good time to check and, if necessary, adjust the CAN bus address and CAN speed settings for each
control surface module and Key Panel. A CAN speed of 500 kbit/sec is recommended.


