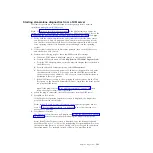
Starting stand-alone diagnostics from a NIM server
Perform this procedure to start the stand-alone diagnostics from a network
installation management (NIM) server.
Note:
See Network Installation Management in the AIX Information Center for
information about configuring the blade server as a NIM server client. Also see the
Configuring the NIM Master and Creating Basic Installation Resources Web page.
1.
Verify with the system administrator and systems users that the blade server
can be shut down. Stop all programs; then, shut down the operating system
and shut down the blade server. Refer to the documentation that comes with
your operating system for information about shutting down the operating
system.
2.
If the system is running in a full-machine partition, turn on the blade server
and establish an SOL session.
3.
Perform the following steps to check the NIM server boot settings:
a.
When the POST menu is displayed, press
1
to start the SMS utility.
b.
From the SMS main menu, select
Setup Remote IPL (Initial Program Load)
.
c.
From the NIC Adapters menu, select the network adapter that is attached to
the NIM server.
d.
From the Network Parameters menu, select
IP Parameters
.
e.
Enter the client, server, and gateway IP addresses (if applicable), and enter
the subnet mask. If there is no gateway between the NIM server and the
client, set the gateway address to 0.0.0.0 See your network administrator to
determine if there is a gateway.
f.
If the NIM server is set up to allow pinging the client system, use the Ping
Test option on the Network Parameters menu to verify that the client system
can ping the NIM server.
Note:
If the ping fails, see “Boot problem resolution” on page 193; then,
follow the steps for network boot problems.
4.
When the ping is successful, start the blade server from the NIM server.
5.
Establish an SOL session.
If the Diagnostic Operating Instructions screen is displayed, the diagnostics
program has started successfully.
Note:
If the AIX login prompt is displayed, the diagnostics program did not
load. See “Boot problem resolution” on page 193; then, follow the steps for
network boot problems.
6.
Press
Enter
to continue.
The Function Selection screen will display. See “Using the diagnostics program”
on page 192 for more information about running the diagnostics program.
Note:
If the Define Terminal screen is displayed, type the terminal type and
press Enter. The use of “vs100” as the terminal type is recommended; however,
the function keys (F#) may not work. In this case, press Esc and the number in
the screen menus. For example, instead of
F3
you can press
Esc
and
3
.
Chapter 2. Diagnostics
191
Содержание BladeCenter JS12
Страница 1: ...BladeCenter JS12 Type 7998 Problem Determination and Service Guide...
Страница 2: ......
Страница 3: ...BladeCenter JS12 Type 7998 Problem Determination and Service Guide...
Страница 14: ...xii JS12 Type 7998 Problem Determination and Service Guide...
Страница 248: ...234 JS12 Type 7998 Problem Determination and Service Guide...
Страница 252: ...238 JS12 Type 7998 Problem Determination and Service Guide...
Страница 290: ...276 JS12 Type 7998 Problem Determination and Service Guide...
Страница 298: ...284 JS12 Type 7998 Problem Determination and Service Guide...
Страница 302: ...288 JS12 Type 7998 Problem Determination and Service Guide...
Страница 312: ...298 JS12 Type 7998 Problem Determination and Service Guide...
Страница 317: ......
Страница 318: ...Part Number 60Y1568 Printed in USA 1P P N 60Y1568...

