150
Scanning
9
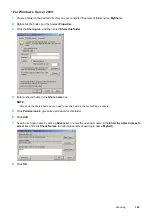
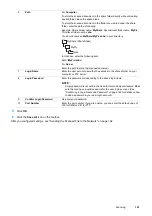
Click the user login name that you have just entered. Select the
Full Control
check box. This will grant you
permission to send the document to this folder.
NOTE:
•
Do not use
Everyone
as the user login name.
10
Click
OK
.
11
Configure other settings as necessary, and then click
Apply
and click
OK
.
NOTE:
•
To add sub-folders, create new folders in the shared folder you have created.
Example: Folder name:
MyShare
, Second-level folder name:
MyPic
, Third-level folder name:
John
You should now see
MyShare\MyPic\John
in your directory.
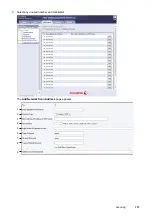
After you created a folder, see "Configuring the Printer Settings" on page 156.
Содержание DocuPrint CM225FW
Страница 1: ...DocuPrint CM225 fw User Guide ...
Страница 10: ...10 Contents Technical Support 338 Online Services 339 Index 340 ...
Страница 157: ...Scanning 157 5 Select any unused number and click Add The Add Network Scan Address page appears 9 8 7 6 5 4 3 2 1 ...
Страница 260: ...260 Digital Certificates 11 Digital Certificates Using Digital Certificates on page 261 ...
Страница 272: ...272 Troubleshooting 4 Lower the levers to their original position 5 Close the rear cover ...
Страница 337: ...Contacting Fuji Xerox 337 14 Contacting Fuji Xerox Technical Support on page 338 Online Services on page 339 ...
Страница 344: ...DocuPrint CM225 fw User Guide ME6939E2 1 Edition 1 July 2014 Fuji Xerox Co Ltd Copyright 2014 by Fuji Xerox Co Ltd ...

